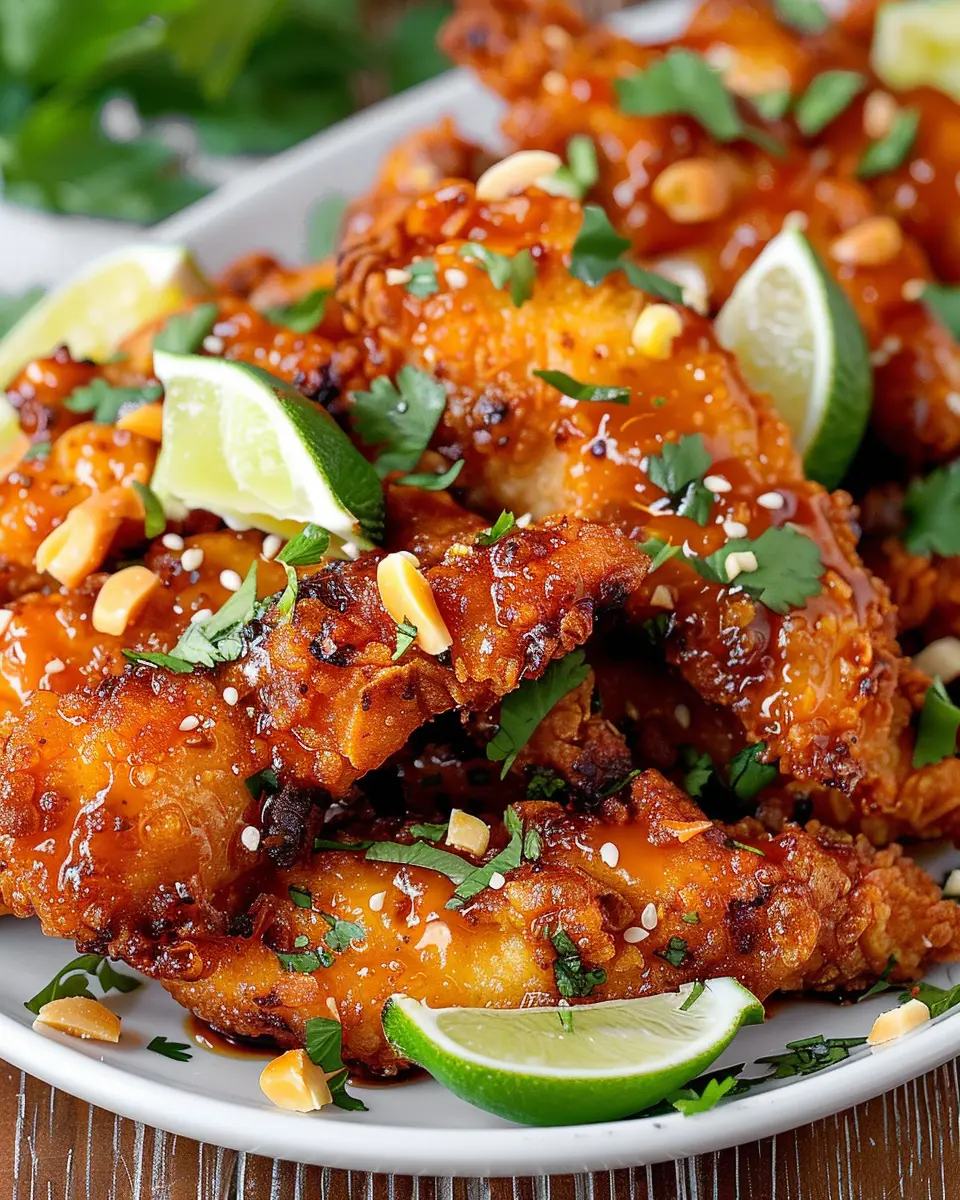
Introduction to Thai Sticky Chicken Fingers Recipe
As a young professional juggling a busy career, it can be all too tempting to grab fast food on the go. But have you ever considered the benefits of choosing homemade meals, especially something as delightful as a Thai Sticky Chicken Fingers Recipe? Not only does cooking at home allow you to indulge in delicious flavors, but it also gives you control over the ingredients, ensuring a healthier meal that fits your lifestyle.
Why Choose Homemade?
Opting for homemade meals over fast food can significantly contribute to your overall well-being. Here are a few reasons why whipping up your own dishes, particularly this Thai-inspired recipe, is a smart choice:
-
Healthier Ingredients: When you prepare meals at home, you’re able to select quality ingredients. This Thai Sticky Chicken Fingers Recipe features lean chicken, packed with protein, and is free from preservatives that often lurk in fast food menu items. Plus, you can control the amount of sugar and sodium, making it a healthier choice for lunch or dinner.
-
Cost-Effectiveness: Eating out can frequently strain your wallet. By preparing your meals at home, you can create several servings of chicken fingers for the same price as a couple of takeout items, allowing you to save money for more important things, perhaps another dinner out with friends.
-
Creative Freedom: Do you enjoy experimenting in the kitchen? This recipe offers a unique blend of flavors—think sweet and savory—using familiar ingredients like coconut milk, soy sauce, and honey. You get the chance to customize your sticky chicken fingers to suit your taste, making them your own.
-
Mindful Eating: Cooking your own food encourages a more mindful eating experience. You’ll find that taking the time to prepare a meal can be a wonderful way to unwind after a long day. Plus, serving up these delicious chicken fingers will surely impress your friends when they come over for a casual gathering!
Incorporating the Thai Sticky Chicken Fingers Recipe into your weekly meal prep could bring fresh excitement to your dining routine. With a few simple ingredients and easy steps, you can create a dish that’s not only delicious but also perfectly aligned with your busy lifestyle. Ready to dive in? Let’s get cooking!
Ingredients for Thai Sticky Chicken Fingers
When you’re diving into the delicious world of Thai Sticky Chicken Fingers, having the right ingredients is key to achieving that irresistible flavor. Here’s what you’ll need to get started.
Main ingredients you’ll need
- Boneless Chicken Thighs: Opt for thighs instead of breasts for juiciness.
- Soy Sauce: This adds that umami kick, and you can use low-sodium if preferred.
- Brown Sugar: Helps create that sweet, sticky glaze that’s oh-so-tempting.
- Garlic: Freshly minced adds robust flavor to the marinade.
- Ginger: Freshly grated ginger provides warmth and spice, enhancing the dish.
- Fish Sauce: A must for authentic Thai flavor; just a touch will go a long way.
These ingredients come together to give your Thai Sticky Chicken Fingers Recipe a captivating flavor profile that is sure to impress!
Optional ingredients for extra flavor
- Cilantro: Chopped, fresh cilantro works great as a garnish.
- Lime Juice: A splash of lime can brighten the dish beautifully.
- Chili Flakes: For those who love a little heat, sprinkle some in the marinade.
- Sesame Seeds: Toasted seeds not only add crunch but a nutty flavor.
Consider these optional ingredients to personalize your dish further, taking your sticky chicken to new heights! How about pairing it with some jasmine rice or fresh veggies? For more inspiration, check out this Thai food guide that delves deeper into balancing flavors in your meals. Enjoy your cooking adventure!
Preparing Thai Sticky Chicken Fingers
Getting ready to whip up some mouthwatering Thai Sticky Chicken Fingers? Great choice! These tasty treats are not only fun to eat but also perfect for sharing. Whether you’re preparing them for a cozy night in or a gathering with friends, this dish is sure to impress. Let’s go through the steps together.
Preheat the oven and prepare baking sheets
Start your adventure by preheating your oven to 425°F (220°C). This step is essential because a hot oven helps achieve that crispy coating we all crave! While the oven heats up, grab your baking sheets. Line them with parchment paper for easy cleanup and to prevent sticking. If you have a cooling rack, consider placing it on top of the sheet; this will allow air to circulate around the chicken fingers, making them even crispier.
Mix the egg and milk for dipping
Next up is the dipping mixture. In a bowl, whisk together 2 large eggs and ¼ cup of milk (you can substitute with almond or oat milk if desired). This egg wash will help the breadcrumb mixture adhere more effectively to the chicken fingers. The creaminess of the milk creates a lovely, moist texture that complements the crispy coating. If you’re wondering about the best types of milk for cooking, you can read more on this cooking tips site.
Make the breadcrumb mixture
Now it’s time to create an irresistible breadcrumb blend. In another bowl, combine 1 cup of panko breadcrumbs, ½ cup of shredded coconut (unsweetened for an authentic touch), and a tablespoon of Thai curry powder. This mixture gives a delightful crunch and flavor. Don’t forget to add a pinch of salt and pepper to enhance the taste. Feel free to get adventurous—adding a bit of chili powder or garlic powder could introduce a nice kick to your chicken fingers!
Coat the chicken strips
Time to coat the chicken strips! First, ensure your chicken breast is cut into even strips for consistent cooking. Dip each strip first into the egg and milk mixture, allowing the excess to drip off. Then, roll it in the breadcrumb mixture, pressing gently to ensure a thick, even coat. Place the coated strips on the prepared baking sheets. This process might feel a bit messy, but remember, deliciousness is a little messy sometimes!
Bake the chicken fingers
Pop your baking sheets into the oven and let the magic happen. Bake for about 18-20 minutes or until they’re golden brown and cooked through. Halfway through, flip the chicken fingers to ensure they cook evenly on both sides. You can always keep an eye on how they look in the oven—who doesn’t enjoy the aroma wafting through their kitchen?
Prepare the delicious sauce
While the chicken fingers are baking, let’s whip up a quick sauce. Combine ¼ cup of sweet chili sauce with a tablespoon of soy sauce and a dash of lime juice in a small bowl. This dip provides the perfect balance of sweet and tangy—ideal for enhancing the flavors of your Thai Sticky Chicken Fingers. If you like it spicy, adding some sriracha can elevate your sauce even further.
Assemble and bake again for maximum flavor
Once your chicken fingers are baked, remove them from the oven and drizzle the sauce over the crispy strips. Toss them gently to coat everything evenly. For an added touch, return the chicken fingers to the oven for an additional 5 minutes. This step allows the flavors to meld and the sauce to caramelize slightly.
And there you have it! Your Thai Sticky Chicken Fingers are now ready to be devoured. Serve them on a platter with extra sauce on the side for dipping, and watch them disappear in no time. Enjoy your culinary creation! If you’re looking for more inspiration, check out other delicious recipes here.

Variations on Thai Sticky Chicken Fingers
Exploring the different variations of your favorite Thai Sticky Chicken Fingers Recipe opens up a world of flavors and options perfect for any palate or dietary preference. Whether you’re feeling adventurous or health-conscious, let’s dive into these exciting twists!
Spicy Variation for Heat Lovers
If you crave a fiery kick in your food, adding a spicy variation to your Thai Sticky Chicken Fingers is a thrilling option. Start by incorporating more Thai chili paste or Sriracha into your marinade. Not only does it amplify the heat, but it also enhances the overall depth of flavor. For an extra zing, consider tossing in some finely chopped jalapeños or Thai bird’s eye peppers just before baking. Pair with a cool dipping sauce made from yogurt and fresh herbs to balance the spice; your taste buds will be dancing!
Healthy Swaps for Lighter Versions
For those looking to enjoy this dish with a healthier twist, there are several easy swaps to lighten things up without sacrificing taste. Use skinless chicken breasts instead of thighs to reduce fat content. You can also replace sugary components in your marinade with honey or pure maple syrup, both of which provide sweetness without the extra calories found in traditional sauces. Opt for baking instead of frying for a mess-free, low-fat version that still retains that sticky, caramelized goodness. A great resource for exploring other healthy substitutions is Healthline, which offers comprehensive nutritional advice and cooking tips.
These variations not only cater to different preferences but also ensure that your Thai Sticky Chicken Fingers Recipe remains versatile and enjoyable for everyone. Don’t hesitate to experiment with different ingredients; cooking is all about creativity!
Cooking tips and notes for Thai Sticky Chicken Fingers
How to ensure crispy chicken
For truly crispy Thai Sticky Chicken Fingers, start by patting your chicken dry with paper towels. This removes excess moisture that can steam the chicken instead of crisp it up during cooking. A light coat of cornstarch can add an extra crunch. When frying or baking, make sure your oil is hot enough—this helps achieve that golden texture. Consider using an air fryer for a healthier alternative while maintaining crispiness.
Ingredient substitutions to consider
Don’t have all the ingredients on hand? No problem! You can easily substitute chicken ham for traditional ham or turkey bacon if you’re looking for a leaner option. If you’re out of honey, maple syrup or agave nectar can offer a similar sweetness. For an extra kick, try incorporating Sriracha or chili paste—the spice can elevate your dish without overwhelming its original essence. For more ideas, check out this ingredient substitution guide.
Feel free to adjust these pointers to make your Thai Sticky Chicken Fingers Recipe your own! What are some of your favorite substitutions?
Serving suggestions for Thai Sticky Chicken Fingers
Pairing your Thai Sticky Chicken Fingers with the right sides can elevate your meal experience to a whole new level.
Perfect sides to complement your chicken fingers
To balance the rich flavors of the sticky glaze, consider these delightful sides:
- Coconut Rice: Creamy and aromatic, coconut rice adds a subtle sweetness that works beautifully.
- Thai Slaw: A crunchy mix of cabbage, carrots, and a tangy dressing offers a refreshing contrast.
- Sweet Potato Fries: These bring a natural sweetness and a crispy element that pairs well with the dish.
- Fresh Mango Salad: Light and fruity, this salad can cut through the richness of the chicken.
Creative ways to serve and present
For a casual yet elegant presentation of your Thai Sticky Chicken Fingers Recipe, try these ideas:
- Skewered Delight: Serve the chicken on bamboo skewers for a fun and easy-to-eat option.
- Dipping Station: Offer a variety of sauces, such as sweet chili or peanut sauce, for added flavor layers.
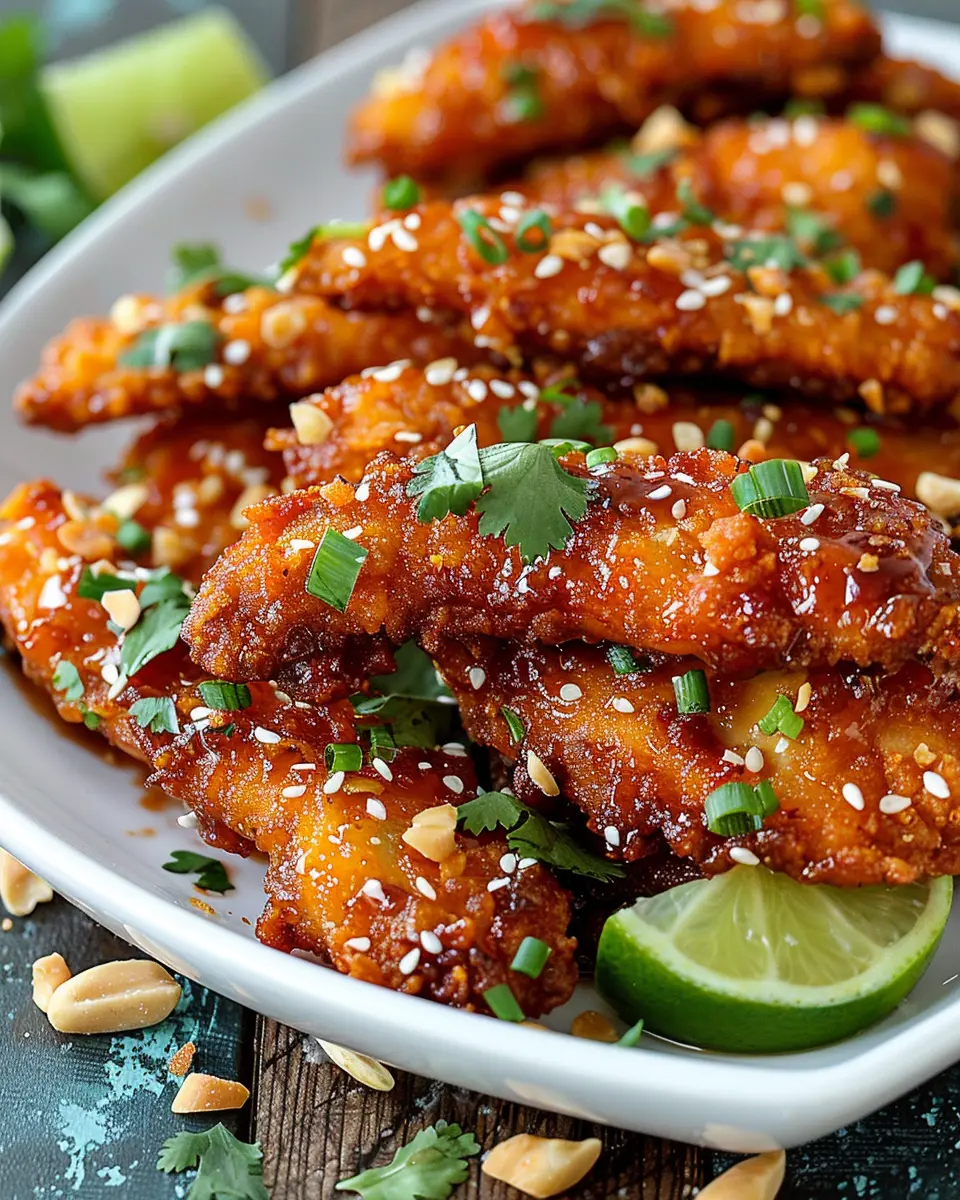
- Garnished Platter: Present the chicken fingers on a large platter garnished with fresh herbs and lime wedges for a pop of color.
These simple touches not only enhance the visual appeal but also create a gathering atmosphere perfect for friends or family. Happy cooking!
Time breakdown for Thai Sticky Chicken Fingers
When craving a delicious meal without spending hours in the kitchen, the Thai Sticky Chicken Fingers Recipe is your go-to solution. Here’s a quick glance at how you can manage your time effectively.
Preparation time
Getting started is a breeze! You’ll need about 15 minutes to gather ingredients, marinate the chicken, and prepare your workspace. Just imagine the delightful aroma filling your kitchen as those flavors blend!
Cooking time
Once prepped, cooking takes approximately 20 minutes. You’ll be amazed at how quickly these succulent chicken fingers come together, perfect for a quick weeknight dinner or fun finger food for friends.
Total time
All in all, you’ll be looking at a total of around 35 minutes from start to finish. Now that’s a satisfying meal in no time! If you’re interested in similar recipes, check out this source for more delicious ideas. Happy cooking!
Nutritional facts for Thai Sticky Chicken Fingers
When whipping up a delicious batch of Thai Sticky Chicken Fingers, it’s important to understand what you’re savoring. Here’s a quick snapshot of the nutritional profile to help you stay informed.
Calories
Each serving of Thai Sticky Chicken Fingers typically contains around 250 calories. This makes them a flavorful option for a satisfying meal or snack without going overboard on your caloric intake.
Protein
Packed with protein, these chicken fingers offer approximately 20 grams per serving. Protein is essential for muscle repair and keeps you feeling full longer, making this dish a smart choice for busy young professionals.
Sodium
While enjoying your Thai Sticky Chicken Fingers, keep an eye on the sodium content, which is roughly 800 mg per serving. It’s always good to balance out sodium with fresh vegetables or a side of brown rice for a nutritious meal.
For more insights on maintaining a balanced diet, check out Healthline. Enjoy every bite while staying mindful of your nutrition!
FAQs about Thai Sticky Chicken Fingers
How can I make these chicken fingers gluten-free?
If you’re looking to make your Thai Sticky Chicken Fingers Recipe gluten-free, it’s quite simple! Swap out regular soy sauce for a gluten-free alternative, like tamari. Many brands offer delicious soy sauce that won’t compromise the flavor you love. Additionally, check that any breadcrumbs or coatings you use are certified gluten-free, which can make a big difference. Your taste buds will thank you, and so will your gluten-sensitive friends!
What’s the best way to store leftovers?
Storing your leftover Thai Sticky Chicken Fingers is super easy! Simply place them in an airtight container in the refrigerator, where they’ll stay fresh for about 3-4 days. If you’re looking to enjoy them later, consider freezing them. Wrap the chicken fingers tightly in plastic wrap and then place them in a freezer-safe bag. They’ll be good for up to three months! Just remember to reheat them in the oven to maintain that delightful crispiness.
Can I prepare the chicken fingers ahead of time?
Absolutely! Meal prep is a great way to save time during busy weeks. You can marinate the chicken a day in advance and store it in the fridge. When you’re ready to cook, just toss them in the oven or air fryer for a quick meal. Alternatively, you could even bread the chicken fingers ahead of time and freeze them. When you’re ready to fry or bake, there’s no need to thaw them first—just adjust cooking time as needed.
For more tips on making and storing your favorite recipes, check out this guide on meal prep. Enjoy the cooking!
Conclusion on Thai Sticky Chicken Fingers Recipe
Recap of why this recipe is a game changer for busy young professionals
In today’s fast-paced world, the Thai Sticky Chicken Fingers Recipe stands out as a culinary hero for those juggling work and life commitments. This dish not only delights with its unique blend of flavors but also simplifies meal prep. With just a handful of ingredients and minimal cooking time, it provides a quick yet satisfying option for lunch or dinner.
You can whip up these savory fingers in under 30 minutes, allowing you to spend more time doing what you love. Plus, they pack nicely for on-the-go meals, making them a perfect choice for busy weekdays.
For those interested in meal planning and efficiency tips, check out this article from Harvard Business Review that dives deeper into the advantages of preparing meals ahead of time. Enjoy experimenting with flavors, and let your kitchen become your favorite refuge amidst a packed schedule!
PrintThai Sticky Chicken Fingers Recipe: Easy, Flavor-Packed Delight

A delightful recipe that combines the bold flavors of Thai cuisine with the fun of chicken fingers, perfect for a quick and tasty meal.
- Prep Time: 10 minutes
- Cook Time: 15 minutes
- Total Time: 25 minutes
- Yield: 4 servings 1x
- Category: Main Dish
- Method: Grilling
- Cuisine: Thai
- Diet: Gluten-Free
Ingredients
- 1 pound chicken tenders
- 1/4 cup soy sauce
- 1/4 cup honey
- 2 tablespoons fish sauce
- 2 cloves garlic, minced
- 1 tablespoon ginger, minced
- 1 tablespoon chili sauce
- 1 tablespoon lime juice
- 1 tablespoon sesame oil
- 2 cups cooked rice, for serving
Instructions
- In a bowl, mix soy sauce, honey, fish sauce, garlic, ginger, chili sauce, lime juice, and sesame oil.
- Marinate chicken tenders in the mixture for at least 30 minutes.
- Preheat the grill to medium-high heat.
- Grill chicken tenders for 6-8 minutes on each side, or until cooked through.
- Serve with cooked rice and drizzle extra marinade on top.
Notes
- Feel free to add more chili for extra heat.
- This dish can be served with a side of steamed vegetables for a complete meal.
Nutrition
- Serving Size: 1 serving
- Calories: 280
- Sugar: 10g
- Sodium: 800mg
- Fat: 10g
- Saturated Fat: 2g
- Unsaturated Fat: 6g
- Trans Fat: 0g
- Carbohydrates: 30g
- Fiber: 1g
- Protein: 25g
- Cholesterol: 70mg
Keywords: Thai Sticky Chicken, Chicken Fingers, Easy Thai Recipe