Introduction to Snowball Cake Recipe
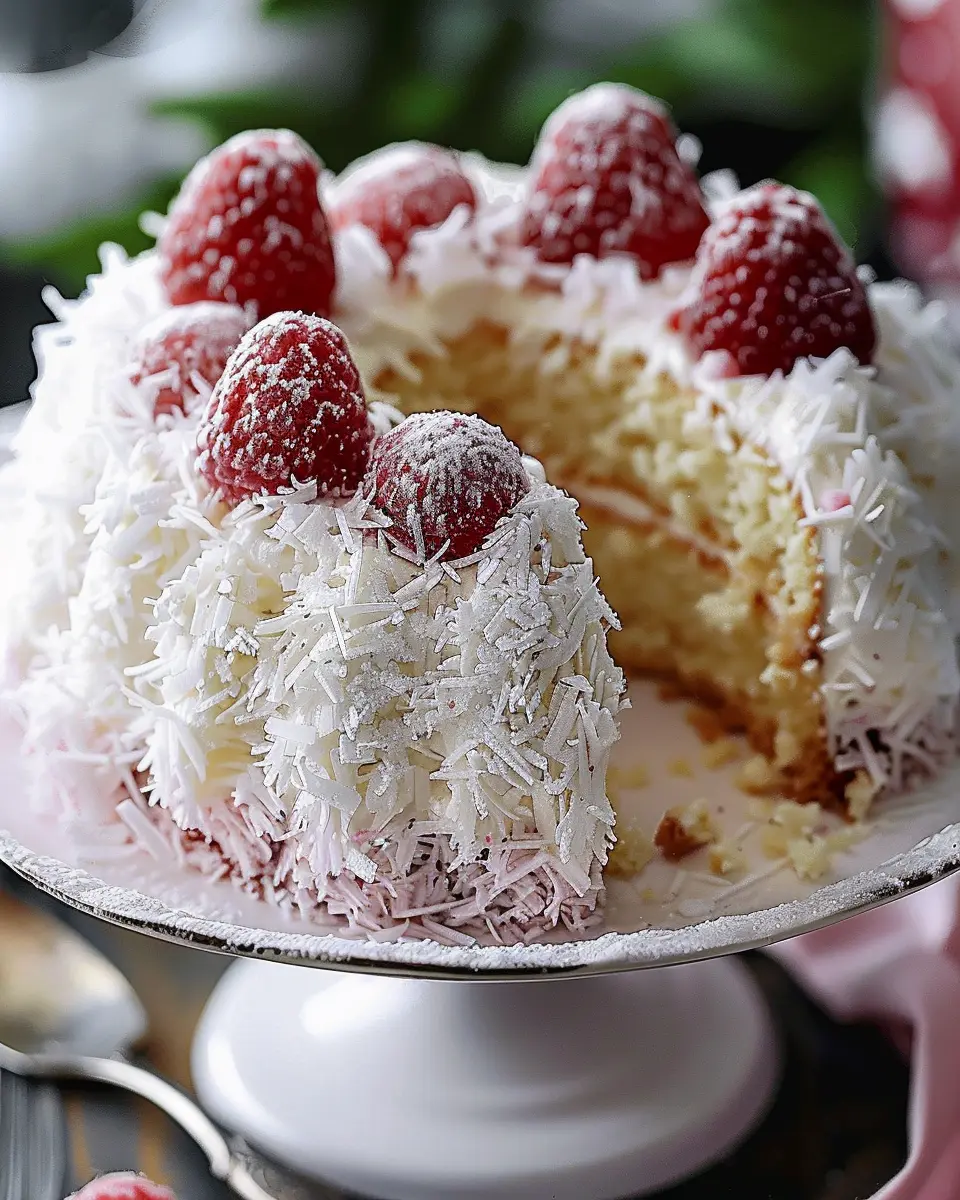
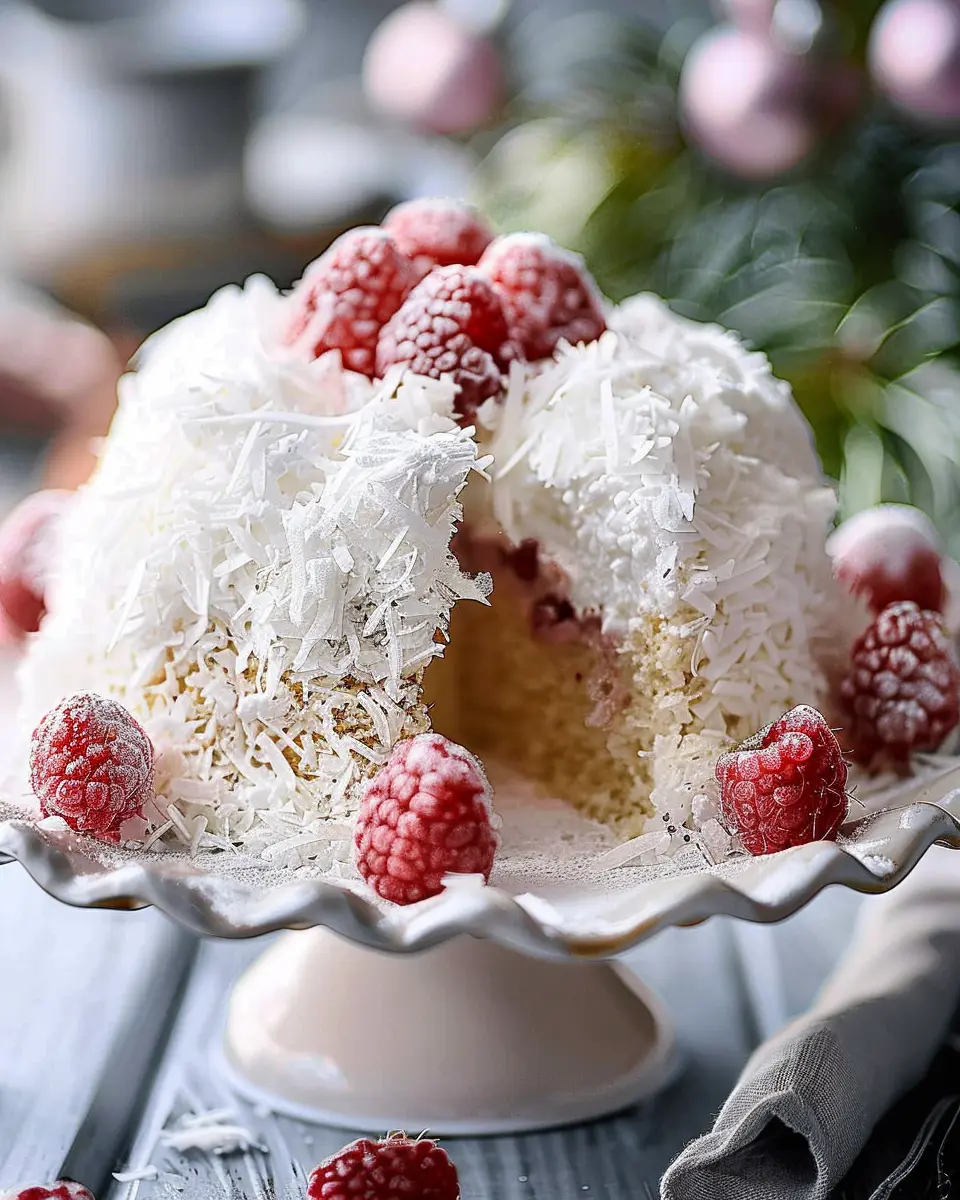
When it comes to impressing at gatherings or enjoying a well-deserved treat after a long day at the office, the Snowball Cake is truly something special. This delightful dessert captures both nostalgia and creativity, making it a fantastic choice for young professionals who want to savor every moment life has to offer.
Why Snowball Cake is the Perfect Dessert for Young Professionals
Have you ever felt overwhelmed by the hustle and bustle of work-life balance? You’re not alone! According to a report by the American Psychological Association, many young adults feel stressed about balancing their careers and personal lives. This is where the Snowball Cake Recipe comes into play—not only is it a wonderful way to indulge your sweet tooth, but it also allows you to create something beautiful while relieving some stress.
Preparing a Snowball Cake doesn’t have to be daunting. The process can actually be a therapeutic experience, offering that much-needed creative outlet. The layers of fluffy cake and the rich, creamy frosting come together to deliver a taste of heaven that’s perfect for celebrations or just a little “me time.” And with options for both light and decadent variations, it caters to different tastes and occasions.
A great feature of this cake is its versatility. It can be dressed up for a fancy dinner party or kept simple for a casual get-together with friends. Plus, it’s an eye-catching centerpiece that will spark conversations—who wouldn’t want to know how to make a Snowball Cake?
Additionally, making this dessert can double as a bonding experience with family or friends. So why not gather your loved ones, switch on your favorite playlist, and dive into a fun baking session? For tips on baking techniques, check out this resource for expert guidance that can elevate your baking skills.
In a world that often requires young professionals to be on the go, taking a little time to create something wonderful can be just the pause you need. So get ready to indulge in the delightful world of layers with our Snowball Cake Recipe—your taste buds will thank you!
Ingredients for Snowball Cake
Essential ingredients for a delicious Snowball Cake
When you’re gearing up to make a delightful Snowball Cake, it’s imperative to gather the right essentials. Here’s what you need for a truly mouthwatering creation:
- Cake Flour: This gives your cake a light and airy texture. If you don’t have any, you can make a substitute with all-purpose flour.
- Granulated Sugar: Sweetness is the heart of every dessert, making it key in this recipe.
- Eggs: They act as a binder and add moisture.
- Unsalted Butter: For rich flavor and a tender cake.
- Baking Powder and Baking Soda: These are the leavening agents that make your cake rise beautifully.
- Milk: Use whole or buttermilk for extra creaminess.
- Fresh Coconut: This is the star garnish that mimics snow, creating that whimsical Snowball Cake Recipe aesthetic.
Optional ingredients for variations and enhancements
Need to spice things up in the kitchen? You can get creative with these optional ingredients:
- Flavored Extracts: Try vanilla or almond extract for additional depth.
- Cocoa Powder: For a chocolate twist, substitute some cake flour.
- Fruit: Incorporate berries for a fresh touch or even citrus zest for brightness.
You’ll find that mixing and matching these ingredients allows you to create a signature Snowball Cake that reflects your unique style. The best part? You can tailor it to what you have on hand or what flavors you love!
For more tips on incorporating seasonal fruits into desserts, check out this great guide on seasonal produce. It’s a wonderful way to elevate your baking game!
Step-by-step Preparation of Snowball Cake
Making a Snowball Cake is not just about following a recipe; it’s an experience filled with delightful aromas and that satisfying feeling of accomplishment when you take a bite of your creation. Let’s dive into the preparation step by step, ensuring you enjoy every moment.
Gather your ingredients
Before you start, it’s crucial to have all your ingredients within arm’s reach. Here’s what you’ll need:
-
For the Cake:
-
1 cup softened unsalted butter
-
2 cups granulated sugar
-
4 large eggs
-
1 teaspoon vanilla extract
-
3 cups all-purpose flour
-
1 tablespoon baking powder
-
1 teaspoon salt
-
1 cup milk
-
1 cup raspberry preserves
-
For the Topping:
-
3 cups shredded coconut
Taking the time to gather everything helps you focus on creating a delicious cake rather than scrambling for ingredients mid-recipe. Check out this site for additional tips on ingredient quality.
Preheat the oven and prepare the pan
Once you have your ingredients, it’s time to get your kitchen warmed up. Preheat your oven to 350°F (175°C). This ensures that your cake rises beautifully. Additionally, prepare your baking pan by greasing it with butter and lightly dusting it with flour, or you can use parchment paper for easy removal.
Mix the dry ingredients in a bowl
In a large mixing bowl, combine your flour, baking powder, and salt. Whisk them together to incorporate air and eliminate any lumps. Mixing dry ingredients separately ensures uniform distribution, contributing to an even rise and texture in your cake.
Cream the butter and sugar
Now, let’s cream that butter and sugar. In another bowl, use an electric mixer to beat the softened butter and sugar together until the mixture is light and fluffy. This usually takes about 3-5 minutes. Why is this step so essential? It introduces air into the batter, giving your cake that delightful lightness.
Combine eggs and vanilla extract
Once your butter-sugar mixture is fluffy, it’s time to add your eggs, one at a time, blending well after each addition. Don’t forget to add that fragrant vanilla extract in at this stage. The vanilla will add a warm, comforting flavor that complements the sweetness of the cake perfectly.
Alternate adding flour mixture and milk
Now for the fun part! Gradually add the flour mixture and milk to the butter-egg mixture, alternating between the two. Start and end with the flour mixture to keep the texture smooth. Mix until just combined. Over-mixing can lead to a dense cake, and no one wants that!
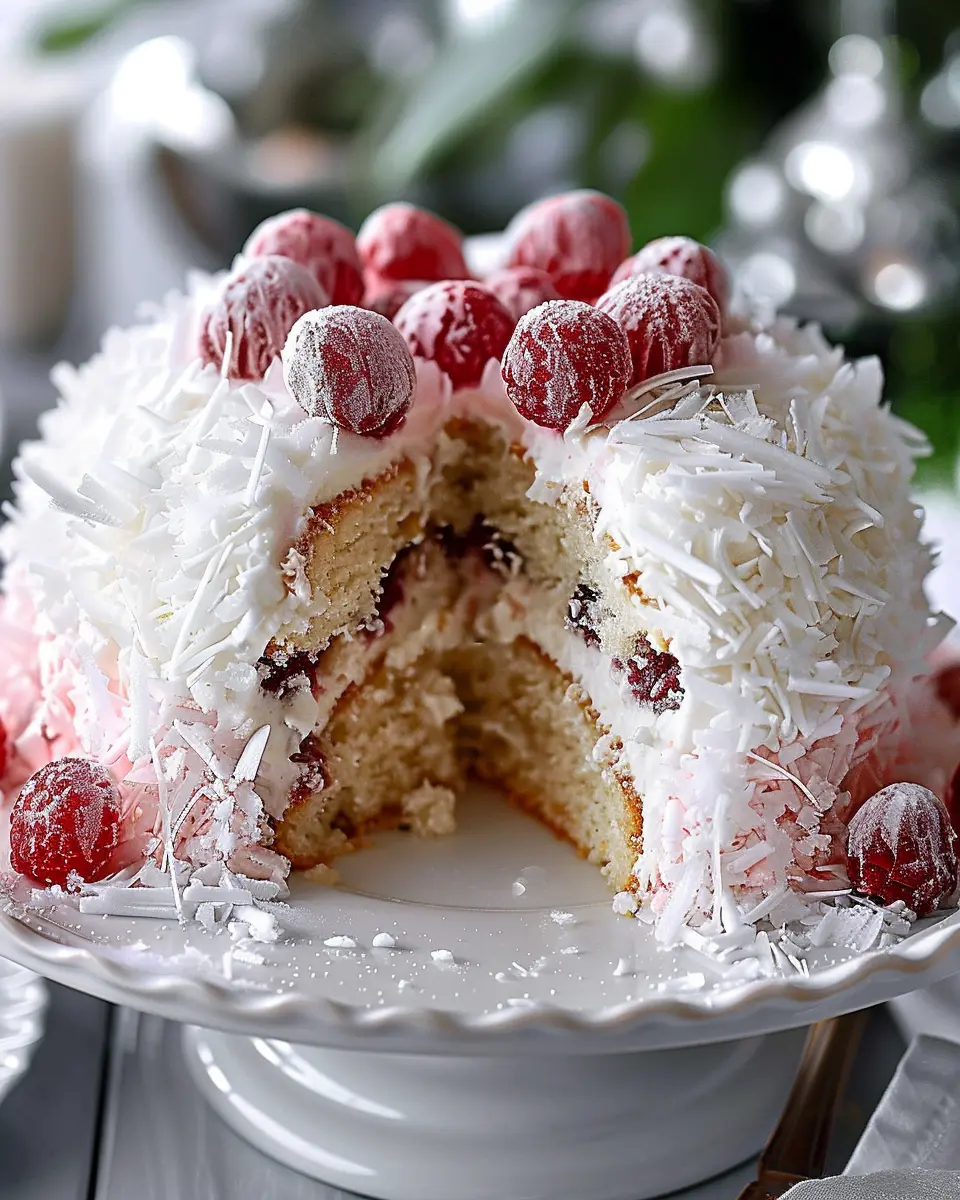
Layer the batter and raspberry preserves
Now, prepare to create that stunning snowball effect. Divide the batter in half, pouring one layer into the prepared pan. Spoon a generous layer of raspberry preserves over the batter, then add the second half of the batter on top. This layering creates a beautiful raspberry swirl and adds a flavor surprise when you slice into the cake.
Swirl and bake to perfection
Using a knife, gently swirl through the batter to create a marbled effect with the preserves. Once satisfied, place your cake in the oven and set your timer for about 30-35 minutes. Keep an eye on it—inserting a toothpick into the center should yield clean results when it’s finished baking.
Cool and coat with coconut
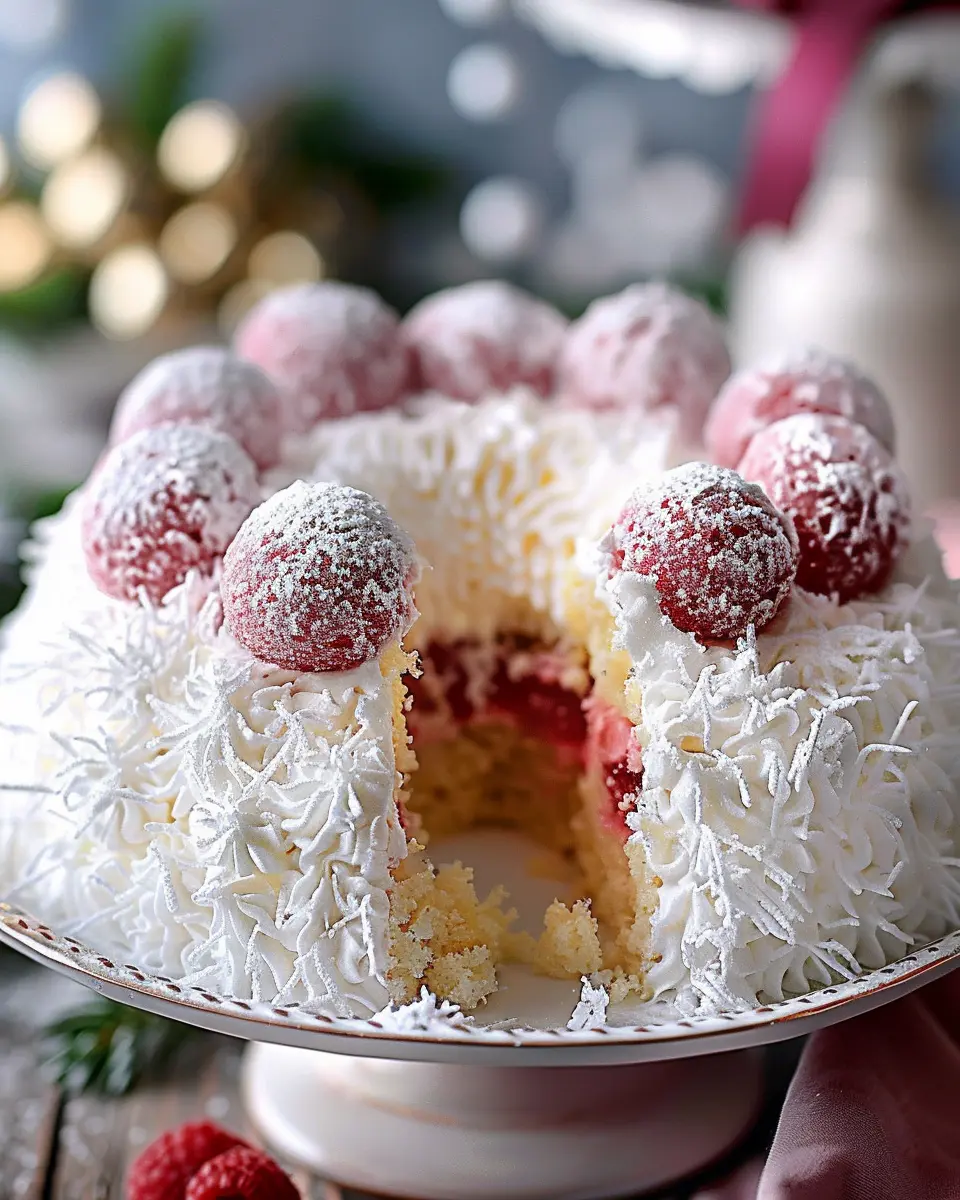
Let the cake cool in the pan for about 10 minutes before transferring it to a wire rack. This is a great time to prepare your coconut. Once the cake is completely cool, generously coat the top and sides with shredded coconut. This gives a lovely snowy texture, just like the name suggests!
Slice and serve
Finally, it’s time for the tastiest part! Slice your Snowball Cake and serve to family or friends—you know they’ll be impressed. Maybe even pair it with a scoop of vanilla ice cream or a cup of coffee for that perfect flavor combination.
With this step-by-step guide in hand, you’ll not only master the Snowball Cake Recipe but also create a memorable experience in your kitchen. Happy baking!
Variations on Snowball Cake
Tropical Twist with Lime or Pineapple Preserves
If you’re looking to elevate your Snowball Cake Recipe, why not experiment with tropical flavors? Incorporating lime or pineapple preserves can give your cake a refreshing zing! Imagine the vividly bright flavors dancing on your palate! You can substitute traditional coconut toppings with shredded coconut mixed with zest from fresh limes or add a luscious layer of pineapple between the cake layers for a moist surprise. It’s like taking a mini-vacation in every bite!
Mini Snowball Cakes for Individual Servings
Want to impress your friends at a get-together? Consider crafting mini Snowball cakes. These adorable bites are perfect for serving at any event, whether it’s a casual dinner party or a fancy soirée. Simply use a muffin tin or small cake molds to create individual portions. Each mini cake can be frosted with a light cream cheese icing and rolled in powdered sugar for that signature snowball effect. Personal-sized treats always seem extra special, don’t you think?
Adding a Chocolate Twist to the Recipe
For those who can’t resist chocolate, incorporate it into your Snowball Cake! You can easily adapt your snowball cake by blending cocoa powder into your batter, or perhaps drizzle some melted chocolate ganache over the top. Another idea is to fold in chocolate chips into the batter for delightful little surprises. This rich addition complements the fluffy texture beautifully and is sure to satisfy any chocolate lover’s cravings.
Explore these variations, and don’t be afraid to combine ideas! For additional inspiration, check out Food52’s Creative Cake Variations to really make your Snowball Cake Recipe your own!
Baking Tips and Notes for Snowball Cake
Common pitfalls to avoid
Baking a Snowball Cake can be incredibly rewarding, but a few common pitfalls can turn your sweet endeavor into a not-so-sweet experience.
- Overmixing the batter: It might be tempting to achieve a super-smooth consistency, but overmixing can lead to a dense cake. Mix just until combined.
- Wrong oven temperature: Always preheat your oven! An oven that’s too hot or too cold can affect the rise of your cake. Consider using an oven thermometer for accuracy.
- Timing is everything: Keep a close eye on your baking time. Every oven is different, so your Snowball Cake may need a little less or more time than the recipe indicates.
Best practices for achieving a perfect swirl
Creating that gorgeous swirl in your Snowball Cake doesn’t have to be complicated. Here are some tips:
- Use a toothpick: Dip it into the batter and give it a gentle swirl. Less is more; you want to maintain that beautiful marbled effect.
- Layer wisely: When adding your batters, pour them in alternating layers rather than mixing them together completely.
For more tips, check out professional baking resources like the King Arthur Baking Company or Serious Eats to elevate your baking game!
Serving Suggestions for Snowball Cake
Ideal Pairings with Beverages and Toppings
When it comes to enjoying your Snowball Cake, the right beverage can elevate your experience. Consider serving it with:
- Iced Coffee: The richness of a creamy iced coffee complements the sweet, snowy layers of your cake beautifully.
- Herbal Teas: Try pairing it with a mint or chamomile tea for a refreshing palate cleanser.
- Sparkling Water: For a light and bubbly option, sparkling water with a twist of lemon is perfect to balance the sweetness of the cake.
As for toppings, don’t shy away from creativity. Fresh berries, a dusting of powdered sugar, or a drizzle of chocolate sauce can add delightful contrasts in flavor and texture.
Presentation Ideas for Gatherings
To impress your guests with your Snowball Cake Recipe, consider these fun presentation ideas:
- Tiered Cake Stand: Elevate your cake on a tiered stand, showcasing the fluffy layers and making it a centerpiece.
- Decorative Plates: Use colorful or themed plates to align with the occasion, making your cake pop visually.
- Garnishes: Add sprigs of mint or edible flowers to create a beautiful finish.
Whatever the occasion, these serving suggestions will have your guests raving about your delicious Snowball Cake! Looking for more inspiration? Check out this resource for entertaining tips and ideas.
Time Breakdown for Snowball Cake Recipe
When it comes to whipping up a delightful Snowball Cake, understanding the time commitment is key. Here’s how the timing breaks down for your baking adventure:
Preparation time
You’ll want to set aside roughly 20–30 minutes for prep work. This includes gathering ingredients, greasing your cake pans, and prepping the batter. Don’t rush this stage; it’s about ensuring everything is ready for a smooth baking experience.
Baking time
The actual baking of your Snowball Cake will take around 30–35 minutes. Keep an eye on your oven time—not all ovens are created equal, and you’ll want that perfect golden brown!
Total time
In total, you’re looking at about 1 hour to 1 hour 10 minutes. Once you factor in both preparation and baking, this cake is quite the weekend treat without consuming your entire afternoon.
Feel free to check out more baking tips and tricks at sources like King Arthur Baking or Serious Eats for a deeper dive into perfecting your cake-making skills. Happy baking!
Nutritional Facts for Snowball Cake
Caloric Content Per Slice
When indulging in a slice of Snowball Cake, you’ll be pleased to know it packs approximately 350 calories. This delightful dessert can be a part of your occasional treat, fitting well within a balanced diet without derailing your health goals.
Overview of Key Nutritional Components
Understanding the nutritional components of your Snowball Cake Recipe adds a layer of enjoyment to your experience. Here’s a breakdown of what each slice usually contains:
- Carbohydrates: Around 46 grams, providing quick energy.
- Fat: Approximately 15 grams, offering richness and flavor.
- Protein: About 4 grams, supporting muscle maintenance.
- Sugar: Typically contains 25 grams, satisfying your sweet tooth.
For more in-depth nutritional insights, consider visiting Healthline or Mayo Clinic for guidance on balancing your diet.
Remember, enjoying a slice of this cake occasionally, while maintaining a nutritious lifestyle, can bring joy without guilt. Have you thought about pairing it with fresh fruit or a dollop of Greek yogurt for a balanced dessert experience?
FAQs about Snowball Cake Recipe
How can I substitute ingredients in this recipe?
Experimenting with ingredients can lead to delicious results! Here are some swaps for your Snowball Cake Recipe:
- Flour: If you’re looking for a gluten-free option, almond or coconut flour are great alternatives.
- Sugar: For a healthier choice, consider using honey or agave nectar. Just adjust the liquid in your recipe accordingly.
- Frosting: If you’re not a fan of coconut, cream cheese or chocolate ganache could take your cake to a new level!
Check out this guide on baking substitutions for even more ideas!
What storage methods are best for leftover Snowball Cake?
To keep your Snowball Cake fresh:
- Refrigerator: Store it in an airtight container. It can last up to a week in the fridge.
- Freezer: Wrap slices tightly in plastic wrap and then in foil to prevent freezer burn. It can last up to three months!
Just remember, letting it thaw in the fridge overnight will help preserve that perfect texture when you’re ready to enjoy it again!
Can I make Snowball Cake ahead of time?
Absolutely! Preparing your Snowball Cake a day in advance can enhance the flavors. Just assemble and frost it but store it in the refrigerator to keep it fresh. This is particularly handy for special occasions when time can be tight. For more tips on make-ahead desserts, check out The Kitchn’s advice.
Having the option to prepare ahead not only saves time but allows you to enjoy the time with your guests!
Conclusion on Snowball Cake Recipe
Final thoughts on making your own Snowball Cake
Creating your own Snowball Cake is not just about following a recipe—it’s a delightful experience that can brighten your day or elevate any occasion. The blend of fluffy layers and rich filling offers a taste that’s simply unforgettable.
Making it at home gives you the freedom to experiment with flavors, such as adding fresh fruit or alternative sweeteners. Plus, there’s something rewarding about sharing a homemade cake with friends and family.
For tips and tricks on perfecting your baking skills, check out these resources from King Arthur Baking and Bon Appétit. So, roll up your sleeves and let the sweetness begin!
PrintSnowball Cake Recipe: The Best Indulgent Treat for Every Occasion
Indulge in the delightful layers of this snowball cake, perfect for any celebration.
- Prep Time: 30 minutes
- Cook Time: 35 minutes
- Total Time: 1 hour 5 minutes
- Yield: 12 servings 1x
- Category: Desserts
- Method: Baking
- Cuisine: American
- Diet: Vegetarian
Ingredients
- 2 cups all-purpose flour
- 1 ½ cups granulated sugar
- ½ cup unsweetened cocoa powder
- 1 cup buttermilk
- ½ cup vegetable oil
- 3 large eggs
- 2 teaspoons baking soda
- 1 teaspoon salt
- 1 teaspoon vanilla extract
- 3 cups shredded coconut
- 1 cup heavy cream
- ½ cup powdered sugar
Instructions
- Preheat your oven to 350°F (175°C) and grease the cake pans.
- In a bowl, mix flour, sugar, cocoa powder, baking soda, and salt.
- In another bowl, combine buttermilk, oil, eggs, and vanilla.
- Mix the wet ingredients into the dry ingredients until well combined.
- Divide the batter evenly between the prepared pans.
- Bake for 30-35 minutes or until a toothpick comes out clean.
- Let the cakes cool completely before frosting.
- In a mixing bowl, whip heavy cream and powdered sugar until stiff peaks form.
- Frost the cooled cakes and cover the sides and top with shredded coconut.
Notes
- For a richer flavor, let the cake chill overnight before serving.
- Experiment with different flavors of ice cream between cake layers for variety.
Nutrition
- Serving Size: 1 slice
- Calories: 350
- Sugar: 25g
- Sodium: 200mg
- Fat: 15g
- Saturated Fat: 7g
- Unsaturated Fat: 5g
- Trans Fat: 0g
- Carbohydrates: 45g
- Fiber: 2g
- Protein: 4g
- Cholesterol: 70mg
Keywords: Snowball Cake, Cake Recipe, Dessert