Introduction to Red White and Blue Mini Fruit Pizzas
The joy of homemade desserts
There’s something uniquely satisfying about baking your own desserts. Not only do you get to control the ingredients, ensuring they’re fresh and free from preservatives, but you also have the creative freedom to adjust flavors to your liking. Mini fruit pizzas are not just easy to make; they offer an excellent canvas for your culinary imagination. Imagine biting into a delectable, soft cookie base topped with creamy goodness and vibrant fruits! Plus, you can whip these up while blasting your favorite playlist or podcast—talk about a delightful way to unwind after a busy day.
Why fruit pizzas are a crowd-pleaser
Red white and blue mini fruit pizzas are perfect for gatherings and celebrations. They capture the hearts (and taste buds) of both kids and adults alike. The combination of a sweet cookie crust, a rich cream cheese frosting, and fresh fruits is irresistible. Whether you’re hosting a barbecue, picnic, or festive get-together, these mini treats provide a light yet satisfying dessert option. Plus, you can make them in various ways – just check out this source for more creative ideas!
Celebrate with a splash of color
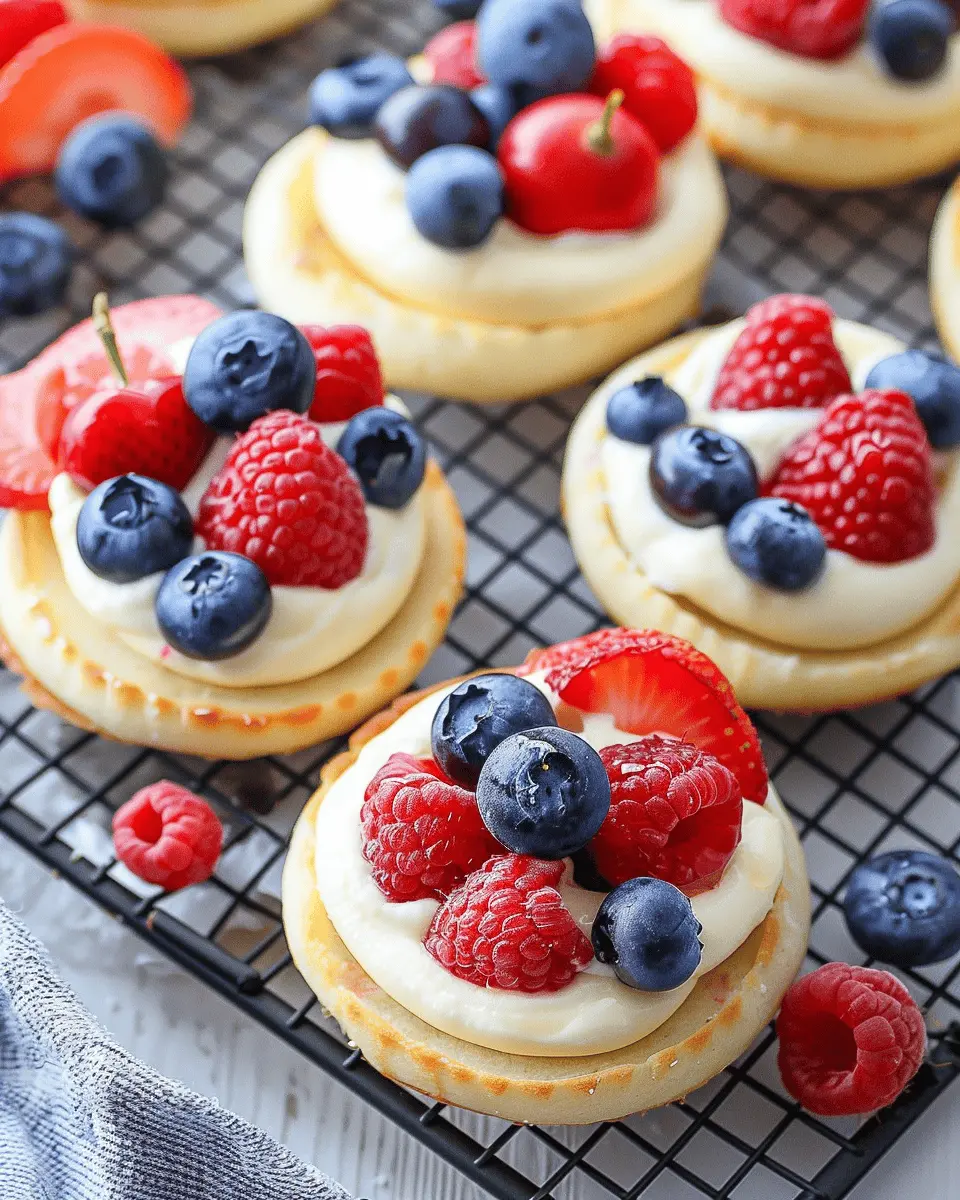
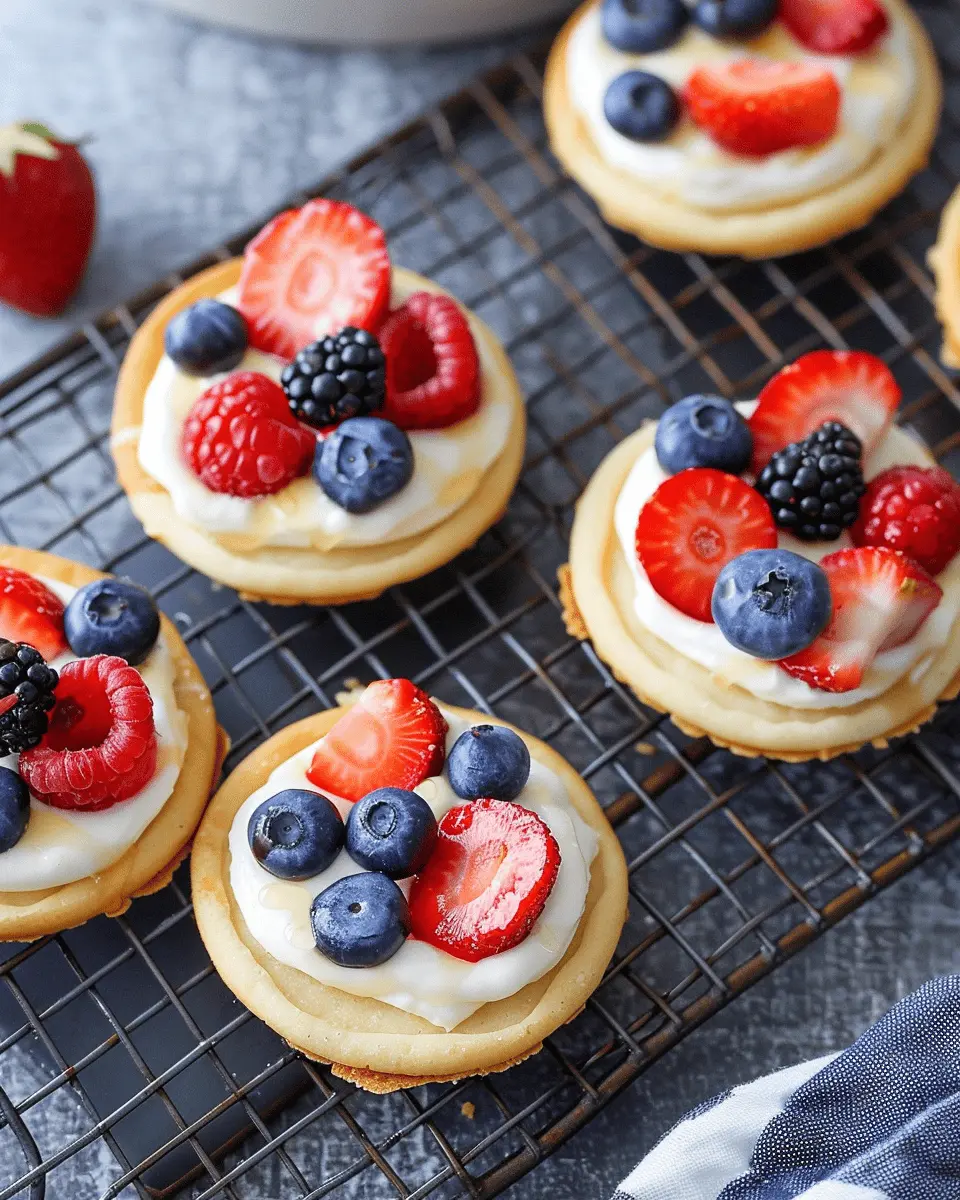
What truly elevates these mini fruit pizzas is their festive appearance. With the vibrant reds from strawberries or raspberries, the brilliant blues of blueberries, and the creamy white frosting in between, they resemble a beautiful flag for any celebration like Independence Day or Memorial Day. It’s like art on a plate! Presenting a dessert that not only tastes fantastic but also looks stunning can turn an ordinary event into something truly special. Invite your friends over for a “mini pizza decorating night”—trust me, everyone will love being part of the colorful fun.
So, ready to bring a slice of joy into your next gathering? Let’s dive into the scrumptious process behind those red white and blue mini fruit pizzas!
Ingredients for Red White and Blue Mini Fruit Pizzas
Creating red white and blue mini fruit pizzas is not just about the fun; it’s also about using the right ingredients to achieve that perfect flavor and presentation. Let’s dive into what you’ll need for this delightful treat!
Essential ingredients for the sugar cookies
For the base of your mini fruit pizzas, you’ll want soft and chewy sugar cookies. Here’s what to gather:
- Butter: 1 cup (unsalted for best flavor)
- Sugar: 1 cup (you can opt for brown sugar for a richer taste)
- Eggs: 2 large
- Vanilla extract: 1 teaspoon (the more pure, the better)
- Flour: 2 ½ cups
- Baking powder: 1 teaspoon
- Salt: ½ teaspoon
These ingredients work harmoniously, creating a delicious canvas for your toppings. Looking for inspiration on baking techniques? Check out Serious Eats.
Ingredients for cream cheese frosting
Next, let’s whip up that luscious cream cheese frosting! You’ll be combining the following:
- Cream cheese: 8 oz (softened for easy mixing)
- Butter: ¼ cup (also softened)
- Powdered sugar: 2 cups (for that sweet, velvety texture)
- Vanilla extract: 1 teaspoon
This frosting is the magic that brings your mini fruit pizzas together, adding a creamy contrast to the fresh fruit.
Fresh fruit toppings you can’t skip
And of course, what’s a fruit pizza without the colorful toppings? For your red white and blue mini fruit pizzas, be sure to include:
- Strawberries: Sliced (rich in Vitamin C)
- Blueberries: Whole (antioxidant powerhouses)
- Bananas: Sliced (for a creamy flavor boost)
The vibrant colors and textures of the fruit make these treats as pleasing to the eye as they are to the palate! If you’re curious about the health benefits of these fruits, consider checking out Healthline.
Now that you have the ingredients ready, let’s get baking and delighting at your next gathering!
Preparing Red White and Blue Mini Fruit Pizzas
If you’re looking for a delightful dessert that’s as festive as it is delicious, these Red White and Blue Mini Fruit Pizzas are your ticket to impressing friends and family. Perfect for summer gatherings, holidays, or just a fun weekend treat, this recipe combines the sweetness of cookie crusts with a creamy frosting and vibrant fruits. Let’s break down the steps to create these delightful bites!
Cream Together Butter and Sugar
Start the whimsical adventure by creaming together softened butter and granulated sugar in a large mixing bowl. For best results, ensure your butter is at room temperature to achieve that light and fluffy texture. This combination creates the foundation for your cookies and adds a delightful sweetness. Use an electric mixer on medium speed for about 2-3 minutes, or until the mixture turns pale and fluffy. Not only does this step develop great flavor, but it also incorporates air for a tender cookie.
Mix in Egg and Vanilla
Next up, it’s time to add in one large egg and a splash of vanilla extract. The egg helps bind everything together, while vanilla adds warmth and depth to your flavors. Keep mixing until everything is well combined—this should take about 1 minute. Consider using a high-quality vanilla extract for a better aroma and taste; the difference is truly remarkable!
Combine Dry Ingredients
In a separate bowl, whisk together your dry ingredients—flour, baking soda, and a pinch of salt. These components will provide structure to your red white and blue mini fruit pizzas. Gradually add the dry mixture to your wet ingredients, mixing on low speed until just combined. Be careful not to overmix; this keeps your cookies tender rather than tough.
Chill the Dough
Once your dough is mixed, it’s crucial to chill it. Wrap the dough in plastic wrap and pop it in the fridge for at least 30 minutes. Chilling firms up the butter, which will help your cookies keep their shape during baking. Plus, it deepens the flavors! This step is key for anyone feeling rushed in the kitchen; taking the time to chill the dough pays off in taste and texture.
Bake the Cookies
Preheat your oven to 350°F (175°C) while you wait. Line a baking sheet with parchment paper. Once chilled, scoop tablespoon-sized portions of dough and place them on the sheet, spacing them about two inches apart. Bake for about 8-10 minutes, or until the edges are golden brown. You want that nice balance of chewy and crisp. Let them cool on the baking sheet for a few minutes before transferring them to a wire rack.
Prepare the Frosting
While your cookies cool, let’s whip up the creamy frosting. In a medium bowl, beat together cream cheese and powdered sugar until smooth, then add vanilla and a bit of milk to reach your desired consistency. This sweet frosting is the perfect canvas for your fresh fruit toppings.
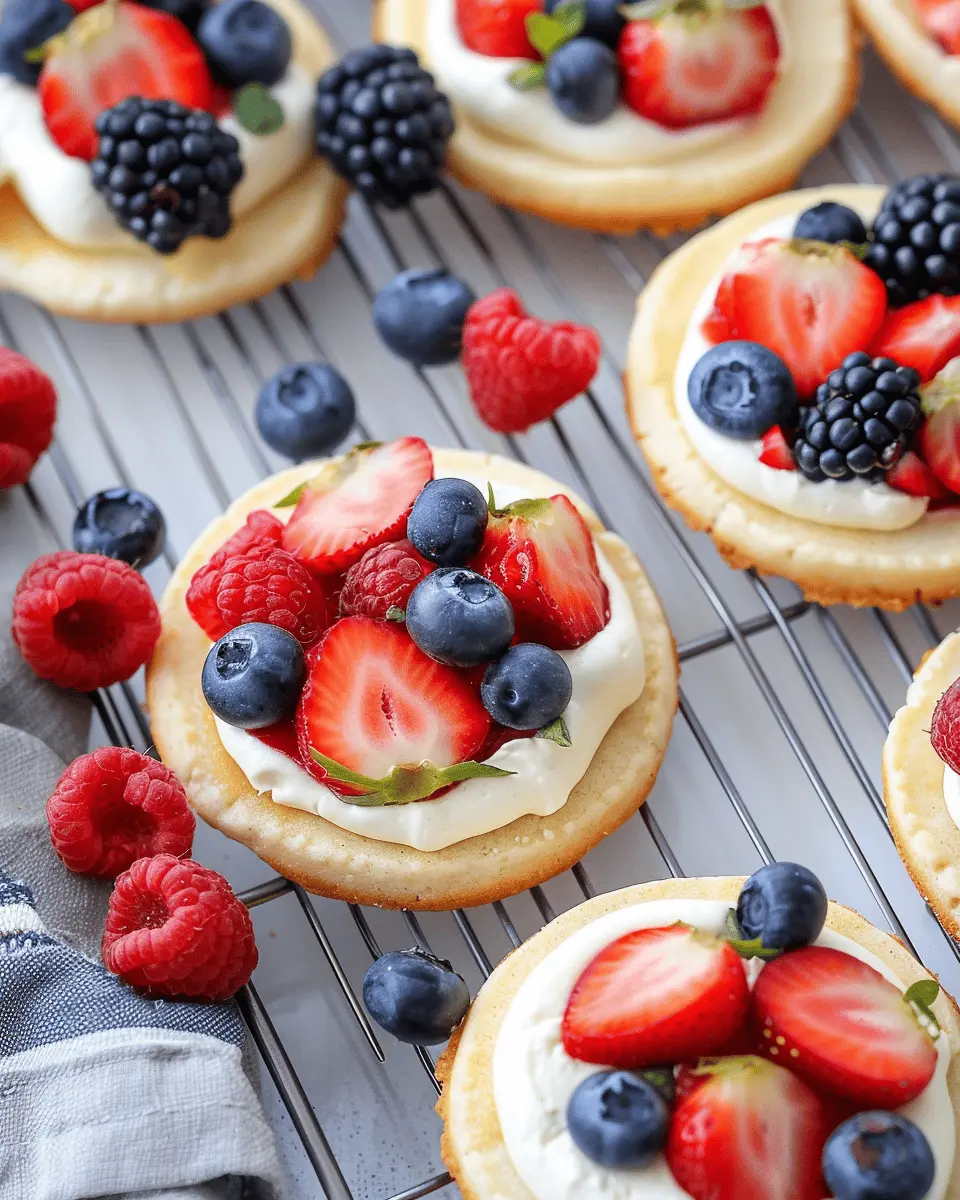
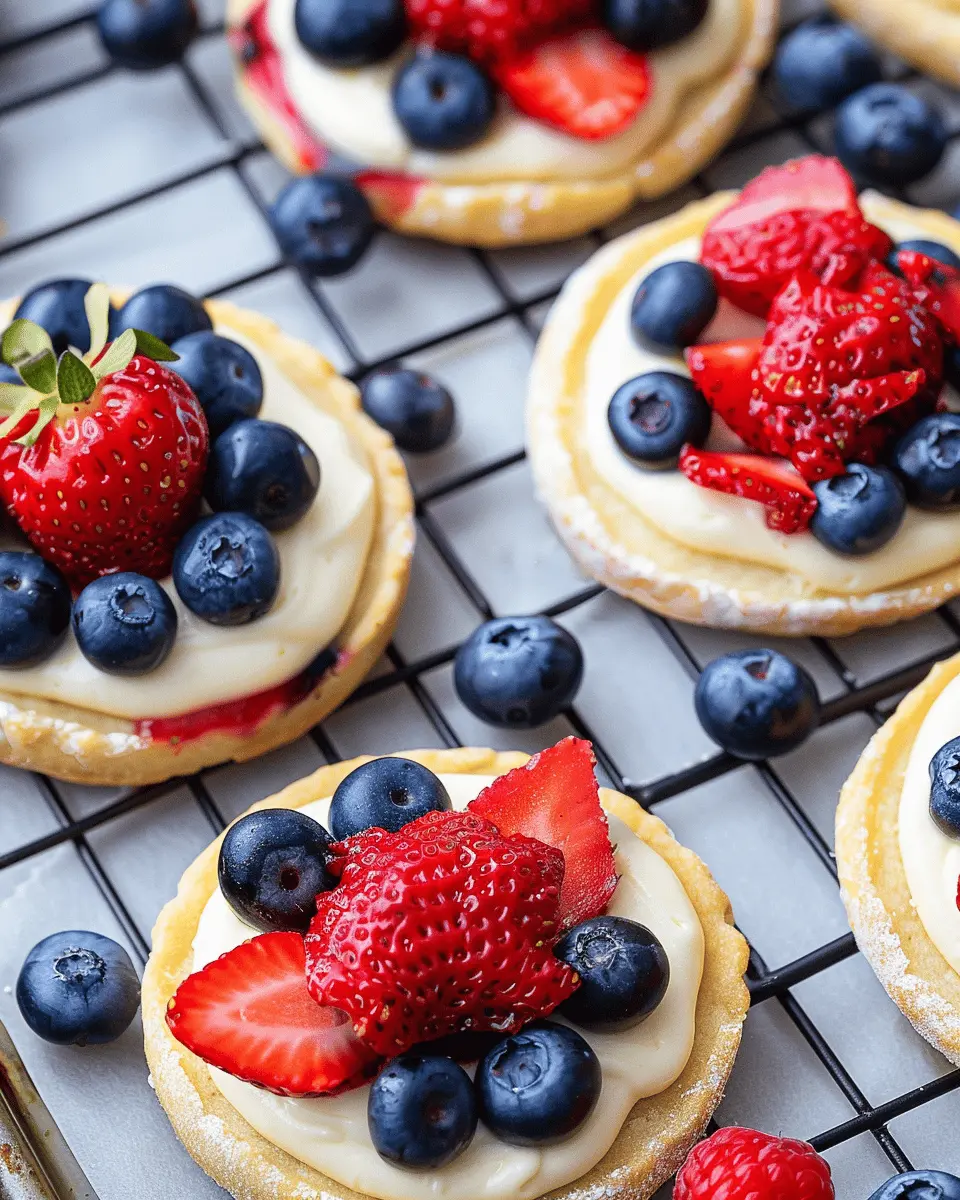
Assemble the Mini Fruit Pizzas
Now comes the fun part—assemble your red white and blue mini fruit pizzas! Spread a generous dollop of frosting on each cookie and top with a selection of fresh fruits: strawberries, blueberries, and slices of banana are excellent choices. Be creative! Arrange the fruits in a pattern to create a beautiful presentation that’s sure to wow your guests.
Chill Before Serving
Finally, take a moment to chill your assembled mini fruit pizzas in the refrigerator for about 20-30 minutes. This allows the flavors to meld and ensures the frosting is nice and firm. Serve these delightful treats chilled, and watch them disappear!
These red white and blue mini fruit pizzas are sure to bring joy and creativity to your table. They’re not only a treat for the taste buds but also easy to make—perfect for young professionals looking to impress without spending way too much time in the kitchen. So, what are you waiting for? Gather your ingredients and let the fun begin! For more on mastering desserts, check out this guide on fruit decoration techniques.
Variations on Red White and Blue Mini Fruit Pizzas
When it comes to making red white and blue mini fruit pizzas, the fun doesn’t stop with just the standard recipe! Here are some creative variations to spice things up.
Berry Swaps: Using Different Fruits
While strawberries and blueberries are classic choices, don’t shy away from experimenting with other berries. Consider using raspberries, blackberries, or even cherries. Each berry brings unique flavors that will delight your taste buds. You might even try a blends like mixed berries for a colorful twist! If you’re looking for more inspiration, check out this fruit picking guide.
Cookie Alternatives: Try Chocolate or Almond Flour
If you’re feeling adventurous, why not switch up the base? Instead of traditional sugar cookies, you can use chocolate cookies for a rich flavor. If you’re looking for a gluten-free option, almond flour cookies provide a nutty taste that pairs beautifully with fruit. You could also get creative with coconut flour for a tropical vibe—endless possibilities await!
Frosting Twists: Add Flavors Like Lemon or Mint
Now, let’s talk about the frosting. Why stick to plain vanilla when you can jazz it up? A hint of lemon zest or mint extract can elevate your mini fruit pizzas to the next level. Imagine that refreshing lemon flavor cutting through the sweetness—delicious! If you want to get really ambitious, consider making a whipped cream cheese frosting infused with your favorite citrus or herb.
By making these simple substitutions, you can customize your red white and blue mini fruit pizzas to reflect your taste preferences and impress your guests. So go ahead, get creative, and enjoy!
Baking notes for Red White and Blue Mini Fruit Pizzas
Tips for achieving the perfect cookie texture
To ensure your red white and blue mini fruit pizzas have that delightful chewy yet crispy texture, don’t skip chilling the dough. Allow your cookie dough to rest in the fridge for at least 30 minutes. This firms up the butter, leading to a less spreadable and more structured cookie. When baking, keep an eye on them; they’ll continue to firm up as they cool.
Storage tips for cookies and toppings
If you plan to make these mini fruit pizzas in advance, store the baked cookies in an airtight container at room temperature for up to four days. For the toppings, wash and slice your fruit fresh to maintain their vibrant colors and flavors. Consider storing them separately in the fridge until you’re ready to assemble.
Best practices for frosting application
For frosting, a piping bag works wonders! It gives you control and makes for a beautiful presentation. Start from the center and swirl outward for even coverage. If you don’t have a piping bag, a sturdy zip-top bag with a corner snipped off will do just fine. A thin layer allows the fruity toppings to shine through while providing that sweet creaminess we love.
Need more tips? Check out resources from King Arthur Baking for expert insights!
Serving Suggestions for Red White and Blue Mini Fruit Pizzas
Perfect Moments to Enjoy These Delightful Treats
Red white and blue mini fruit pizzas are perfect for celebrations, potlucks, or family gatherings. Imagine serving these at a Fourth of July barbecue, where their patriotic colors steal the show. They’re also great for birthday parties or summer picnics, as they add a cheerful touch to any dessert table.
Creative Ways to Plate Your Mini Fruit Pizzas
For an appealing presentation, consider using slate boards or vibrant serving platters. Arrange the mini pizzas in a circular pattern, and garnish with mint leaves for that extra splash of color. You can even drizzle some honey or yogurt on the platter for a fun touch. A sprinkle of edible glitter could really elevate the festive feel!
Delicious Beverage Pairings
To complement your red white and blue mini fruit pizzas, serve them with refreshing iced tea, sparkling lemonade, or even homemade fruit-infused water. These drinks not only match the vibrant aesthetics but also enhance the fresh fruit flavors. For a warm touch, consider offering spiced chai or creamy lattes, which balance the sweetness beautifully.
For more creative ideas, don’t hesitate to check out Epicurious or Food Network! They have a plethora of recipes that can inspire your next gathering. Enjoy your fruity adventure!
Time details for Red White and Blue Mini Fruit Pizzas
When planning to create red white and blue mini fruit pizzas, timing is everything. Here’s a breakdown to help you manage your schedule seamlessly.
Preparation time
Gathering your ingredients and prepping the bases takes about 15-20 minutes. This includes mixing your dough and cutting up fresh fruits for that vibrant topping.
Baking time
Once your bases are ready, pop them in the oven for approximately 10-12 minutes. You want them to be golden and slightly crisp for that delightful crunch.
Chill time
After baking, let those cute little pizzas chill for about 30 minutes. Cooling enhances the flavors and makes them perfect for serving.
Total time
Overall, you’re looking at around 1 hour to get these scrumptious red white and blue mini fruit pizzas from your kitchen and onto the table. Happy baking!
Nutritional information for Red White and Blue Mini Fruit Pizzas
Calories per mini pizza
Each of these delightful red white and blue mini fruit pizzas comes in at around 100 calories, making them a guilt-free dessert option perfect for summer gatherings or quick snacks. The combination of fresh fruits adds natural sweetness without packing on the calories.
Key nutrients to keep an eye on
These mini pizzas are not just tasty; they also offer essential nutrients. The Greek yogurt base provides a good source of protein and calcium, while the assorted berries deliver antioxidants, vitamins C and K, as well as fiber. To dive deeper into nutrient profiles, check out the USDA FoodData Central for detailed insights into fruit nutrition.
Adjustments for a healthier version
If you want to up the health factor, consider these easy adjustments:
- Opt for whole grain mini pizza crusts to increase fiber content.
- Use low-fat yogurt instead of regular for fewer calories and less fat.
- Mix in some chia seeds or nuts for added omega-3 fatty acids and a satisfying crunch.
These small tweaks can make your red white and blue mini fruit pizzas even more nutritious without sacrificing flavor!
FAQs about Red White and Blue Mini Fruit Pizzas
Whether you’re preparing for a summer picnic or a festive celebration, red white and blue mini fruit pizzas are both delicious and visually appealing. If you have questions about making these treats, you’re in the right place!
Can I make these cookies ahead of time?
Absolutely! You can prepare the cookie base a day in advance. Just bake and allow them to cool, then store them in an airtight container. When you’re ready to serve, whip up the frosting and add your favorite fruits. This will keep the cookies fresh and prevent them from getting soggy.
What’s the best way to store leftover fruit pizzas?
Leftover red white and blue mini fruit pizzas should be refrigerated. Place them in a single layer in an airtight container. If you need to stack them, separate each layer with parchment paper to avoid squishing the frosting and toppings. They’re best enjoyed within a day or two for maximum freshness.
Can I freeze the dough?
Yes! Freezing the dough is a great way to save time. Shape the dough into a disc, wrap it tightly in plastic wrap, and store it in the freezer for up to three months. When you’re ready to bake, let it thaw in the fridge overnight before rolling it out and cutting into your desired shapes.
Is there a dairy-free option for the frosting?
Definitely! You can easily swap regular cream cheese for a dairy-free alternative like cashew cream or a store-bought vegan cream cheese option. Sweeten it with maple syrup or agave for a delicious frosting that everyone will love.
For more tips on fruit and dessert styling, check out resources from The Kitchn or Food Network. Enjoy creating your mini fruit pizzas!
Conclusion on Red White and Blue Mini Fruit Pizzas
Recap of Why These Are a Must-Try
These red white and blue mini fruit pizzas are not only a visual delight, but they also offer a wonderfully delicious way to celebrate any occasion. Their vibrant colors and fresh flavors make them a standout treat at picnics, barbecues, or family gatherings. Plus, they’re easy to make and perfect for involving friends or kids in the kitchen!
Encouragement to Experiment with the Recipe
Feel free to let your creativity shine! Experiment with different fruits or even try adding a drizzle of honey or a sprinkle of chia seeds for added texture. Each variation can bring a new twist to the classic recipe, keeping your mini pizzas fresh and exciting.
Invitation to Share Your Creations!
We would love to see your takes on these red white and blue mini fruit pizzas. Snap a photo and share your creation on social media, tagging us! It’s always inspiring to see how others put their unique spin on a classic recipe. Happy baking!
PrintRed White and Blue Mini Fruit Pizzas: Easy, Fresh, and Fun Treats

A refreshing and delightful treat perfect for summer gatherings and celebrations.
- Prep Time: 20 minutes
- Cook Time: 10 minutes
- Total Time: 30 minutes
- Yield: 12 servings 1x
- Category: Dessert
- Method: Baking
- Cuisine: American
- Diet: Vegetarian
Ingredients
- 1 cup cookie dough
- 1 cup cream cheese
- 2 tablespoons sugar
- 1 teaspoon vanilla extract
- 1 cup strawberries, sliced
- 1 cup blueberries
- 1 cup raspberries
Instructions
- Preheat the oven to 350°F (175°C).
- Roll the cookie dough into small circles and bake until golden brown.
- In a bowl, mix cream cheese, sugar, and vanilla extract until smooth.
- Once the cookies are cooled, spread the cream cheese mixture on top.
- Decorate with strawberries, blueberries, and raspberries.
Notes
- For a healthier option, consider using Greek yogurt instead of cream cheese.
- These can be assembled a few hours in advance.
Nutrition
- Serving Size: 1 mini pizza
- Calories: 120
- Sugar: 8g
- Sodium: 50mg
- Fat: 5g
- Saturated Fat: 3g
- Unsaturated Fat: 2g
- Trans Fat: 0g
- Carbohydrates: 16g
- Fiber: 1g
- Protein: 2g
- Cholesterol: 15mg
Keywords: Red White and Blue Mini Fruit Pizzas, fruit pizzas, summer treats