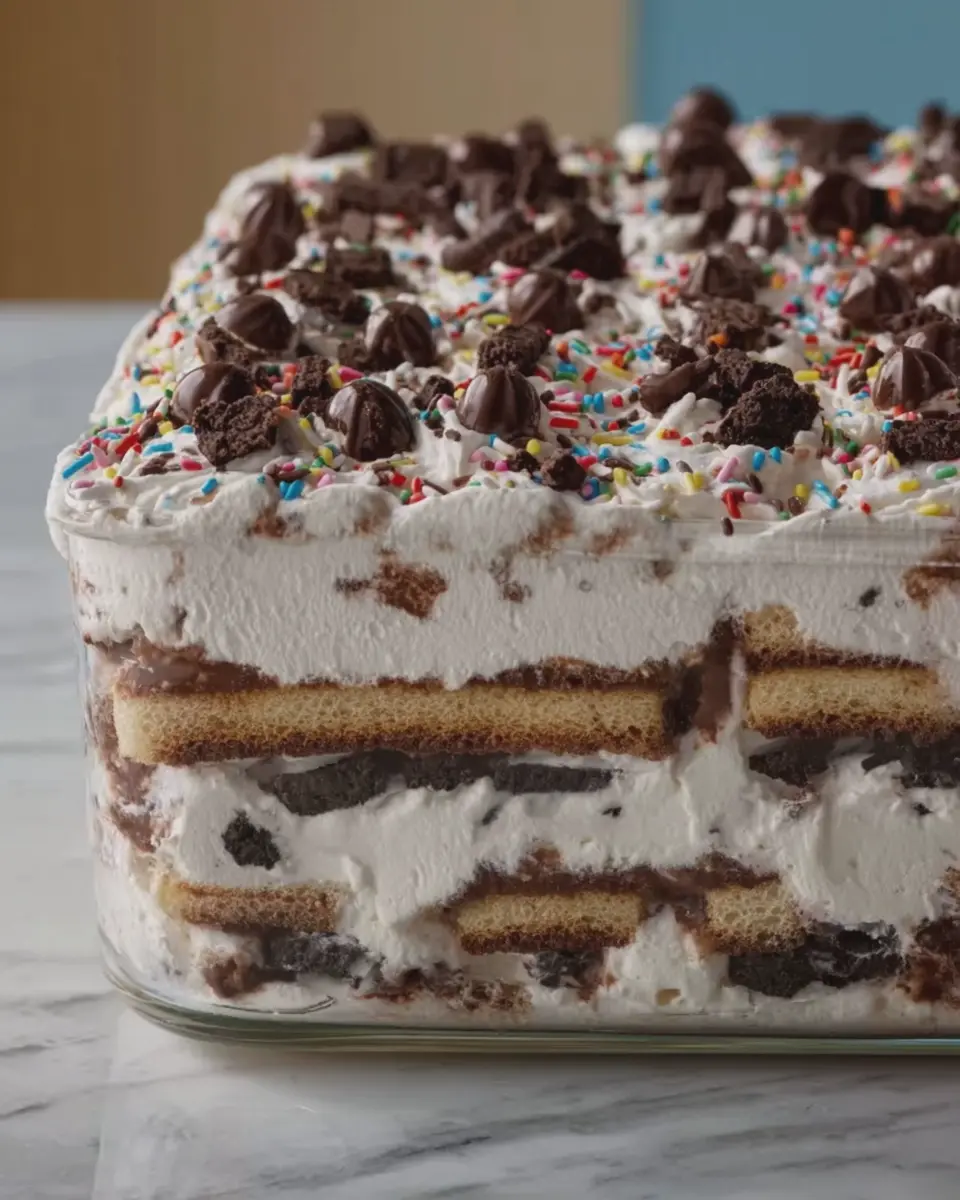
Introduction to Ice Cream Sandwich Cake
When it comes to satisfying that sweet tooth, you can’t go wrong with an ice cream sandwich cake. This delightful dessert brings together the best elements of cake and ice cream in a simple yet elegant way. It’s no wonder this confection has become a favorite among dessert lovers everywhere. Let’s dive into what makes this treat so special.
Why Ice Cream Sandwich Cake is the Ultimate Dessert
Imagine biting into a slice of cake where every bite is creamy, cold, and bursting with flavor. Now, think about the ease of making it without having to turn on your oven. An ice cream sandwich cake checks all the boxes for an ideal dessert: it’s fun, easy to prepare, and guaranteed to impress friends and family at any gathering.
-
No Baking Required: One of the best things about this cake is that it requires minimal time and effort, making it perfect for those of us who are always on the go. You stack ice cream sandwiches, layer them with toppings, and voilà—you have a show-stopping dessert ready to serve.
-
Endless Flavor Combinations: The flavor possibilities are nearly endless! You can use chocolate, vanilla, or even mint chocolate chip ice cream sandwiches. Customize it further with toppings like crushed nuts, chocolate syrup, or fresh berries. The choice is yours!
-
Great for Any Occasion: Whether it’s a summer barbecue, a birthday party, or just a random Tuesday evening, an ice cream sandwich cake fits right in. It’s an all-season treat that appeals to kids and adults alike. According to a National Ice Cream Association study, about 90% of Americans love ice cream. Who wouldn’t want to bring that joy to their next gathering?
A Personal Touch
In my experience, making an ice cream sandwich cake has led to some wonderful moments. From birthday surprises to spontaneous get-togethers, this dessert always brings a smile to people’s faces. Plus, watching the excitement as I cut into the cake—revealing those perfect layers of deliciousness—never gets old.
In summary, if you’re looking for a simple yet fabulous dessert that everyone will love, look no further than the ice cream sandwich cake. Your future baking self will be thanking you. Let’s get started on creating this deliciously fun dessert!
Ingredients for Ice Cream Sandwich Cake
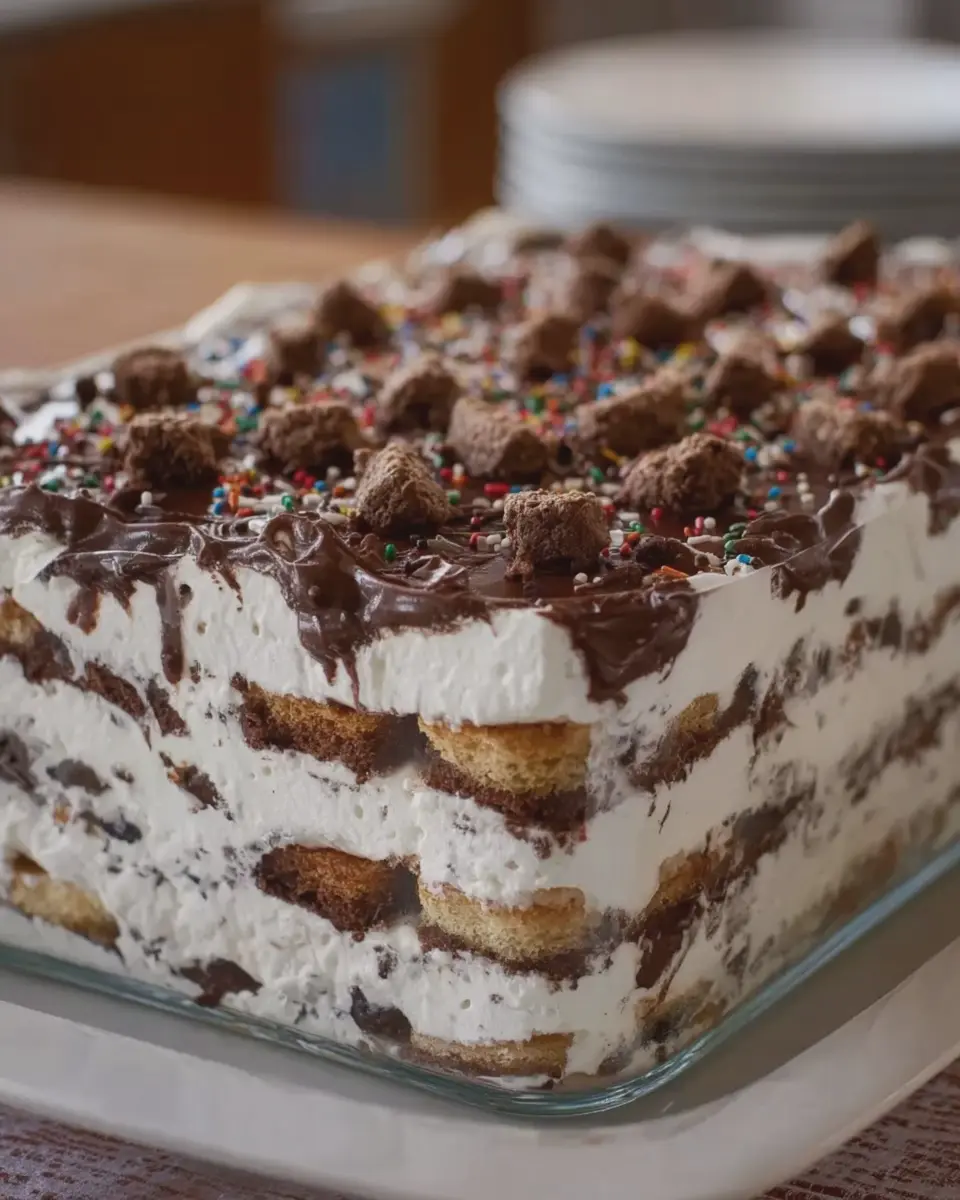
Creating a delightful ice cream sandwich cake is easier than it sounds! You’ll want to gather some simple yet essential ingredients to ensure your dessert is a hit at your next gathering. Here’s what you’ll need:
- Ice Cream Sandwiches: Choose a variety you love—vanilla, chocolate, or even a fun flavor like cookies and cream!
- Whipped Topping: Opt for an 8-ounce tub of cool whip for that light, airy texture.
- Chocolate Sauce: A delicious drizzle of chocolate sauce adds a rich finish to your cake.
- Sprinkles or Toppings: Get creative! Whether it’s sprinkles, nuts, or crushed cookies, toppings add a personal touch.
- Additional Ice Cream: For a creamier layer, consider using soft-serve or a tub of your favorite ice cream flavor.
- Optional Add-Ins: Think about including fruits or candy pieces for an extra layer of fun and flavor.
Once you’ve gathered these ingredients, you’re ready to dive into the fun! Check out more details on food combinations and how to enhance your ice cream sandwich cake in this guide.
Get ready to impress your friends with minimal effort!
Step-by-Step Preparation of Ice Cream Sandwich Cake
Creating an ice cream sandwich cake is an ultimate way to treat yourself and your friends to a delightful dessert that’s simple yet indulgent. If you’re ready to embark on this sweet journey, let’s break it down into easy-to-follow steps that ensure a fun baking experience!
Organizing Your Ingredients
Before diving into the creation of your mouthwatering ice cream sandwich cake, it’s crucial to have everything you need on hand. Trust me; the last thing you want is to be scrambling for ingredients midway through. Here’s what you’ll need:
- 16 ice cream sandwiches (any flavor you prefer)
- 1 container of whipped topping (around 8 oz)
- 1 cup of chocolate syrup (for drizzling)
- Sprinkles (optional, but who doesn’t love a little flair?)
- Food-safe plastic wrap or parchment paper
- A 9×13 inch baking dish or pan
Having all your ingredients organized and ready to go will streamline your process, making it more efficient and enjoyable! Feel free to explore different flavors of ice cream sandwiches, such as mint chocolate chip or cookies and cream. The key to a rich flavor profile lies in the combination of textures and tastes.
Layering the Ice Cream Sandwiches
With your ingredients at the ready, it’s time to layer the ice cream sandwiches. This step is where the magic begins! Here’s how:
-
Line your pan: Begin by lining your baking dish with plastic wrap or parchment paper. This will allow you to lift the cake out later, making it easier to serve.
-
First layer: Place 8 ice cream sandwiches in the baking pan side by side, creating a solid bottom layer. We recommend starting with the classic vanilla or chocolate flavor to balance out the toppings you’ll add later.
-
Press down gently: Make sure to press down slightly on the sandwiches so they bond well together.
-
Repeat: Add a second layer of 8 more ice cream sandwiches on top of the first layer, ensuring that each sandwich is aligned properly. The structure is important for the overall presentation.
Spreading the Whipped Topping
Next comes the fun part: adding that fluffy whipped topping! This step doesn’t just bring in flavor; it also adds a light texture to your ice cream sandwich cake. Here’s what to do:
-
Gently spread: Using a spatula, take your whipped topping and spread it evenly on top of the second layer of ice cream sandwiches. Be gentle to avoid displacing the sandwich layers underneath.
-
Smoothing it out: Take the time to smooth the whipped topping for even coverage. It’s all about aesthetics here; a nicely spread layer makes your cake look professionally done!
Drizzling the Chocolate Syrup
Ah, the chocolate syrup—the icing on the cake, if you will. This step is where creativity can shine. Here’s how to do it right:
-
Generous drizzle: Grab your chocolate syrup and start drizzling it over the whipped topping with a steady hand. You can create fun patterns by alternating your drizzle; zigzag patterns, spirals, or even just a plain drizzle work!
-
Optional toppings: If you want to take your cake to another level, sprinkle some colored sprinkles on top to create a festive look.
Final Assembly of the Cake
You’re almost there! With your layers built and toppings added, it’s time to give your cake its final touches:
-
Chill: Cover the cake with plastic wrap and place it in the freezer for at least 4 hours, or better yet, overnight. This allows the cake to firm up nicely, making it easier to slice when you’re ready to serve.
-
Serving: When it’s time to indulge, pull your cake from the freezer, lift it out of the pan using the plastic wrap, and slice it into squares.
-
Enjoy: Serve cold, and watch as your friends and family dive into this decadent treat!
Making an ice cream sandwich cake is not only simple but also an excellent way to spend time with friends and family in the kitchen. So, what are you waiting for? Grab your ingredients and start assembling this sweet delight! If you’re ready to explore more dessert ideas, check out this resource for creative inspiration. Your taste buds will thank you!
Variations on Ice Cream Sandwich Cake
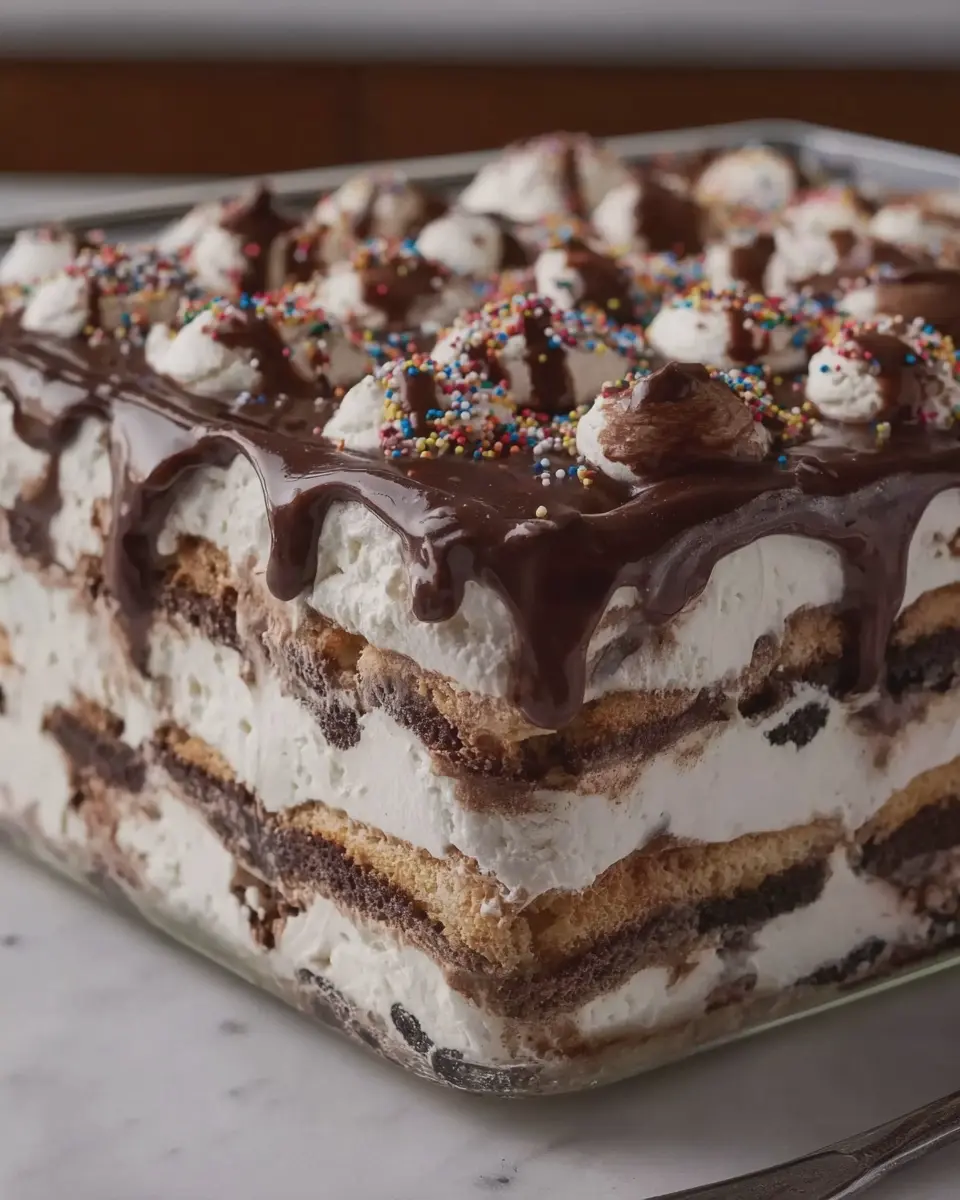
If you’re ready to take your ice cream sandwich cake to the next level, consider these delightful variations! Not only do they provide a fun twist, but they also cater to different taste buds.
Berry Blast Ice Cream Sandwich Cake
Imagine sinking your spoon into layers of creamy delight packed with vibrant berry flavors. This variation takes advantage of seasonal berries, offering a refreshing taste that’s perfect for summer gatherings.
-
Ingredients: Layer your ice cream sandwich cake with vanilla or berry-flavored ice cream, and fill it with fresh strawberries, blueberries, and raspberries. If you want an extra zing, drizzle a homemade berry coulis between layers.
-
Instructions:
- Start with a base of store-bought ice cream sandwiches.
- Add a layer of your chosen ice cream.
- Scatter a mix of berries and top with another layer of sandwiches.
- Finish with whipped cream and more berries on top. Chill before serving.
This mix of flavors not only looks stunning but also provides a refreshing burst of fruitiness.
Nutty Chocolate Ice Cream Sandwich Cake
For those who crave the rich, decadent notes of chocolate paired with a satisfying crunch, this variation is a match made in heaven.
-
Ingredients: Layer chocolate ice cream with crushed nuts like almonds or hazelnuts, and perhaps add a touch of toasted coconut for added texture.
-
Instructions:
- Use chocolate ice cream sandwiches for a double chocolate whammy.
- Between layers, sprinkle the nut mixture and a drizzle of chocolate syrup.
- Top it off with whipped cream and a final scattering of nuts for decoration.
This ice cream sandwich cake is truly indulgent and perfect for any celebration, or even as a guilty pleasure on a cozy evening with friends.
Feel inspired? For more dessert ideas, check out The Kitchn or Bon Appétit for scrumptious recipes.
Cooking Tips and Notes for Ice Cream Sandwich Cake
Creating a delicious ice cream sandwich cake can be surprisingly simple and fun! Here are some handy tips to elevate your dessert game:
Choose Your Ice Cream Wisely
- Flavor Matters: Pick ice cream that complements your sandwich flavors. Classics like vanilla or chocolate are always crowd-pleasers, but don’t shy away from unique options like mint chocolate chip or cookie dough.
- Softening Technique: Let your ice cream sit at room temperature for about 10-15 minutes before spreading. This makes it easier to work with and helps to avoid breaking the sandwiches.
Layering for Success
- Even Layers: Aim for even layers of both ice cream and sandwich cookies. This not only looks appealing but also ensures that each bite is perfectly balanced.
- Add Crunch: Consider adding sprinkles or crushed cookies between layers for an extra crunch. It’s a visual and textural boost that everyone will love.
Freezing and Serving Tips
- Chill to Perfection: Freeze your assembled cake for at least 4 hours or overnight for the best results. This allows all those flavors to meld beautifully.
- Slice with Ease: When it’s time to serve your ice cream sandwich cake, use a warm knife for clean slices—just run it under hot water for a few seconds!
By applying these tips, you’ll be well on your way to impressing friends and family alike. Remember, baking is all about having fun while creating something delicious! For more inspiration on desserts, check out resources from Food Network or Bon Appétit. Happy baking!
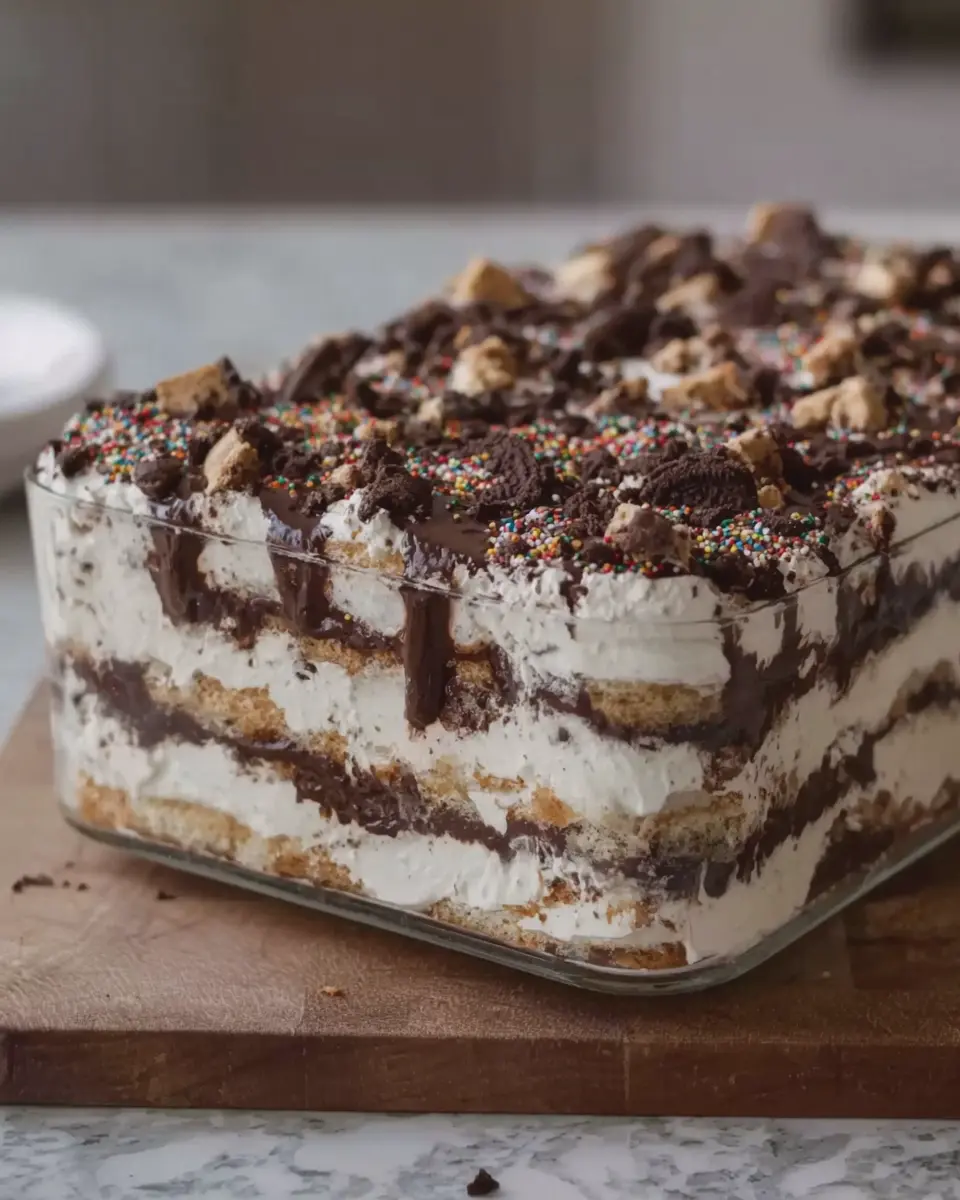
Serving Suggestions for Ice Cream Sandwich Cake
When it comes to enhancing your ice cream sandwich cake, creativity is your ally. Here are some delightful ways to serve this easy, crowd-pleasing dessert:
Add Toppings that Pop
Elevate your cake with a variety of toppings:
- Chocolate Sauce or Caramel: A drizzle of rich chocolate or gooey caramel can enhance the sweetness.
- Fresh Fruits: Consider strawberries, bananas, or even a handful of blueberries for a burst of color and flavor.
- Nuts: Chopped walnuts or pecans add a satisfying crunch and a bit of savory contrast.
Pair with a Drink
Complement your ice cream sandwich cake with some refreshing beverages:
- Iced Coffee: A chilled brew can balance the dessert’s sweetness without overpowering it.
- Sparkling Water: Flavored sparkling water cleanses the palate beautifully.
- Herbal Tea: A light peppermint or chamomile tea can provide a soothing after-dinner experience.
Creative Presentations
Serving your cake doesn’t have to be straightforward:
- Individual Portions: Cut them into smaller squares, and serve on colorful plates for a fun twist.
- Layered Desserts: Crumble pieces of the cake into dessert cups and layer with whipped cream and fruit for a whimsical parfait.
For a charming visual guide on dessert presentations, check out resources from culinary websites like Serious Eats or Food Network.
Enjoy the satisfaction of sharing this delicious creation with friends and family – your ice cream sandwich cake will be a hit!
Time Breakdown for Ice Cream Sandwich Cake
Preparation Time
Creating your delicious ice cream sandwich cake takes about 15 to 20 minutes. This window is when you’ll layer the ingredients, ensuring the cake is well-assembled. You’ll simply need to gather your ingredients, unbox your ice cream sandwiches, and layer them meticulously. Remember, this is where you can get creative!
Freezing Time
After assembling your cake, it’s crucial to let it sit in the freezer for about 4 to 6 hours. This chilling period allows the flavors to meld together and ensures that the cake firms up perfectly. If you can wait overnight, even better! It builds anticipation, doesn’t it?
Total Time
In total, you’re looking at around 4 to 6 hours and 20 minutes from start to dessert. This includes both the preparation and freezing times. While the waiting can feel hard, the fabulous taste of your ice cream sandwich cake will certainly make it worth the wait!
For more tips on layering and flavor mixing, check out experts like Bon Appétit and Serious Eats. Enjoy your creation!
Nutritional Facts for Ice Cream Sandwich Cake
When it comes to indulging in a delightful ice cream sandwich cake, understanding its nutritional content can help you savor every bite without the guilt. Here’s a quick breakdown:
Calories
A serving of ice cream sandwich cake typically ranges between 250 to 350 calories. It largely depends on the specific ingredients you choose, such as the type of ice cream and any additional toppings like nuts or sprinkles. Opting for lighter ice creams can help keep those numbers in check.
Sugars
On average, a slice contains about 20-30 grams of sugar. While sugar provides that satisfying sweetness, it’s wise to be mindful of your intake. For some tips on managing sugar in desserts, check out this informative guide.
Saturated Fat
The saturated fat level in ice cream sandwich cake can vary, typically around 7-10 grams per serving. The key is moderation—pairing your dessert with healthier meals throughout the day can help balance your overall fat intake. For detailed insights on dietary fats, refer to Harvard Health.
Incorporating these factors into your enjoyment of an ice cream sandwich cake can enhance your experience, making it delicious and satisfying. Now, who’s ready to whip up a delicious treat?
FAQs about Ice Cream Sandwich Cake
Creating an Ice Cream Sandwich Cake is a delightful experience, and you might have a few questions before diving in. Let’s tackle some common queries!
Can I make Ice Cream Sandwich Cake ahead of time?
Absolutely! One of the great things about an Ice Cream Sandwich Cake is its make-ahead convenience. You can assemble your cake a day or two in advance. Just wrap it tightly in plastic wrap or aluminum foil and keep it in the freezer. This way, it’s ready to serve whenever you have a gathering or a craving!
What are some alternative toppings I can use?
The best part about an Ice Cream Sandwich Cake is its versatility! Feel free to get creative with toppings. Here are some delicious ideas:
- Fresh Fruits: Berries, bananas, or sliced peaches can add a refreshing touch.
- Nuts: Chopped almonds or walnuts for a nice crunch.
- Chocolate Chips: Semi-sweet or dark chocolate chips can elevate the flavor.
- Caramel or Fudge Sauce: Drizzling either sauce will add a decadent taste.
You can customize these toppings based on your personal preferences or what you have on hand.
How long can I store Ice Cream Sandwich Cake in the freezer?
If stored properly, an Ice Cream Sandwich Cake can last in the freezer for about 1 to 2 weeks. However, for the best flavor and texture, try to enjoy it within the first week. Just remember to keep it well-wrapped to prevent freezer burn!
For more tips on freezing desserts, check out this resource from the USDA! With these FAQs in mind, you’re all set to whip up your delicious ice cream creation. Happy baking!
Conclusion on Ice Cream Sandwich Cake
To wrap up, the ice cream sandwich cake is truly a dessert that combines simplicity and delight. Perfect for gatherings or a quiet night in, it offers an easy way to impress your friends—without spending hours in the kitchen.
As you layer and decorate, feel free to get creative! Add toppings like crushed nuts or fresh fruit for that personal touch. And let’s be real: there’s something purely nostalgic about indulging in childhood treats in a more sophisticated way.
So why not give this recipe a try? It could become your new go-to dessert for any occasion! If you’re interested in more sweet creations, check out additional recipes on BBC Good Food.
PrintIce Cream Sandwich Cake: The Best Indulgent Treat for Summer
A deliciously indulgent ice cream sandwich cake perfect for summer.
- Prep Time: 15 minutes
- Total Time: 4 hours 15 minutes
- Yield: 12 servings 1x
- Category: Dessert
- Method: Frozen
- Cuisine: American
- Diet: Vegetarian
Ingredients
- 12 ice cream sandwiches
- 2 cups whipped cream
- 1 cup chocolate sauce
- 1 cup crushed cookies
- 1 cup chocolate chips
Instructions
- Layer half of the ice cream sandwiches on the bottom of a rectangular dish.
- Spread half of the whipped cream over the sandwiches.
- Drizzle with half of the chocolate sauce.
- Repeat the layers, finishing with whipped cream on top.
- Sprinkle with crushed cookies and chocolate chips.
- Freeze for at least 4 hours before serving.
Notes
- Let the cake sit at room temperature for a few minutes before cutting.
- Use any favorite toppings to customize your cake.
Nutrition
- Serving Size: 1 slice
- Calories: 300
- Sugar: 25g
- Sodium: 150mg
- Fat: 15g
- Saturated Fat: 8g
- Unsaturated Fat: 5g
- Trans Fat: 0g
- Carbohydrates: 40g
- Fiber: 1g
- Protein: 4g
- Cholesterol: 30mg
Keywords: Ice Cream Sandwich Cake, Summer Treat, Dessert