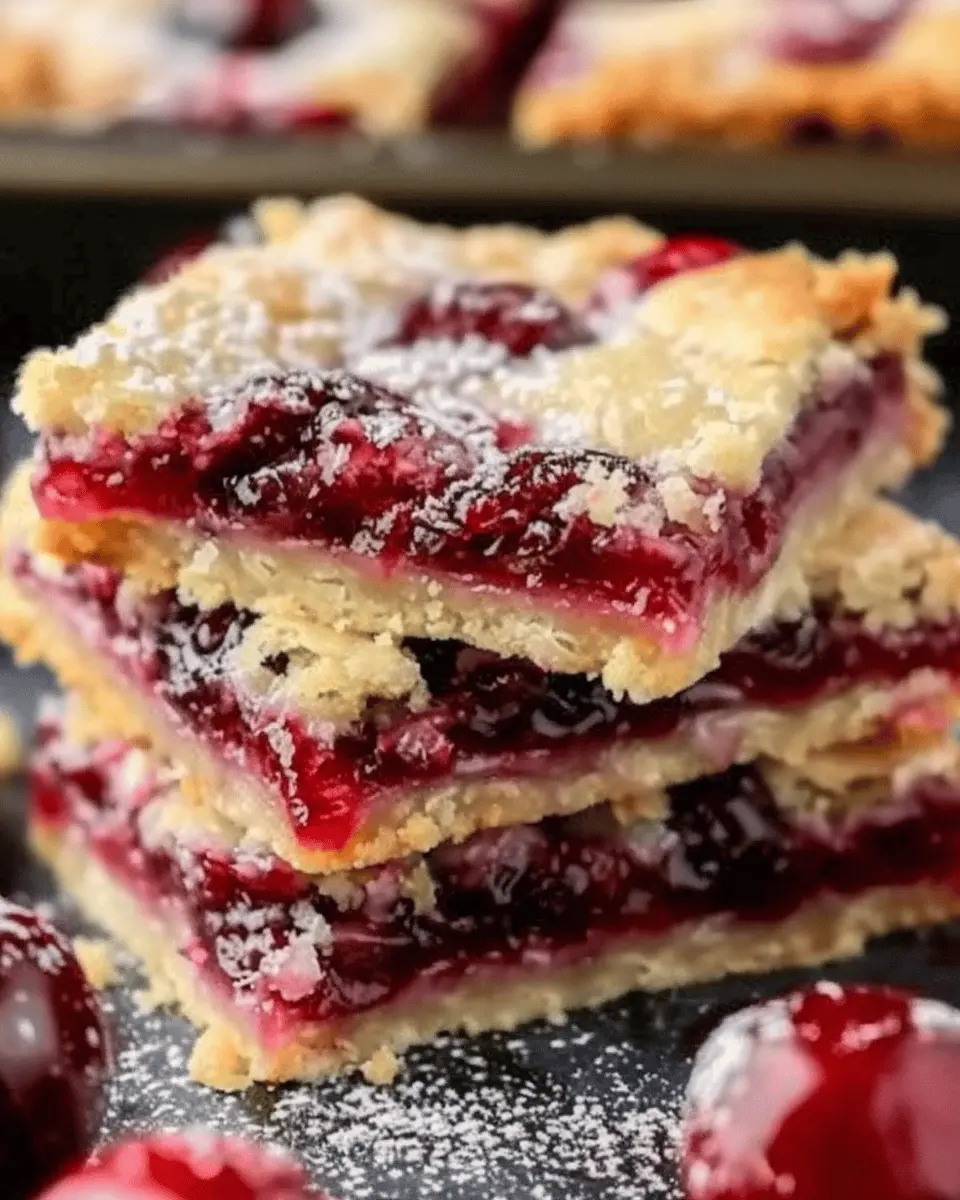
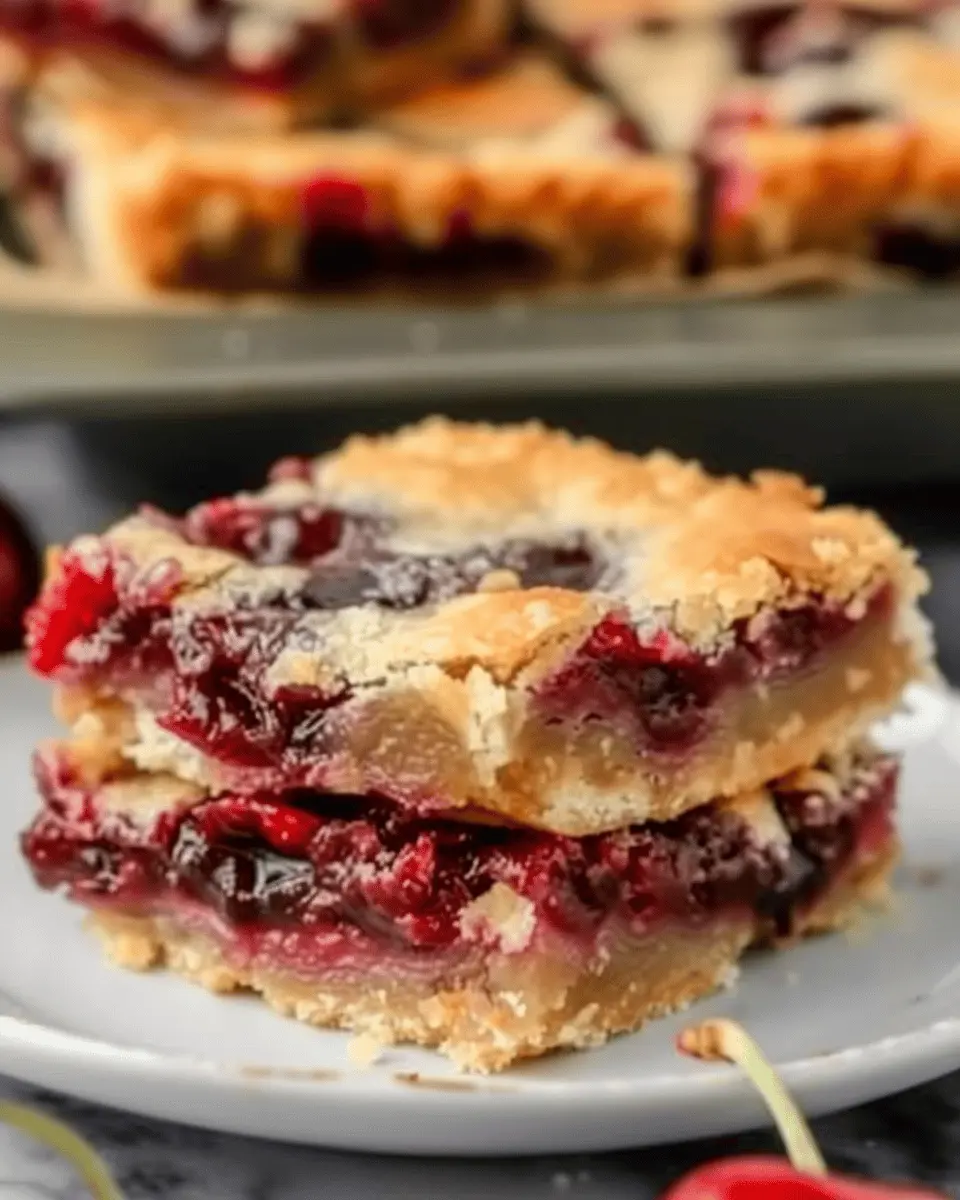
Easy Cherry Pie Bars: A Delightful Homemade Dessert
Why Cherry Pie Bars Are the Ultimate Treat for Busy Young Professionals
If you’re a young professional juggling work, social commitments, and the occasional Netflix binge, you might think that homemade desserts aren’t in your cards. However, easy cherry pie bars are here to change your mindset! These delightful bars are the perfect solution for anyone seeking a quick yet satisfying treat.
Imagine this: You just finished a long day at the office, and the last thing you want to do is whip up an elaborate dessert. That’s where these cherry pie bars become your best ally. They require minimal ingredients and demand little active time. With just a bit of prep, you can have a sweet indulgence ready for yourself or to impress friends at dinner parties.
Quick and Satisfying
What makes easy cherry pie bars a must-try? For starters, the prep and bake time is practically a breeze. Combine basic ingredients like flour, sugar, and butter with cherry pie filling, and voilà! An hour later, you have a delicious dessert that fills your kitchen with the comforting aroma of baking cherry goodness.
Versatility for Everyone
Whether you’re a cherry enthusiast or just someone who enjoys fresh flavors, these bars have something for everyone. Honestly, you can swap the cherry filling for whatever fruit you’re in the mood for—think blueberries or even a mix of fruits! It’s an exciting outlet to express your culinary creativity without excessive effort.
Perfect for Meal Prep
What’s even better? Easy cherry pie bars store well in airtight containers. Make a batch on Sunday and enjoy them throughout the week. Their portability makes them a great snack for busy days—grab a bar as you head out the door to work, or pack one for an afternoon pick-me-up.
Check out health-conscious alternatives and tips for making these bars even more nutritious. The National Institutes of Health provides valuable insights into incorporating fruits into your diet, and cherry pie bars are a delicious way to do just that!
In summary, if you’re looking for a delightful dessert that takes less than an hour to make and offers endless variations, treat yourself to easy cherry pie bars. They not only satisfy your sweet cravings but also fit seamlessly into the busy lifestyle you lead. Happy baking!

Ingredients for Easy Cherry Pie Bars
Creating your own easy cherry pie bars at home is not only rewarding but quite delightful—especially when you see how simple the ingredients are! Let’s dive into what you’ll need to whip up this sweet treat.
Key ingredients for the perfect cherry pie bars
To make these bars truly scrumptious, here are the essential components:
- Fresh or frozen cherries: Choose ripe cherries for the best flavor. Frozen is a great option if cherries aren’t in season.
- Granulated sugar: This sweetens the cherry filling and can also enhance the crust.
- All-purpose flour: The base for both the crust and crumb topping.
- Unsalted butter: Adds richness to the crust; make sure it’s softened.
- Baking powder: Helps the crust rise for a light texture.
- Salt: A pinch enhances all the flavors!
If you want to level up your easy cherry pie bars, consider some optional ingredients for added flair.
Optional ingredients for added flair
Want to make your bars even more exciting? Try these additions:
- Almond extract: Just a splash adds a delightful twist to the filling.
- Cinnamon or nutmeg: A hint of spice can make your bars feel extra cozy.
- Oatmeal: Incorporate into the topping for a bit of crunch.
Experimenting with these options allows you to customize your dessert. For more ideas on pie variations, check out Food Network.
By using these ingredients, your cherry pie bars are sure to turn out delicious, making them a crowd-pleaser at any gathering!
Step-by-Step Preparation for Easy Cherry Pie Bars
Creating easy cherry pie bars is a satisfying culinary adventure that yields a delightful treat! Follow these simple steps to whip up a batch that will impress your friends and family. Let’s dive into the delicious process.
Gather Your Ingredients
First things first—having all your ingredients ready will make your baking experience seamless and enjoyable. Here’s what you need:
-
For the crust and topping:
-
1 cup unsalted butter, softened
-
1 cup granulated sugar
-
2 large eggs
-
1 teaspoon vanilla extract
-
1 teaspoon almond extract (you’ll love this touch!)
-
2 cups all-purpose flour
-
1 teaspoon baking powder
-
A pinch of salt
-
For the cherry filling:
-
2 cups of pitted cherries (fresh or frozen)
-
3/4 cup granulated sugar
-
1 tablespoon cornstarch
-
1 tablespoon lemon juice
Gathering these ingredients in one place not only makes the cooking process easier but also helps you to set the mood for a fun baking session!
Preheat Your Oven
While you’re busy organizing your space, it’s a good idea to preheat your oven to 350°F (175°C). Preheating allows your easy cherry pie bars to bake evenly, giving you that perfect golden-brown finish. Who wants undercooked dessert?
Cream the Butter and Sugar Together
In a large mixing bowl, combine the softened butter and granulated sugar. Using a hand mixer or a stand mixer, cream them together until it’s a light, fluffy mixture. This step is crucial—good aeration leads to a lighter texture in your bars. Did you know that creaming the butter first releases its natural flavors, enhancing your baked goods?
Incorporate Eggs and Extracts
Next, add in the eggs one at a time, mixing well after each addition. Don’t forget the vanilla and almond extracts! These ingredients provide that warming, aromatic profile that says “home-baked goodness” with every bite. The almond extract, in particular, can elevate the flavor profile dramatically.
Combine the Dry Ingredients
In a separate bowl, whisk together the flour, baking powder, and salt. Slowly incorporate the dry mixture into the wet mixture, blending just until combined. It’s important not to overmix—this can lead to tough bars. You’re looking for a soft, doughy consistency.
Press the Dough into Your Baking Pan
Line a 9×13 inch baking pan with parchment paper for easy removal. Take two-thirds of your dough and press it firmly into the bottom of the pan to form a crust. It should cover the bottom evenly, ensuring a sturdy base for those delicious cherries to rest on.
Spread the Cherry Filling Evenly
Now, the fun part—make the cherry filling! If using fresh cherries, pit and slice them. For frozen, just let them thaw. In a separate bowl, combine cherries, sugar, cornstarch, and lemon juice. Evenly spread this filling over the dough in your pan. The vibrant color of the cherries will make your bar look absolutely tempting!
Dollop the Remaining Dough on Top
With the remaining one-third of the dough, create small dollops or crumbles on top of the cherry filling. This little layer will add texture and a little sweetness.
Bake and Cool
Pop your baking pan in the preheated oven and bake for about 30-35 minutes or until the bars are golden brown. Once done, take them out and allow them to cool in the pan on a wire rack. Patience is key here; letting them cool completely will make cutting easier.
Drizzle the Glaze Over the Bars
Optional but highly recommended: whisk together powdered sugar and a bit of milk to create a simple glaze. Drizzle this over chilled bars for an irresistible, sweet finish. Your easy cherry pie bars are now ready to impress!
Baking shouldn’t feel overwhelming. With these steps, you can create a delicious dessert that’s sure to be a hit. Get ready for compliments and happy taste buds! For more delightful desserts and baking tips, check out resources like King Arthur Baking and Food Network. Happy baking!

Variations on Easy Cherry Pie Bars
Cherry pie bars are great as they are, but have you ever opened your mind to the exciting variations you can try? Let’s dive into some delightful options that will take your easy cherry pie bars to the next level!
Cherry-Almond Pie Bars for a Nutty Twist
If you love a bit of crunch in your desserts, consider adding almond extract to your cherry filling. Just substitute a teaspoon of vanilla extract with almond extract. Additional sliced almonds sprinkled on top before baking adds both flavor and texture. This variation not only enhances the taste but also gives your bars a gorgeous presentation. Plus, the combination of cherries and almonds creates a flavor profile that feels extra special—perfect for impressing guests!
Gluten-Free Options for Cherry Pie Bars
Many people are embracing gluten-free living, and luckily, your easy cherry pie bars can easily be adapted. Swap regular flour with a high-quality gluten-free flour blend—make sure it includes a binding agent like xanthan gum for the right texture. Take a look at resources like King Arthur Baking for tips on gluten-free baking. With a few adjustments, you can enjoy these bars without sacrificing taste!
Seasonal Variations with Different Fruits
Why limit yourself to cherries? Experiment with seasonal fruits like blueberries, peaches, or even apples! Each fruit brings its own sweetness and tartness, allowing for endless combinations. For a fresh twist, try mixing cherries with raspberries for a vibrant filling. Think of the opportunities to match your bars with seasonal gatherings, creating unique flavors that resonate with the time of year.
With these variations, your easy cherry pie bars can become a fantastic canvas for culinary creativity! Which twist will you try first?
Cooking Tips and Notes for Easy Cherry Pie Bars
Storage tips for optimal freshness
To keep your easy cherry pie bars fresh, store them in an airtight container at room temperature for up to three days. If you want to enjoy them later, they freeze beautifully! Just wrap individual pieces in plastic wrap and place them in a freezer-safe bag. They’ll last for about three months—perfect for a quick treat or unexpected guests. When you’re ready to enjoy, let them thaw in the fridge overnight to maintain their texture.
Baking troubleshooting for perfect bars
Achieving perfect easy cherry pie bars can sometimes be a challenge. Here are some common issues and solutions to ensure you get it right every time:
- Soggy crust: Make sure to pre-bake the crust for about 10 minutes. This helps it firm up before adding the filling.
- Filling is too runny: Use cornstarch to thicken your cherry filling. Typically, 1-2 tablespoons is all you need.
- Uneven baking: Rotate your pan halfway through to ensure even cooking.
For more detailed baking tips, consider visiting resources like King Arthur Baking Company or Serious Eats. Happy baking!
Serving Suggestions for Easy Cherry Pie Bars
Pairing with Ice Cream for a Delectable Dessert
What’s better than a delicious slice of easy cherry pie bars? Try topping them with a generous scoop of your favorite vanilla or chocolate ice cream! The creamy texture of the ice cream beautifully contrasts with the tartness of the cherries, creating a truly indulgent dessert experience. For an extra touch, drizzle some warm chocolate or caramel sauce on top. The combination is simply irresistible and perfect for entertaining guests or satisfying your own sweet tooth.
Creative Presentation Ideas for Gatherings
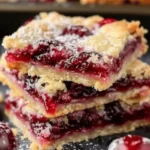
When hosting a gathering, presentation is crucial. Serve your easy cherry pie bars on a rustic wooden platter or a vibrant cake stand to catch everyone’s eye. For added flair, dust the bars with powdered sugar and garnish with fresh mint leaves. You can even cut them into fun shapes using cookie cutters for a playful twist. Not only will your guests be impressed, but they’ll also appreciate the thought that went into a delightful presentation! For more inspiration, check out these creative dessert ideas that can elevate your dessert game.
Embrace your creativity and enjoy!
Time Breakdown for Easy Cherry Pie Bars
Preparation Time
Getting started on your easy cherry pie bars takes about 15-20 minutes. This includes gathering your ingredients, prepping the crust, and mixing the cherry filling. Make sure you have everything ready before diving in—that way, you can make the process smoother and more enjoyable!
Baking Time
Once you have your bars assembled, these tasty treats need just 30-35 minutes in the oven. You’ll want that golden brown crust to let you know they’re ready to be taken out. The sweet aroma of cherry will definitely make the wait worthwhile!
Cooling and Serving Time
After baking, it’s crucial to let your easy cherry pie bars cool for about 10-15 minutes. This gives them time to set up properly, making them easier to slice. Serve warm or at room temperature, and maybe pair with a scoop of vanilla ice cream for that perfect touch. If you’re interested in more cherry dessert ideas, check out resources like The Cherry Marketing Institute for inspiration!
Nutritional Facts for Easy Cherry Pie Bars
Calories per serving
When indulging in these easy cherry pie bars, you’ll find that each serving contains approximately 190 calories. This makes them a delightful yet manageable treat for your dessert cravings, fitting well into a balanced lifestyle.
Key nutritional values
These scrumptious bars not only satisfy your sweet tooth but also offer some essential nutrients:
- Total Fat: 7g
- Saturated Fat: 3g
- Carbohydrates: 29g
- Fiber: 1g
- Sugar: 15g
- Protein: 2g
The cherry filling packs antioxidants, while the oat crust provides a nurturing dose of whole grains. Don’t forget to explore alternatives like whole wheat flour or nutritional yeast for a healthier twist. For a deeper understanding of the health benefits of cherries, you can check out resources like the Cherry Marketing Institute. By incorporating these easy cherry pie bars into your routine, you can enjoy a balance of flavor and nutrition—perfect for that mid-afternoon pick-me-up!
FAQs about Easy Cherry Pie Bars
Can I use fresh cherries instead of pie filling?
Absolutely! Using fresh cherries in your easy cherry pie bars can elevate the flavor and texture. Just make sure to pit and halve them before mixing with sugar. You might want to add a little cornstarch to help thicken the filling. This can make a big difference, especially as fresh cherries can release more juice compared to canned pie filling. Check out this guide for tips on making fresh cherry pie filling!
How can I make these bars healthier?
There are several simple tweaks you can make to your easy cherry pie bars to give them a healthier twist:
- Swap Sugar: Use a natural sweetener like honey or maple syrup.
- Choose Whole Grains: Substitute regular flour with whole wheat flour for added fiber.
- Add Nuts or Oats: Incorporating chopped nuts or oatmeal into the crust adds texture and a nutritional boost.
You’ll find that these changes can help you enjoy your dessert guilt-free!
What’s the best way to store cherry pie bars?
To keep your easy cherry pie bars fresh, store them in an airtight container at room temperature for up to three days. If you want to make them last longer, you can refrigerate them for about a week. For maximum longevity, consider freezing them! Just wrap each bar in plastic wrap and place them in a freezer-safe bag. When you’re ready to enjoy, simply thaw them at room temperature.
These tips can help you savor your delicious cherry bars longer!
Conclusion on Easy Cherry Pie Bars
Making easy cherry pie bars at home is not just a cooking adventure; it’s a delightful experience that fills your kitchen with warmth and tempting aromas. Whether you’re whipping these up for a picnic or as a simple dessert to savor after dinner, they’re sure to impress friends and family alike.
Remember the joy of mixing the sweet and tangy cherry filling with that buttery crust? It’s a nostalgic treat that brings back cherished memories. Plus, the best part is that you can customize them with your favorite fruits! So, gather your ingredients and dive into this baking journey—it’s an experience worth sharing and a delicious story to tell around the table.
For more cherry-inspired tips, check out this resource on cherry varieties, which can help you select the best cherries for your baking!
PrintEasy Cherry Pie Bars: The Perfect Dessert for Family Gatherings
Easy Cherry Pie Bars are a delicious and simple dessert perfect for family gatherings. These bars are filled with sweet cherry filling and a buttery crust, making them a hit with both kids and adults.
- Prep Time: 15 minutes
- Cook Time: 35 minutes
- Total Time: 50 minutes
- Yield: 12 bars 1x
- Category: Dessert
- Method: Baking
- Cuisine: American
- Diet: Vegetarian
Ingredients
- 1 cup all-purpose flour
- 1/2 cup unsalted butter
- 1/2 cup sugar
- 1/4 teaspoon salt
- 1/2 teaspoon baking powder
- 1 can (21 ounces) cherry pie filling
- 1 teaspoon vanilla extract
- 1 tablespoon lemon juice
Instructions
- Preheat the oven to 350°F (175°C).
- In a mixing bowl, combine flour, butter, sugar, salt, and baking powder until crumbly.
- Press half of the mixture into the bottom of a greased baking pan.
- Spread the cherry pie filling over the crust.
- In a separate bowl, mix the remaining crumb mixture with vanilla and lemon juice, then sprinkle it over the cherries.
- Bake for 30-35 minutes or until golden brown.
- Let it cool before cutting into bars and serving.
Notes
- For a stronger cherry flavor, consider adding some almond extract.
- These bars can be served warm or cold.
Nutrition
- Serving Size: 1 bar
- Calories: 200
- Sugar: 15g
- Sodium: 30mg
- Fat: 10g
- Saturated Fat: 6g
- Unsaturated Fat: 3g
- Trans Fat: 0g
- Carbohydrates: 25g
- Fiber: 1g
- Protein: 2g
- Cholesterol: 25mg
Keywords: Easy Cherry Pie Bars, dessert, family gatherings, cherry dessert