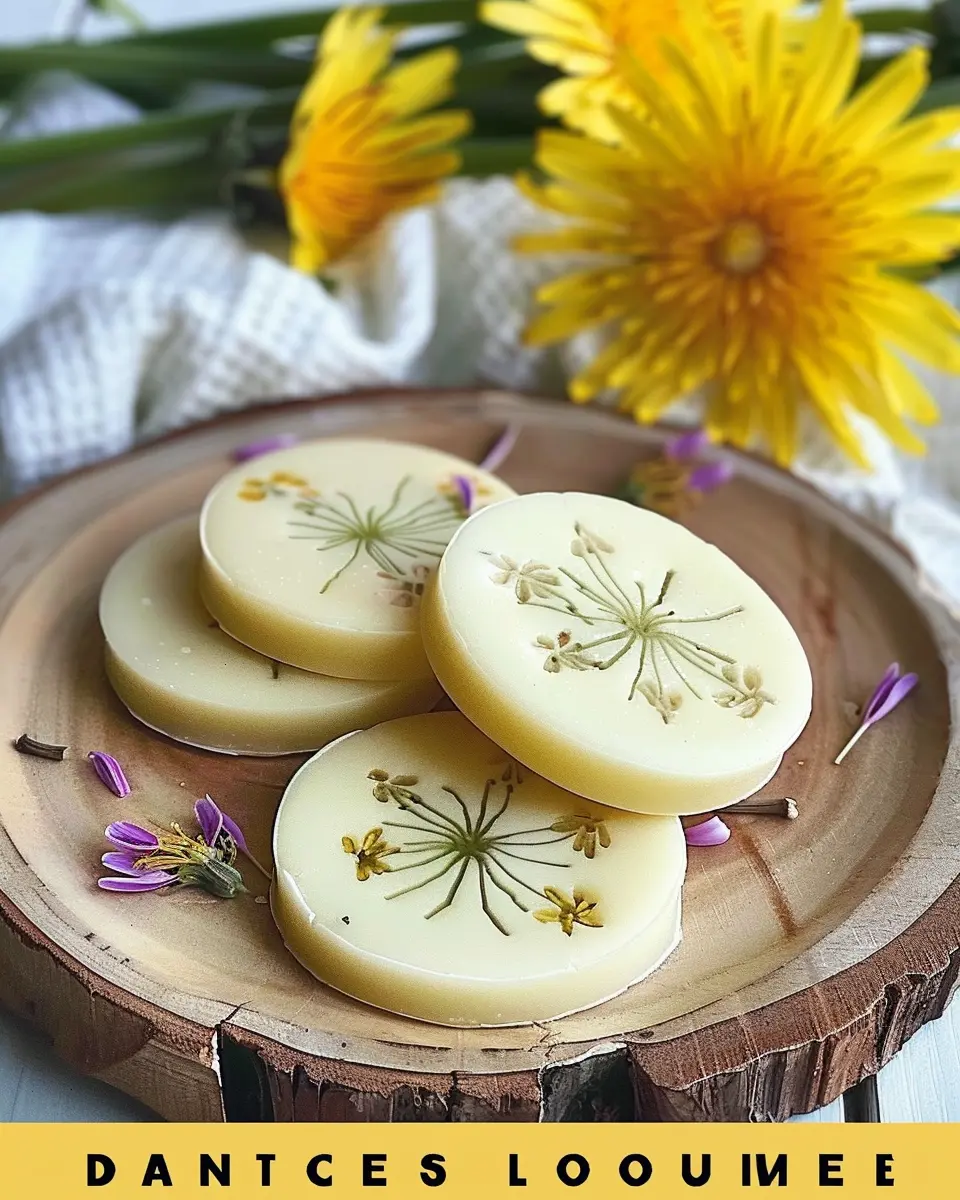
Introduction to Dandelion Lotion Bars
Have you ever thought about transforming those cheerful yellow dandelions dotting your yard into soothing skincare products? Believe it or not, dandelion lotion bars are trending in the DIY community for their nourishing properties and delightful simplicity. These charming little bars not only pamper your skin but also offer a chance to connect with nature while creating something beautiful.
Why Choose Homemade Lotion Bars?
When it comes to skincare, we often grapple with the daunting ingredient lists found on commercial products. That’s where homemade lotion bars shine! Making your own gives you complete control over what goes onto your skin. By using natural ingredients, you can avoid harmful chemicals and embrace a more eco-friendly, customizable option.
Here are a few compelling reasons to try crafting your own lotion bars:
- Natural Ingredients: You can choose organic beeswax, shea butter, coconut oil, and, of course, dandelions. This way, you know exactly what’s being absorbed by your skin.
- Customization: Love a particular scent? Feel free to add essential oils or tweak the recipe to focus on your skin’s specific needs, whether that’s extra hydration or soothing properties.
- Cost-Effective: Once you gather the basic ingredients, creating batches of lotion bars can save you money over time compared to buying high-end lotions that may only come in little containers.
Should you be curious about the benefits of dandelions, resources like the National Center for Biotechnology Information provide great insights into their medicinal properties. You’ll discover that dandelions are rich in vitamins A, C, and K, along with antioxidants that can help nourish your skin.
Furthermore, consider that there’s immense satisfaction and pride in making something for yourself. Plus, these dandelion lotion bars make fantastic gifts! Picture this: wrapping them up in eco-friendly paper and gifting them to friends who appreciate homemade beauty solutions.
As we dive deeper into the steps to create your very own dandelion lotion bars, you’ll see just how rewarding this process can be. Trust me, once you try it, you might just ditch the store-bought products for good!
Ingredients for Dandelion Lotion Bars
Creating your own dandelion lotion bars is a wonderful way to harness the soothing properties of dandelions while enjoying the process of making your own skincare. Let’s dive into the essential ingredients you’ll need!
Essential ingredients for the infusion
To kickstart your journey, you’ll need to create an infused oil. The ingredients for this infusion are:
- Dandelion flowers: Fresh or dried, these little blossoms are packed with antioxidants and have anti-inflammatory properties, making them perfect for soothing your skin.
- Carrier oil: Choose a nurturing oil like olive oil or grapeseed oil. These oils will help extract the benefits from the dandelions and serve as the base for your lotion bars.
If you’re curious about the benefits of dandelion for skin health, check out this informative article on Healthline.
Additional ingredients for the lotion bars
Once your infusion is ready, gather the following to finish off your dandelion lotion bars:
- Beeswax: This natural wax helps to solidify the lotion bars and creates a protective barrier on the skin.
- Shea butter and cocoa butter: Both provide deep hydration and nourishment.
- Essential oils: For a pleasant scent and added skin benefits, consider lavender or chamomile.
With these ingredients in hand, you’ll be well on your way to crafting your very own dandelion lotion bars that can help soothe and protect your skin. Who doesn’t love a little pampering?
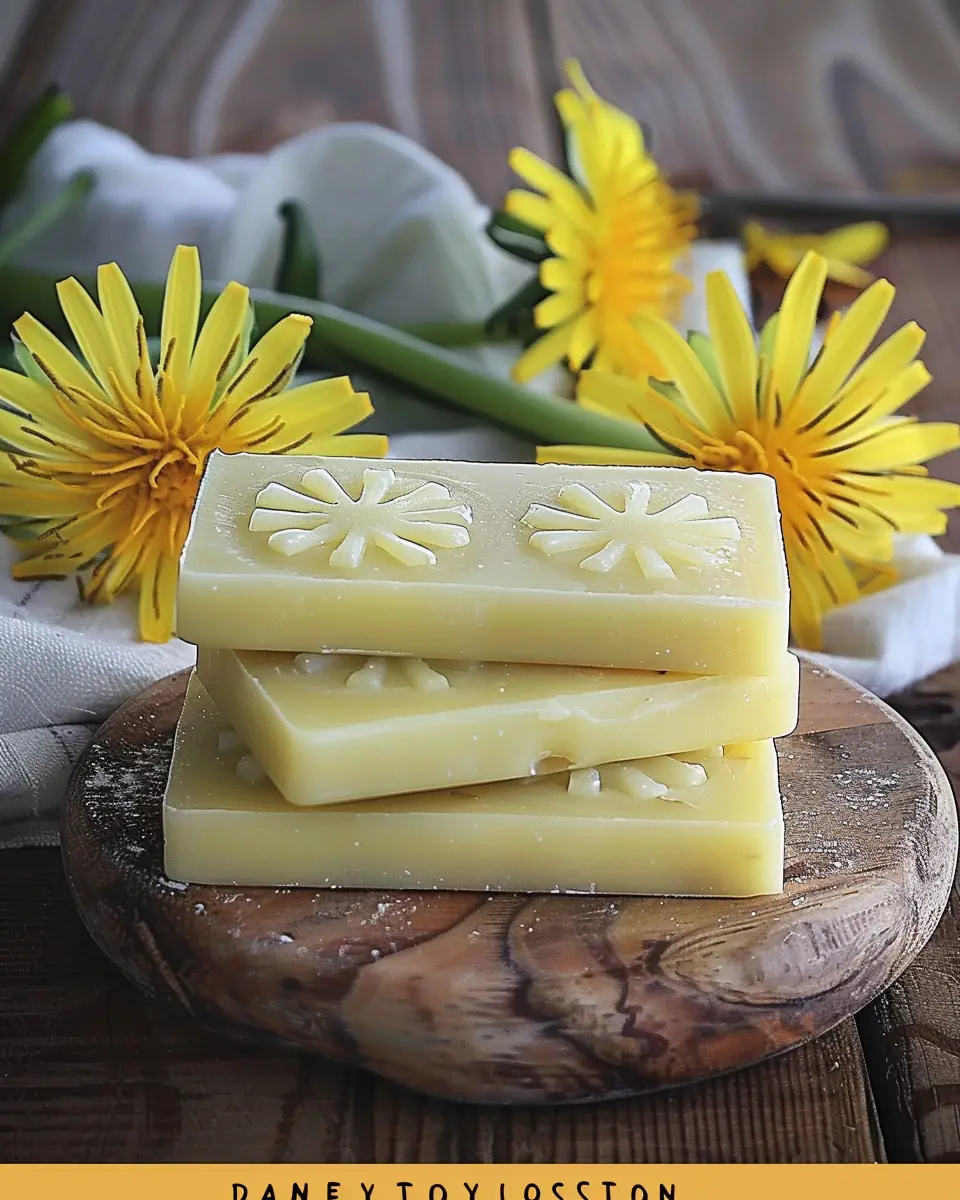
Preparing Dandelion Lotion Bars
Creating your own dandelion lotion bars is like capturing the essence of spring in a tin. Not only are these lotion bars a delightful way to harness the benefits of dandelions, but you also get to enjoy the satisfaction of making something beautiful and beneficial from scratch. Let’s dive into the steps to prepare these lovely skin-soothing gems.
Gather and Wilt the Dandelions
The first step in making your dandelion lotion bars is, surprisingly, to gather your dandelions! Don’t worry if you’re not a foraging expert—these cheerful yellow flowers are often considered a weed, making them quite easy to find. Choose a sunny day to pick a handful of fresh dandelion flowers, making sure to source them from areas free of pesticides or chemicals.
Once you’ve gathered your dandelions, lay them out in a single layer on a clean cloth or paper towel for about 24 hours. This wilting process reduces moisture content, which is especially beneficial when infusing the flowers into oils, as excess moisture can lead to spoilage.
Infuse the Oils
For the infusion, you’ll need your wilting dandelions and a carrier oil of your choice—sweet almond oil or olive oil works beautifully. Pour your desired amount of oil into a double boiler, ensuring it’s gently heated. Add the wilted dandelions once the oil is warm.
Here’s a helpful tip: If you want to speed up the infusion process, you can let the mixture sit in a warm (not hot!) spot for 48 hours. Otherwise, you can cook it gently for 2 to 3 hours, stirring occasionally. This process extracts the nutrients and properties of the dandelions and makes your lotion bars aromatic and effective. For more detailed information on oil infusions, you can explore resources like Mountain Rose Herbs.
Strain the Infusion
After the infusion period, it’s time to strain the oil mixture. Use a fine mesh strainer or cheesecloth to remove the dandelion flowers, leaving you with a beautifully infused oil. Make sure to squeeze out as much oil as possible from the plant material—this is the liquid gold that will nourish your skin.
At this stage, you can also note how the vibrant color of your infused oil has changed, reflecting the goodness of the dandelions. It’s truly a rewarding sight.
Create the Lotion Bar Mixture
Now for the fun part—creating the actual dandelion lotion bars. In a clean double boiler, combine your infused oil with solidifying agents like beeswax and shea butter. The typical ratio is about 1 part beeswax to 2 parts oil and 1 part shea butter. Stir until everything is melted and combined.
Feel free to customize your lotion bars with a few drops of essential oils—lavender or chamomile blends well with the earthy scent of dandelion. This personalized touch not only enhances the fragrance but also adds skin benefits.
Pour into Molds and Let Set
Once your mixture is fully combined, remove it from heat and carefully pour it into molds. Silicone molds work best because they allow for easy removal. Let them set at room temperature for a few hours until fully hardened. If you’re in a hurry, placing them in the fridge can help quicken the process.
Once set, pop out your dandelion lotion bars and store them in a cool, dry place. They make lovely gifts or are perfect for your own skincare routine. Plus, every time you use one, you’re reminded of the joy of crafting something natural with your own two hands.
And there you have it—a simple and rewarding way to make your own dandelion lotion bars! You’ll not only enjoy a handy product but also the pride that comes with creating something beautiful and practical. Happy crafting!
Variations on Dandelion Lotion Bars
When it comes to making dandelion lotion bars, the fun really begins with customization! You have the power to create a unique product that suits your style and skin needs. Here are a couple of great ways to add a personal touch to your homemade lotion bars.
Adding Essential Oils for Fragrance
One of my favorite enhancements is integrating essential oils into the mix. Not only do they impart an inviting aroma, but they also offer various skin benefits. Here are some excellent options:
- Lavender: Known for its calming properties, lavender can help soothe both your skin and your mind.
- Tea Tree: With its antiseptic qualities, tea tree oil is fantastic for blemish-prone skin.
- Sweet Orange: This bright, uplifting scent can elevate your mood while providing a refreshing scent.
When adding essential oils, aim for about 15-20 drops per batch for a well-balanced fragrance. Always check for skin sensitivities before diving in!
Customizing with Other Botanicals
If you’re feeling adventurous, why not add other botanicals to your dandelion lotion bars? Think about incorporating dried flowers such as chamomile or calendula, which can provide additional soothing properties.
- Herbs: A pinch of finely crushed mint or rosemary can add not just a lovely scent but also invigorate your skin.
- Honey: Adding a small amount of honey can enhance moisture retention, making your bars effectively hydrating.
Experimentation is key, so don’t hesitate to mix and match until you find your perfect blend. This is not just about skincare; it’s about crafting a product that reflects you!
By making these simple tweaks, you can create truly unique dandelion lotion bars that are not only effective but also a pleasure to use. Check out resources like the National Center for Complementary and Integrative Health for more insights into the benefits of essential oils and botanicals!
Tips for Making Your Dandelion Lotion Bars
Troubleshooting Infusion Issues
Infusing dandelions can be a delightful yet tricky process. If your infusion isn’t vibrant or fragrant, you may not have used enough flower heads, or perhaps the oil was heated too quickly. For better results, try using dried dandelions, which can concentrate their properties, and steep them for at least 2-4 weeks in a cool, dark place. If time is an issue, a gentle heat infusion using a double boiler can also work wonders. There’s nothing more rewarding than getting it right and enjoying your homemade dandelion lotion bars, don’t you think?
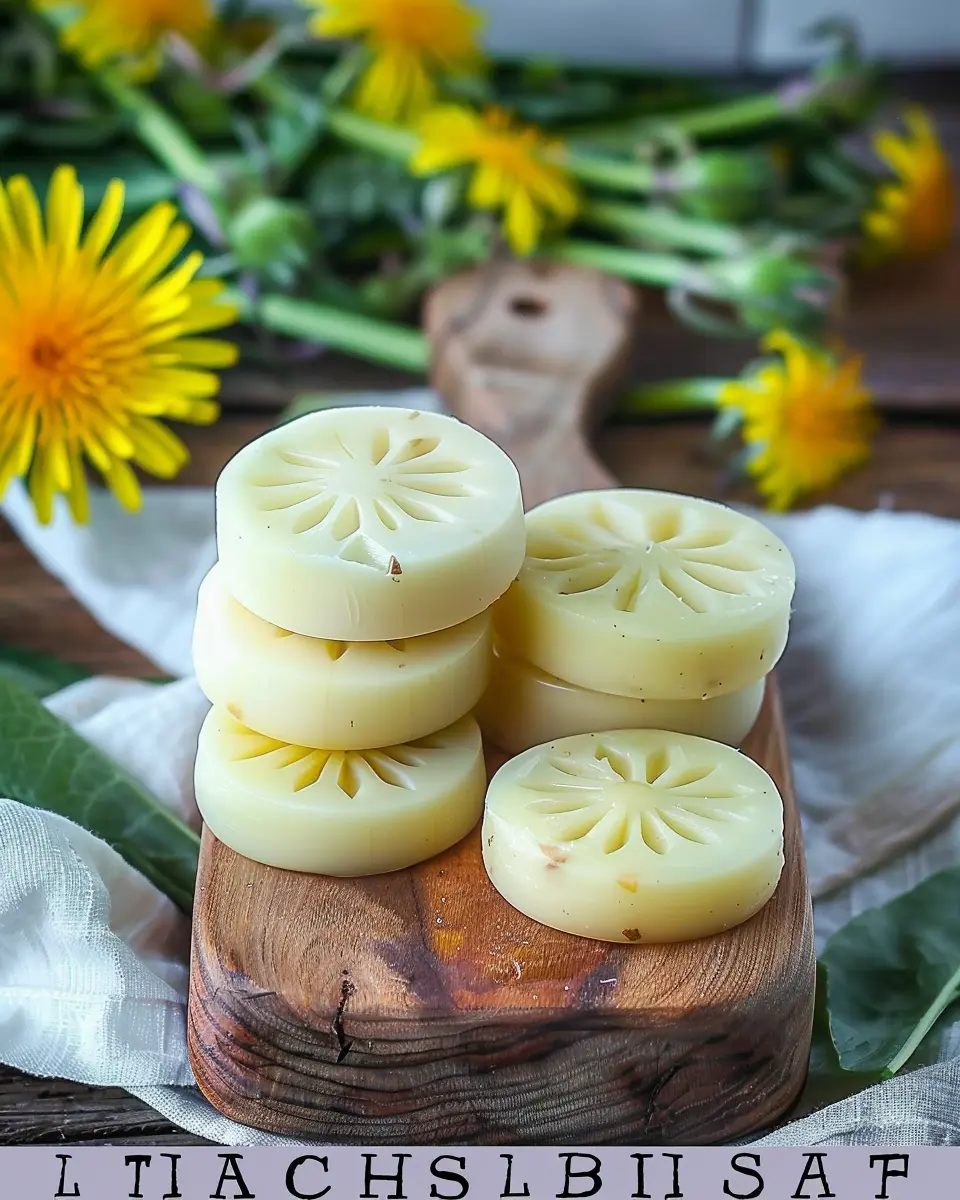
Choosing the Right Molds
When it comes to making dandelion lotion bars, the mold you choose can make a significant difference. Silicone molds are often preferred for their flexibility, which makes it easy to pop out your lotion bars once they’ve cooled and solidified. Think about the shape, too—fun shapes can add a personal touch, but keep in mind that simpler designs might be easier for first-time makers.
For more tips on mold selection, check out this insightful resource, which offers additional advice on various mold materials. Happy crafting!
Serving Suggestions for Dandelion Lotion Bars
Packaging as Gifts
Dandelion lotion bars make delightful handmade gifts, perfect for friends and family who appreciate natural skincare. Try wrapping them in eco-friendly paper or placing them in reusable tins. You could even personalize the packaging with a handwritten note about the benefits of dandelion, like its skin-soothing properties. This thoughtful touch will be sure to impress! If you’re looking for some packaging inspiration, check out resources like Etsy for creative DIY gift ideas.
Using as a Travel Moisturizer
Traveling can often leave your skin feeling dry and parched. That’s where your dandelion lotion bars come in! Their compact size makes them easy to pack in your carry-on or even your purse. Apply it after a long flight or a day spent outdoors to nourish your skin. Plus, the solid form means there’s no risk of spills—always a bonus when you’re on the go! And if you want to learn more about travel-friendly skincare, you might find this article from Healthline quite useful.
Incorporating dandelion lotion bars into your lifestyle not only enriches your skincare routine but also spreads joy to those around you.
Time Breakdown for Dandelion Lotion Bars
Preparation Time
Creating your dandelion lotion bars starts with about 15 minutes of preparation. This includes gathering your ingredients, measuring them out, and preparing the workspace. Don’t worry if you’ve never made lotion bars before; it’s pretty straightforward and fun!
Infusion Time
The real magic happens during the infusion phase, where you’ll need 24 hours. This step allows the dandelion petals to release their natural properties into your oil. It may feel lengthy, but patience here pays off with an effective, soothing bar.
Total Time
In total, you’re looking at roughly 24 hours and 15 minutes from start to finish. Most of this time is passive, so you can carry on with your day while your dandelion lotion bars are infusing. The wait is worth it for a product that care for your skin naturally and effectively, making your DIY approach truly rewarding!
If you want to dive deeper into the benefits of dandelion, check out more about its healing properties on Healthline or WebMD.
Nutritional Information for Dandelion Lotion Bars
Key Ingredients and Their Benefits
Dandelion lotion bars are not just soothing; they’re also packed with nourishing ingredients. The key components often include organic beeswax, coconut oil, and dandelion-infused oil.
- Beeswax: Helps form a protective barrier on the skin, locking in moisture.
- Coconut Oil: Known for its moisturizing properties, it hydrates and soothes dry skin.
- Dandelion Oil: Rich in antioxidants, it promotes skin rejuvenation.
Each of these ingredients plays a crucial role in making dandelion lotion bars effective in skin care.
Skin-Friendly Properties of Dandelion
Dandelion isn’t just a pesky weed; it boasts remarkable skin-friendly properties. Traditionally used in herbal medicine, studies have shown that dandelion extracts improve skin elasticity and reduce inflammation. The incredible phytochemicals in dandelions help in combating free radical damage—perfect for maintaining youthful skin.
For more insights, you can check out resources like Healthline which dives deeper into dandelion’s nutritional benefits.
Incorporating dandelion lotion bars into your skincare routine not only enhances your skin’s health but also provides a relaxing, luxurious experience. They’re a perfect way to treat yourself while harnessing nature’s best remedies.
FAQs about Dandelion Lotion Bars
How long do the lotion bars last?
One of the great things about dandelion lotion bars is their impressive shelf life! When stored in a cool, dry place away from direct sunlight, these bars can last up to a year. However, if you notice changes in color, texture, or smell, it’s best to toss them out and whip up a fresh batch. Regularly checking your homemade products is a good habit that ensures you’re using the best for your skin.
Can I use different oils?
Absolutely! While the traditional recipe for dandelion lotion bars typically calls for oils like coconut or sweet almond oil, you can definitely swap them out based on your preferences or what you have on hand. Some fantastic alternatives include jojoba oil for its skin-locking benefits or olive oil for its rich, nourishing properties. Just remember that different oils may have varying effects on the texture and absorption of your lotion bars, so feel free to experiment!
Are dandelion lotion bars suitable for sensitive skin?
Yes, dandelion lotion bars can be quite gentle and beneficial for sensitive skin. The dandelion extract is known for its soothing properties, making it a favorite among those with skin sensitivities. However, it’s always wise to do a patch test before fully applying any new product, especially if you have known allergies or sensitivities. Consult with a dermatologist if you’re unsure—after all, your skin’s health is the top priority!
Want to dive deeper into the benefits of dandelions? Check out this guide on herbal remedies for more insights!
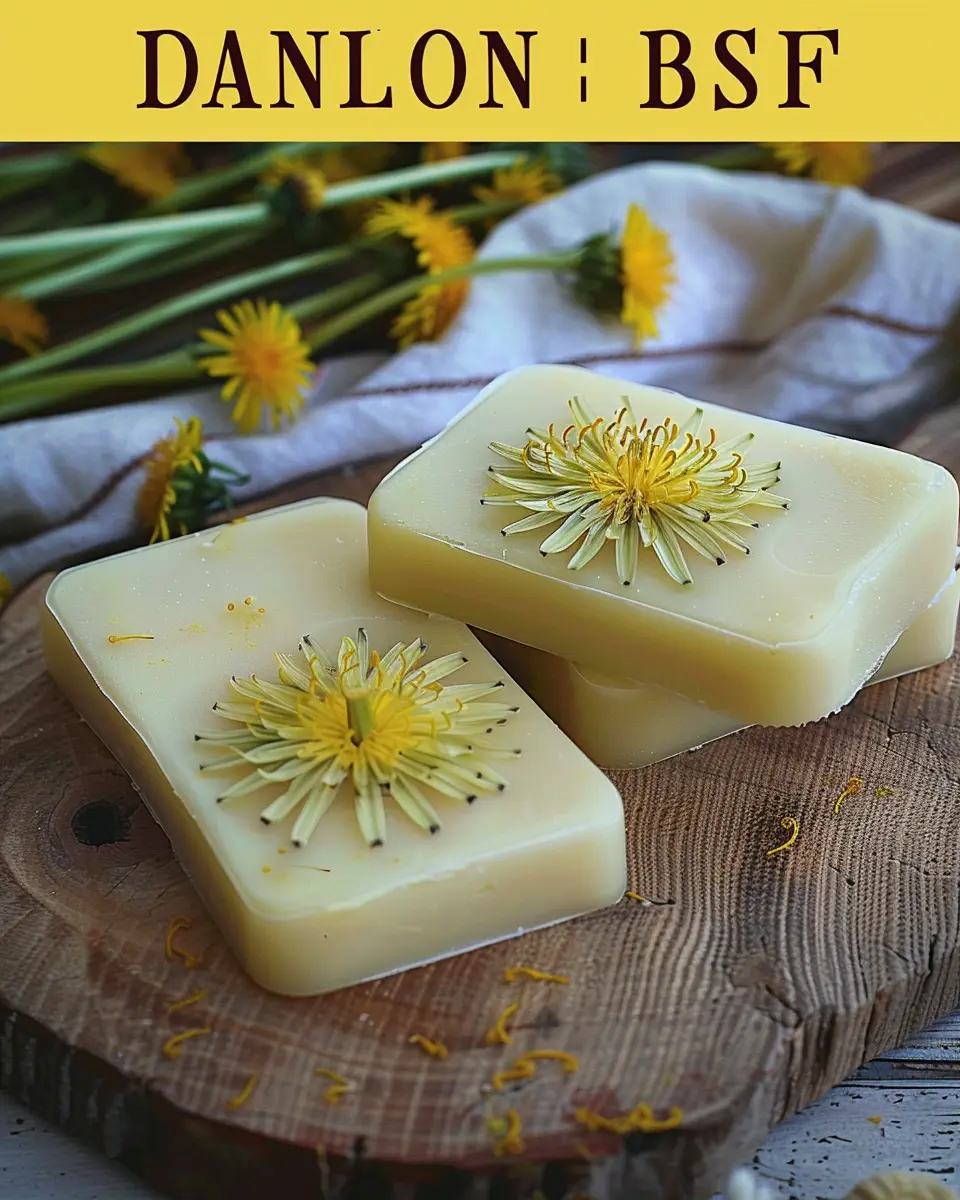
Conclusion on Dandelion Lotion Bars
Final thoughts on DIY skincare
Embarking on the journey of creating your own dandelion lotion bars can be both fulfilling and beneficial for your skin. Not only do these bars utilize the natural healing properties of dandelions, but they also allow you to tailor the ingredients to your specific needs. Imagine pampering yourself with a product that’s completely free from harsh chemicals—talk about a win-win! Plus, crafting your own lotion bars is a great way to embrace sustainability, reducing packaging waste in the process.
By incorporating homemade skincare into your routine, you’re not just caring for your skin; you’re nurturing a more personalized approach to self-care. Whether you’re gifting them to friends or keeping them for yourself, dandelion lotion bars are a wonderful addition to your skincare arsenal. For more insights on natural skincare, consider visiting Healthline or WebMD for expert health tips.
PrintDandelion Lotion Bars: Easy Homemade Skin Soothing Recipe
Discover how to make soothing dandelion lotion bars that nourish and hydrate your skin, ideal for homemade skincare enthusiasts.
- Prep Time: 15 minutes
- Cook Time: 15 minutes
- Total Time: 30 minutes
- Yield: 12 bars 1x
- Category: Skin Care
- Method: Stovetop
- Diet: Vegan-friendly (if using vegan wax)
Ingredients
- 1 cup dandelion-infused oil
- 1/2 cup beeswax pastilles
- 1/4 cup shea butter
- 10–15 drops essential oil (optional)
Instructions
- In a double boiler, combine dandelion-infused oil, beeswax, and shea butter.
- Heat gently until everything is melted and well blended.
- Remove from heat and stir in essential oils if using.
- Pour the mixture into molds and let it cool completely.
- Once solid, remove from molds and store in a cool, dry place.
Notes
- Experiment with different essential oils for fragrance.
- Keep the bars away from direct sunlight to maintain texture.
Nutrition
- Serving Size: 1 bar
- Calories: 100
- Sugar: 0g
- Sodium: 0mg
- Fat: 11g
- Saturated Fat: 5g
- Unsaturated Fat: 4g
- Trans Fat: 0g
- Carbohydrates: 0g
- Fiber: 0g
- Protein: 0g
- Cholesterol: 0mg
Keywords: Dandelion Lotion Bars, Homemade Skin Care, Skin Soothing Recipe