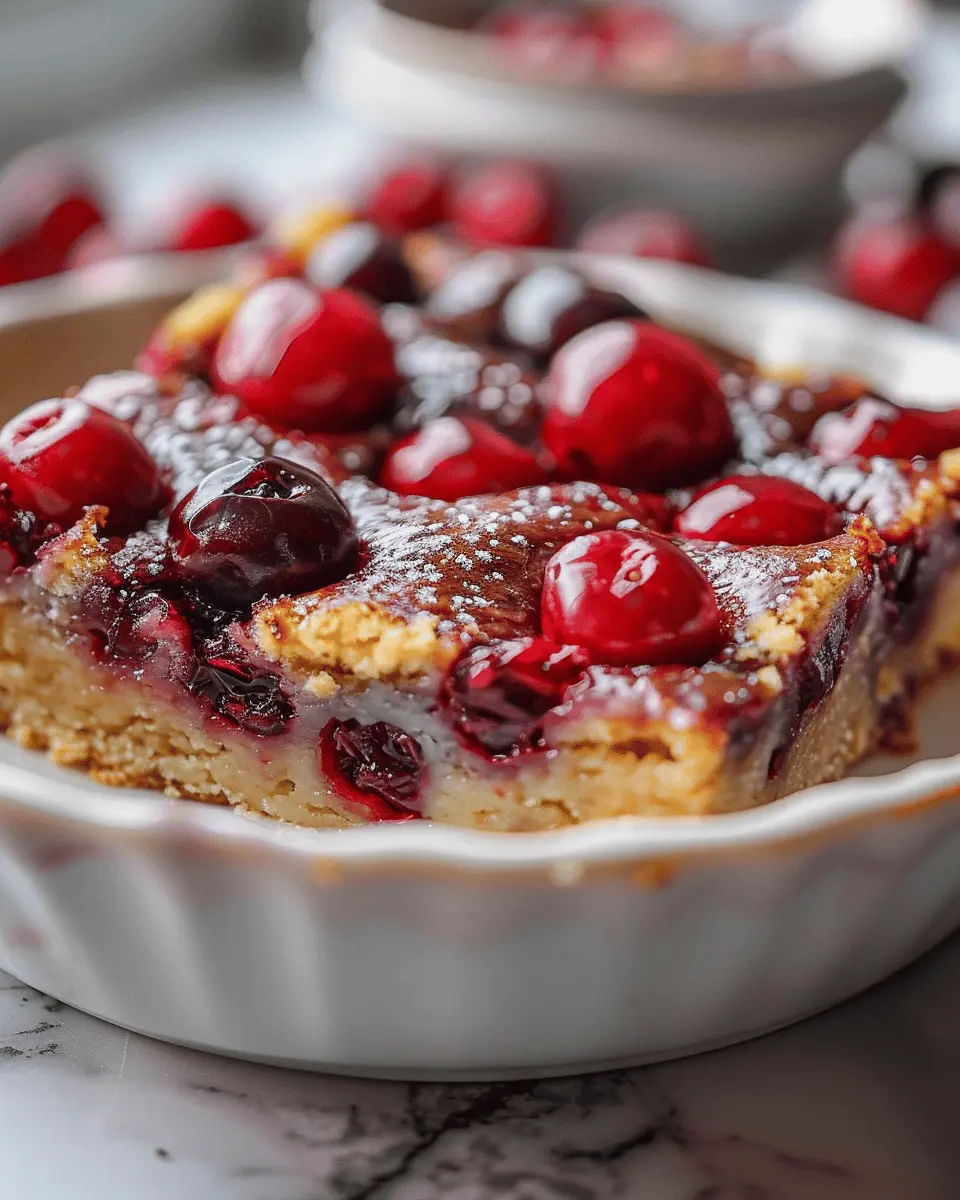
Introduction to Christmas Cherry Bars
When the holiday season rolls around, Christmas Cherry Bars become a delightful staple in many kitchens, blending the joy of baking with the festive spirit. These colorful bars are not only visually appealing but also deliver a perfect balance of sweetness and tartness, making them a favorite among friends and family alike.
Why Christmas Cherry Bars are a Festive Favorite
There’s something magical about the vibrant red of cherries against a backdrop of golden crust, inviting everyone at the holiday table to take a bite. The charm of Christmas Cherry Bars lies in their versatility: they can be enjoyed as a dessert, a snack during holiday get-togethers, or even as a sweet breakfast treat to fuel those bustling mornings filled with holiday shopping.
One of the best aspects of making these bars is how easy it is to do so. Whether you’re a novice in the kitchen or a seasoned pro, you can whip up a batch in no time. Plus, the ingredients are usually pantry staples – flour, sugar, butter, and, of course, cherries. If you’re keen on trying a new baking adventure, check out some great tips on baking with seasonal fruits.
Not only do they taste great, but they also bring people together. Picture this: you’re hosting friends for a cozy holiday gathering. As the smell of baked cherry filling wafts through your home, friends gather in the kitchen, laughing and reminiscing while the bars cool. It’s this kind of effortless bonding that makes recipes like Christmas Cherry Bars truly special.
Homemade or Store-Bought?
While store-bought versions exist, nothing beats the taste of homemade Christmas Cherry Bars. The process allows you to customize the sweetness and even swap in your favorite fruit preserves. Plus, there’s a satisfying achievement in sharing a homemade treat with loved ones, showing that you care enough to put in the effort.
Whether you’re planning to share these bars at a holiday potluck or simply enjoy them with a warm cup of cinnamon-spiced tea, you can be sure they will add a touch of festivity to your celebrations. So, grab your apron, and let’s dive into the delightful world of baking!

Ingredients for Christmas Cherry Bars
Making Christmas Cherry Bars is not just about following a recipe; it’s about creating a festive experience that brings joy and warmth to your gatherings. Let’s dive into the essential ingredients you’ll need to whip up these delightful treats.
Base Ingredients for the Bars
- 1 cup unsalted butter – The richness of butter is crucial for that tender, melt-in-your-mouth texture.
- 1 cup granulated sugar – For just the right amount of sweetness.
- 2 large eggs – They help bind everything together and add moisture.
- 2 cups all-purpose flour – This is the foundation of your bars, providing structure.
Flavor Boosters
- 1 teaspoon vanilla extract – A splash of vanilla elevates the flavor profile nicely.
- 1 can (15 oz) cherry pie filling – The star of the show! Cherries add a pop of color and flavor.
Topping Ingredients
- 1 cup crushed walnuts or pecans – For added crunch and a delicious nutty flavor.
- Powdered sugar – To dust the top once baked, adding a lovely touch of festivity.
Optional Ingredients
- A splash of almond extract – Add if you crave an extra layer of flavor. Just a hint will do!
Once you’ve gathered these ingredients, you’re ready to elevate your holiday baking game with these scrumptious Christmas Cherry Bars!
For more baking tips, you can explore Serious Eats for expert advice and techniques.
Preparing Christmas Cherry Bars
The holiday season is upon us, and there’s nothing quite like the joy of baking festive treats to share with friends and family. One delightful addition to your festive spread is Christmas Cherry Bars. These deliciously sweet and tangy bars showcase the vibrant color of cherries, making them not only a treat for the taste buds but also a feast for the eyes. Let’s dive into the steps you’ll need to follow to create these irresistible bars!
Gather and measure your ingredients
Before anything else, ensure you have all your ingredients ready. This not only makes the process smoother but also ensures you don’t miss anything crucial. Here’s what you’ll need for your Christmas Cherry Bars:
- 1 cup unsalted butter, softened
- 2 cups granulated sugar
- 4 large eggs
- 2 teaspoons vanilla extract
- 2 teaspoons almond extract
- 3 cups all-purpose flour
- 1 teaspoon baking powder
- 1/2 teaspoon salt
- 1 cup cherry pie filling (or fresh cherries, if you prefer)
Make sure to measure everything accurately! If you’re unsure about measuring flour, spoon it into your measuring cup and level it with a knife to avoid packing.
Creaming butter and sugar
Now that you’ve got your ingredients ready, it’s time to start creaming your butter and sugar. In a large mixing bowl, add the softened butter and granulated sugar. Use an electric mixer on medium speed to beat the two ingredients together until the mixture is pale and fluffy, which should take about 4-5 minutes.
This step is crucial because it incorporates air into your batter, making your Christmas Cherry Bars light and tender. Remember, the fluffier your mixture, the better your bars will be!
Incorporating the egg and extracts
Once your butter and sugar are beautifully combined, it’s time to add in the eggs and extracts. Crack the eggs into a separate bowl to avoid any shell mishaps before adding them one at a time into your creamed mixture. After each addition, mix thoroughly to ensure everything is well integrated.
Here’s where the magic happens: the flavors! Adding both vanilla and almond extract elevates the taste of your Christmas Cherry Bars, giving them that comforting holiday essence. Mixing these flavors well will create a luscious batter that’s totally irresistible.
Combining dry ingredients
In another bowl, whisk together your dry ingredients: flour, baking powder, and salt. Gradually add this dry mixture to your wet ingredients. It’s best to do this in thirds, gently mixing until just combined. Be careful not to overmix! This could lead to tougher bars, and we want them to stay soft and chewy.
This step is essential for achieving that perfect texture. If you’re interested in more baking tips, check out King Arthur Baking for expert advice on ingredient combinations.
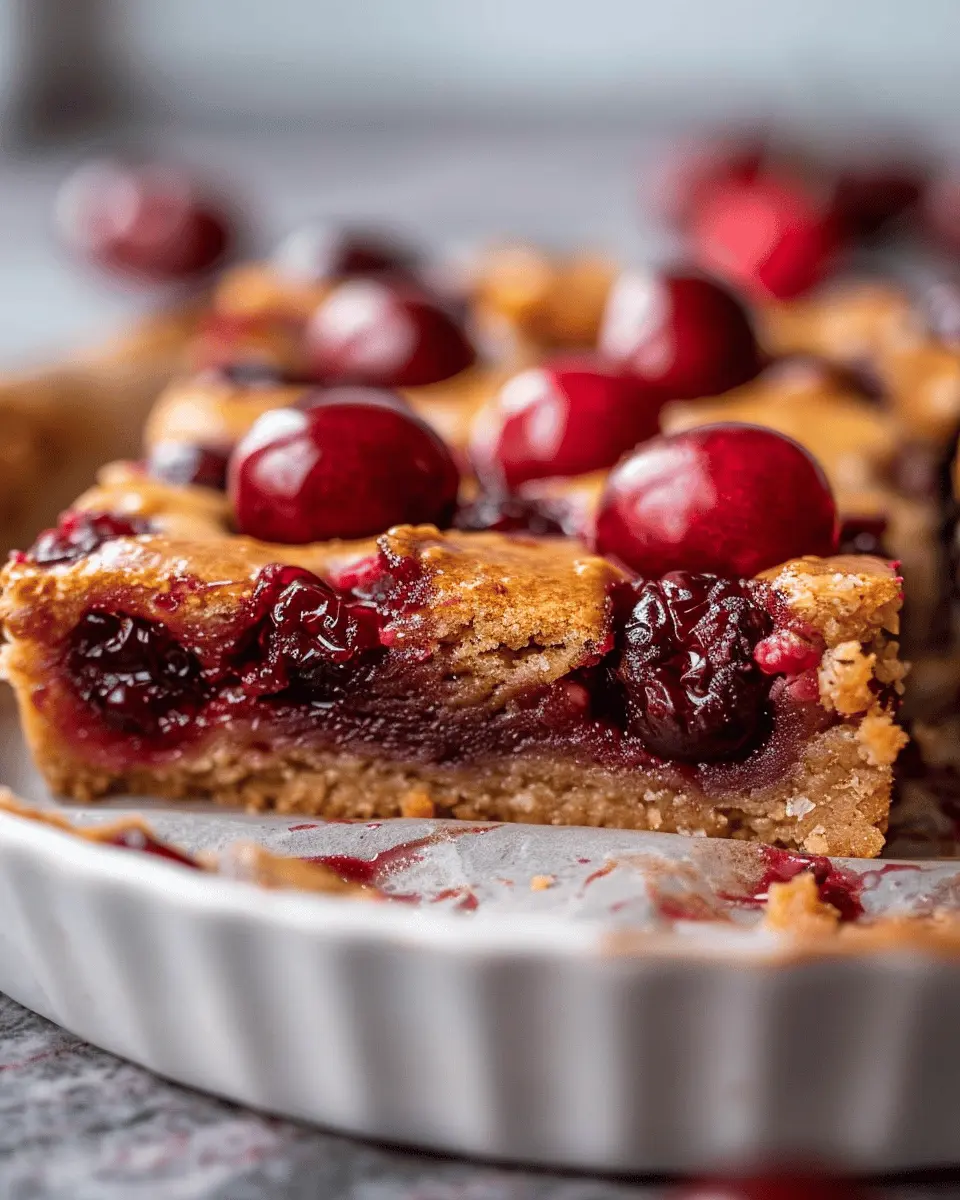
Assembling the bars
Now it’s time to bring everything together. Preheat your oven to 350°F (175°C) and line a 9×13 inch baking pan with parchment paper, leaving some overhang to easily lift the bars out later.
Spoon about 2/3 of the batter into the prepared pan and spread it evenly. Dollop the cherry pie filling onto the batter, then spoon the remaining batter on top, spreading it gently to cover the cherries.
Pop your pan in the oven and bake for 30-35 minutes, or until the edges are golden brown and a toothpick inserted in the center comes out clean. Once done, let the bars cool completely before slicing them into squares.
There you have it! With just a few simple steps, you’ve created Christmas Cherry Bars that are perfect for sharing. These sweet treats capture the essence of the holiday season, creating joyful memories with every bite. Happy baking!
Variations on Christmas Cherry Bars
Cherry Chocolate Chip Bars
Who says you can’t have the best of both worlds? Cherry chocolate chip bars combine the sweet, tart flavor of cherries with the rich, indulgent taste of chocolate. To create this variation, simply fold in a cup of semi-sweet or dark chocolate chips into your classic cherry bar batter. If you’re feeling adventurous, try using white chocolate chips for a delightful contrast! These bars are perfect for those holiday gatherings where you want to impress friends and family without spending hours in the kitchen.
To enhance the chocolate flavor, consider using a splash of vanilla extract or a pinch of espresso powder. This subtle addition makes all the difference, bringing a depth of flavor that complements the cherries beautifully. Need more ideas for dessert inspiration? Check out this chocolate cherry dessert guide.
Almond Cherry Bars
If you’re a fan of nutty flavors, almond cherry bars are a fantastic twist on the traditional Christmas cherry bars. By substituting a portion of the flour with almond flour or finely ground almonds, you’ll introduce a delightful nuttiness that pairs wonderfully with cherries. You can also incorporate slivered almonds for added crunch.
To elevate this version, consider drizzling some almond glaze on top after baking. Just mix powdered sugar, almond extract, and a bit of milk until smooth, then drizzle over the cooled bars. The result is a sweet, nutty treat that will disappear faster than you can say “yum”!
Experimenting with variations can turn your Christmas Cherry Bars into a standout dessert that everyone will remember. Enjoy the holiday baking season and have fun trying out these new flavor combinations!
Baking Tips for Christmas Cherry Bars
Creating Christmas Cherry Bars can be a delightful experience, especially when you have a few helpful tips! Here are some tried-and-true ideas to ensure your baking turns out perfectly:
Choose Quality Ingredients
The better your ingredients, the better your dessert. Opt for fresh, high-quality cherries or cherry preserves. If you’re using fresh cherries, make sure they are ripe for the best flavor.
Prep is Key
Before you start, gather all your ingredients and tools. This will streamline your baking process and save you from those last-minute scrambles. Prepping your baking tray with parchment paper can also make for an easy cleanup.
Don’t Overmix
When combining your wet and dry ingredients, mix until just incorporated. Overmixing can lead to tough bars, so embrace a gentle hand!
Cool Before Cutting
Let your Christmas Cherry Bars cool completely in the pan before cutting. This helps them to firm up, making those perfect squares easier to cut.
Add a Personal Touch
Feel free to customize your bars! Consider adding chopped nuts, a sprinkle of cinnamon, or even drizzling them with chocolate for an elevated twist.
For more baking guidance, I recommend checking out resources from sites like King Arthur Baking to further enhance your skills. Happy baking!
Serving Suggestions for Christmas Cherry Bars
When it comes to enjoying your Christmas Cherry Bars, presentation is just as important as the flavor. Here are some delightful ideas to elevate your holiday dessert experience!
Perfect Pairings
Consider serving your bars alongside:
- Whipped Cream or Vanilla Ice Cream: The creaminess beautifully contrasts the sweet and tart flavors of the cherry, adding an indulgent touch.
- Hot Chocolate or Coffee: These comforting drinks bring warmth to your holiday gathering and serve as a perfect backdrop to every bite of your Christmas Cherry Bars.
Creative Serving Styles
To make your dessert table even more festive, try these fun ways to present your bars:
- Individual Portions: Cut your bars into smaller squares and present them in decorative cupcake liners. This not only looks appealing but makes them easy for guests to grab.
- Garnish with Fresh Fruit: A sprinkle of fresh cherries or a few mint leaves alongside your bars can instantly brighten the dish, both visually and flavor-wise.
Enhance the Experience
Lastly, consider the setting. Soft holiday music and warm lighting can create an inviting atmosphere that encourages guests to savor the delicious flavors of your Christmas Cherry Bars.
For more festive serving ideas, the Joy of Baking offers great suggestions on holiday dessert pairings that you can explore!
Time breakdown for Christmas Cherry Bars
Preparation time
Getting started is half the fun! For your Christmas Cherry Bars, you’ll want to set aside about 20 minutes for preparation. This includes gathering your ingredients, mixing the batter, and spreading that delightful cherry filling. It’s the perfect time for your favorite holiday playlist to set the mood.
Baking time
Once you’ve prepped everything, it’s time for the Christmas Cherry Bars to bask in the oven! Expect them to take about 25 to 30 minutes to fully bake. You’ll know they’re ready when the edges begin to turn a lovely golden brown.
Total time
In total, you’ll need around 50 to 60 minutes, including both prep and baking. This makes it an ideal recipe for busy young professionals like yourself looking to impress at holiday gatherings. So, grab your ingredients, and let’s make some delicious Christmas Cherry Bars together! For tips on butter storage to keep it fresh, check out Butter Manufacturing Guidelines.
Nutritional facts for Christmas Cherry Bars
When preparing your delicious Christmas Cherry Bars, it’s essential to understand their nutritional profile to enjoy them mindfully. Here’s a quick breakdown of what’s packed into these festive treats:
Calories
Each serving of these delectable Christmas Cherry Bars contains approximately 150 calories. This makes them a sweet indulgence you can enjoy without the guilt—perfect for holiday get-togethers!
Carbohydrates
One serving includes about 22 grams of carbohydrates, primarily from the natural sugars in cherries and the crust. These carbs can provide a quick energy boost, particularly useful during those busy holiday festivities.
Sugar
These bars contain about 10 grams of sugar per serving. The natural sweetness from the cherries shines through, balancing perfectly with the buttery crust. If you want to reduce sugar intake, consider using a sugar substitute or fresh, unsweetened cherries for a healthier twist.
For more on nutrition, visit Healthline for insights into balancing treats during the holidays. Remember, enjoying these Christmas Cherry Bars in moderation is key to a festive but healthy celebration!
FAQ about Christmas Cherry Bars
Can I use fresh cherries instead of pie filling?
Absolutely! Using fresh cherries in your Christmas Cherry Bars can elevate the flavor to another level. Just make sure to pit and chop them before incorporating them into the batter. If you choose to go this route, consider adding a little sugar to account for the tartness of fresh cherries. You can also enrich them with a touch of lemon juice or almond extract for a delightful twist. For more tips on using fresh fruit in recipes, check out this great resource.
How should I store leftover Christmas Cherry Bars?
To maintain the deliciousness of your Christmas Cherry Bars, store them in an airtight container. If you want them to stay fresh longer, placing them in the refrigerator can help, especially if you’ve made them a few days in advance. They can also be kept at room temperature, but be mindful of the moisture in the air—this can affect the texture. For a longer shelf life, you can freeze them. Just wrap individual bars in plastic wrap and then place them in a freezer-safe bag. When you’re ready to enjoy, simply thaw them at room temperature.
Can I make Christmas Cherry Bars ahead of time?
Yes, making Christmas Cherry Bars ahead of time is a fantastic idea, especially during the hustling holiday season. You can prepare them a couple of days in advance; they actually taste better as the flavors meld together. Just remember to store them properly as mentioned above. If freezing, it’s best to do so before frosting them; you can frost them just before serving for that fresh-baked look. Planning ahead gives you more time to enjoy celebrations with friends and family!
For more inspired holiday baking ideas, check out this insightful baking blog.
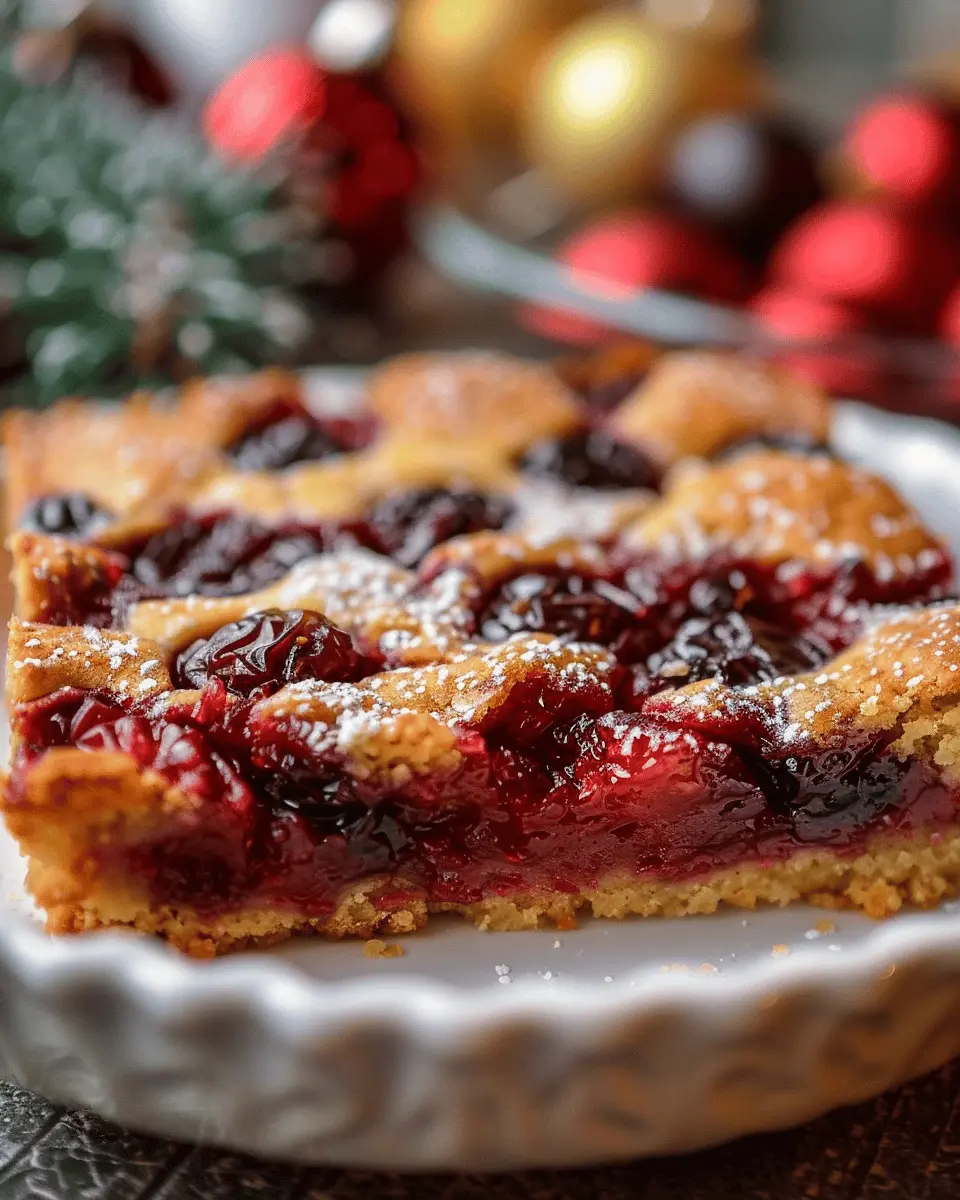
Conclusion on Christmas Cherry Bars
These delightful Christmas Cherry Bars are the perfect festive treat for your holiday gatherings. With their vibrant colors and zesty flavors, they bring a touch of cheer that’s hard to resist. The combination of tart cherries and a buttery crust creates a irresistible texture, making these bars a must-have on your dessert table.
When planning your Christmas menu, don’t forget to make room for these delicious bars! They’re not only easy to bake but also travel well — share them with friends or coworkers for an extra sparkle in their holiday season. For further inspiration, check out this Christmas baking resource. Happy baking!
PrintChristmas Cherry Bars: Easy Homemade Treats for Festive Celebrations
Delight in these festive Christmas Cherry Bars, perfect for your holiday celebrations.
- Prep Time: 15 minutes
- Cook Time: 35 minutes
- Total Time: 50 minutes
- Yield: 12 servings 1x
- Category: Dessert
- Method: Baking
- Cuisine: American
Ingredients
- 1 cup all-purpose flour
- 1 cup granulated sugar
- 1/2 cup unsalted butter, softened
- 2 large eggs
- 1 teaspoon vanilla extract
- 1/2 teaspoon almond extract
- 1 can cherry pie filling
- 1/2 teaspoon baking powder
Instructions
- Preheat the oven to 350°F (175°C) and grease a 9×13 inch baking dish.
- In a large bowl, cream together the butter and sugar until smooth.
- Add the eggs, vanilla extract, and almond extract and mix until well combined.
- In a separate bowl, whisk together the flour and baking powder.
- Gradually add the dry ingredients to the wet mixture until just combined.
- Spread half of the batter into the prepared baking dish, then pour the cherry pie filling over the top.
- Dollop the remaining batter on top of the cherries and spread gently.
- Bake for 30-35 minutes or until golden brown and a toothpick comes out clean.
- Allow to cool before slicing into bars.
Notes
- For added flavor, sprinkle with powdered sugar before serving.
- These bars can be served warm or at room temperature.
Nutrition
- Serving Size: 1 bar
- Calories: 200
- Sugar: 20g
- Sodium: 150mg
- Fat: 10g
- Saturated Fat: 6g
- Unsaturated Fat: 3g
- Trans Fat: 0g
- Carbohydrates: 30g
- Fiber: 1g
- Protein: 2g
- Cholesterol: 50mg
Keywords: Christmas Cherry Bars, Holiday Treats, Festive Desserts