Introduction to A Spooky and Cheesy Halloween Favorite
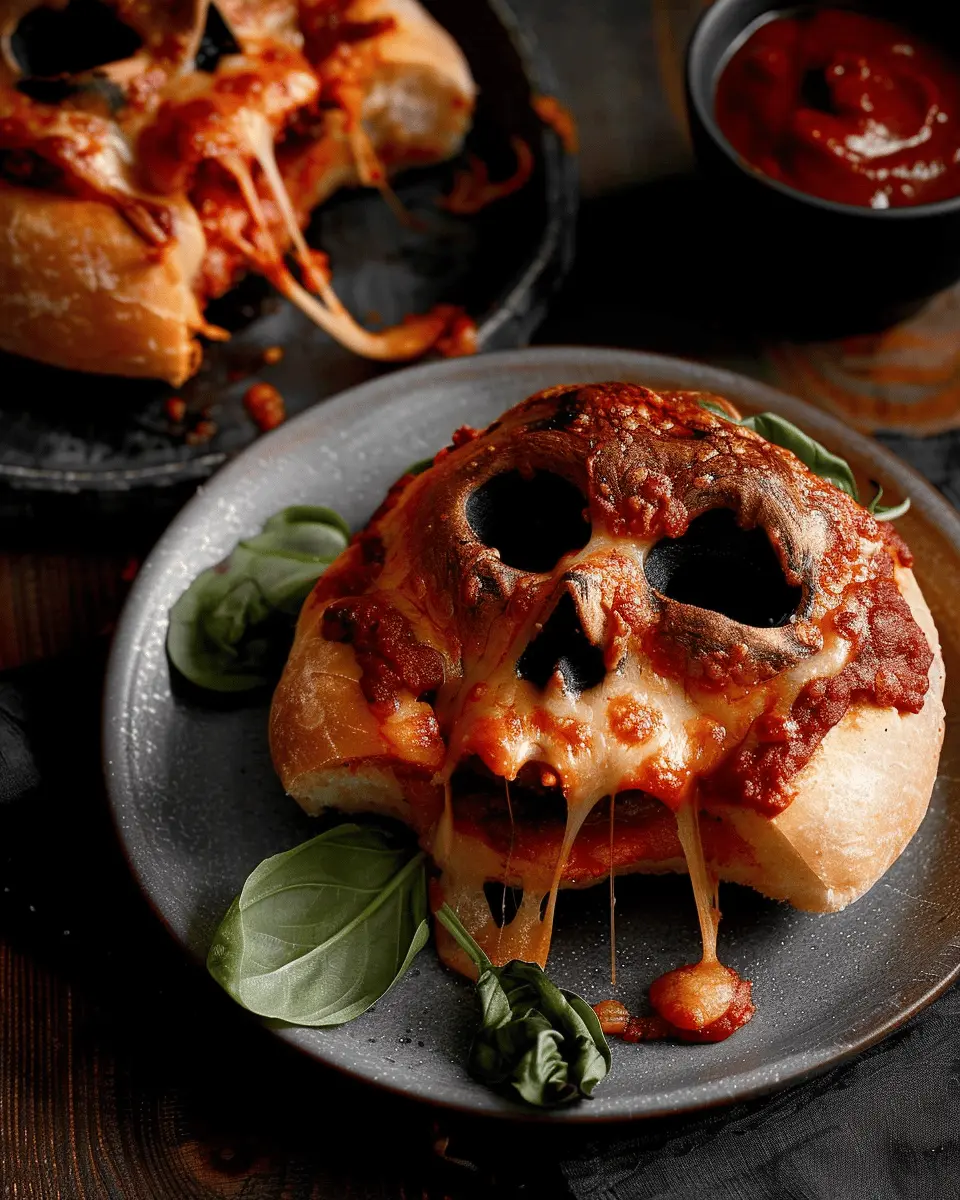
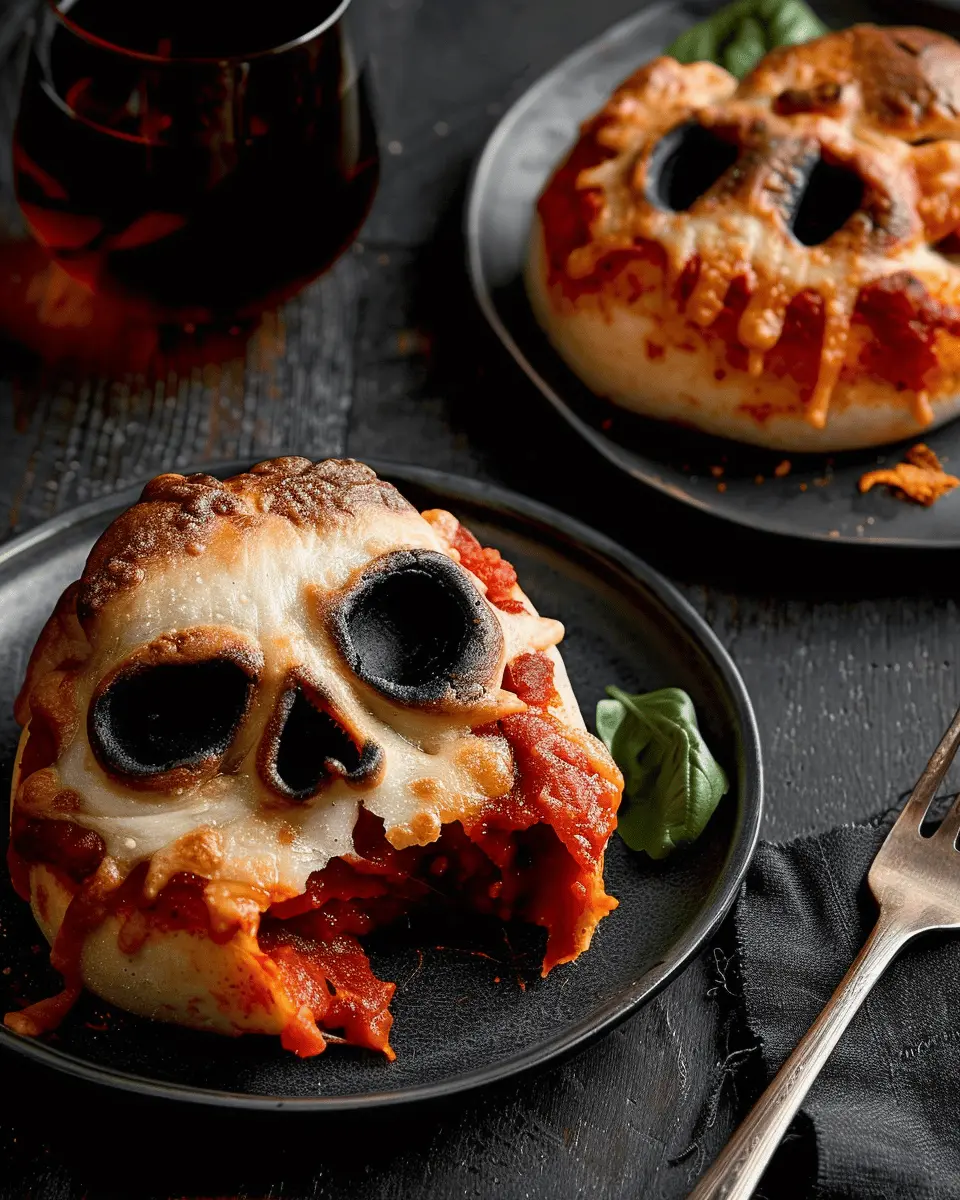
As Halloween creeps closer, thoughts of spine-tingling thrills and delightfully eerie treats come to mind. One dish stands out as a spooky and cheesy Halloween favorite: Pizza Skulls. These whimsical snacks perfectly blend fun and flavor, making them an absolute hit for lovers of Halloween festivities. Just imagine gathering with friends and family, indulging in these delicious creations that not only look fantastic but also taste amazing.
Why Pizza Skulls Are the Perfect Halloween Treat
Pizza Skulls are not just your average snack; they embody the spirit of Halloween while satisfying those cheesy cravings. They’re a versatile dish that can cater to various tastes, allowing for creative toppings like turkey bacon, chicken ham, or seasonal veggies. The best part? You can make them as spooky or cute as you’d like! Whether you opt for friendly ghost shapes or menacing skulls, they will surely evoke giggles and gasps alike.
Not only do these delectable snacks look the part, but they also provide an excellent conversation starter at any Halloween gathering. Picture yourself presenting these unique creations and watching your friends’ eyes light up. The fun of keeping the “what’s inside” a mystery adds a dash of intrigue. Not to mention, pizzas are often a beloved comfort food, making them a safe bet for guest enjoyment.
Moreover, making Pizza Skulls is a fantastic activity for all ages. If you have kids or younger siblings, get them involved in the kitchen! This creates memorable bonding experiences filled with laughter as you roll out the dough and fill the spooky molds. The joy of crafting these treats together enhances the festive spirit, fostering a sense of teamwork and creativity. It’s a great opportunity to teach kids about cooking while enjoying the flavors of Halloween.
So as you prepare for this year’s celebrations, consider shaking things up with a dish that’s both hauntingly fun and utterly delicious. For the full recipe that guides you on this cheesy adventure, keep reading!
Ingredients for Pizza Skulls
Creating Pizza Skulls for this spooky season is a delightfully fun experience. Just think about it: cheesy, gooey goodness wrapped in a playful skull shape! Let’s dive right into the essential ingredients you’ll need for a truly A Spooky and Cheesy Halloween Favorite.
Essential ingredients
To bring your Pizza Skulls to life, you’ll want to gather the following goodies:
- Pizza Dough: Store-bought or homemade; either works wonderfully.
- Cheese: A blend of mozzarella and cheddar provides that melty, rich flavor.
- Tomato Sauce: Opt for a classic marinara or a zesty pizza sauce.
- Turkey Bacon or Chicken Ham: For a protein kick, these substitutes ensure everyone can enjoy your creation.
- Pepperoni: A classic choice that adds just the right amount of spice.
- Vegetables: Chopped bell peppers, mushrooms, or olives enhance both flavor and nutrition.
Optional toppings for customization
Now, let’s talk about making them your own. You can easily customize your Pizza Skulls with additional toppings, like:
- Fresh herbs: Basil or oregano for an aromatic touch.
- Hot sauce: For those who like it spicy!
- Spinach: A great way to sneak in some greens.
By mixing these optional ingredients, you’re not just making Pizza Skulls—you’re crafting an unforgettable Halloween treat! If you’d like to explore more about each ingredient’s benefits, check out sources like Healthline for nutritional insights.
Preparing Pizza Skulls
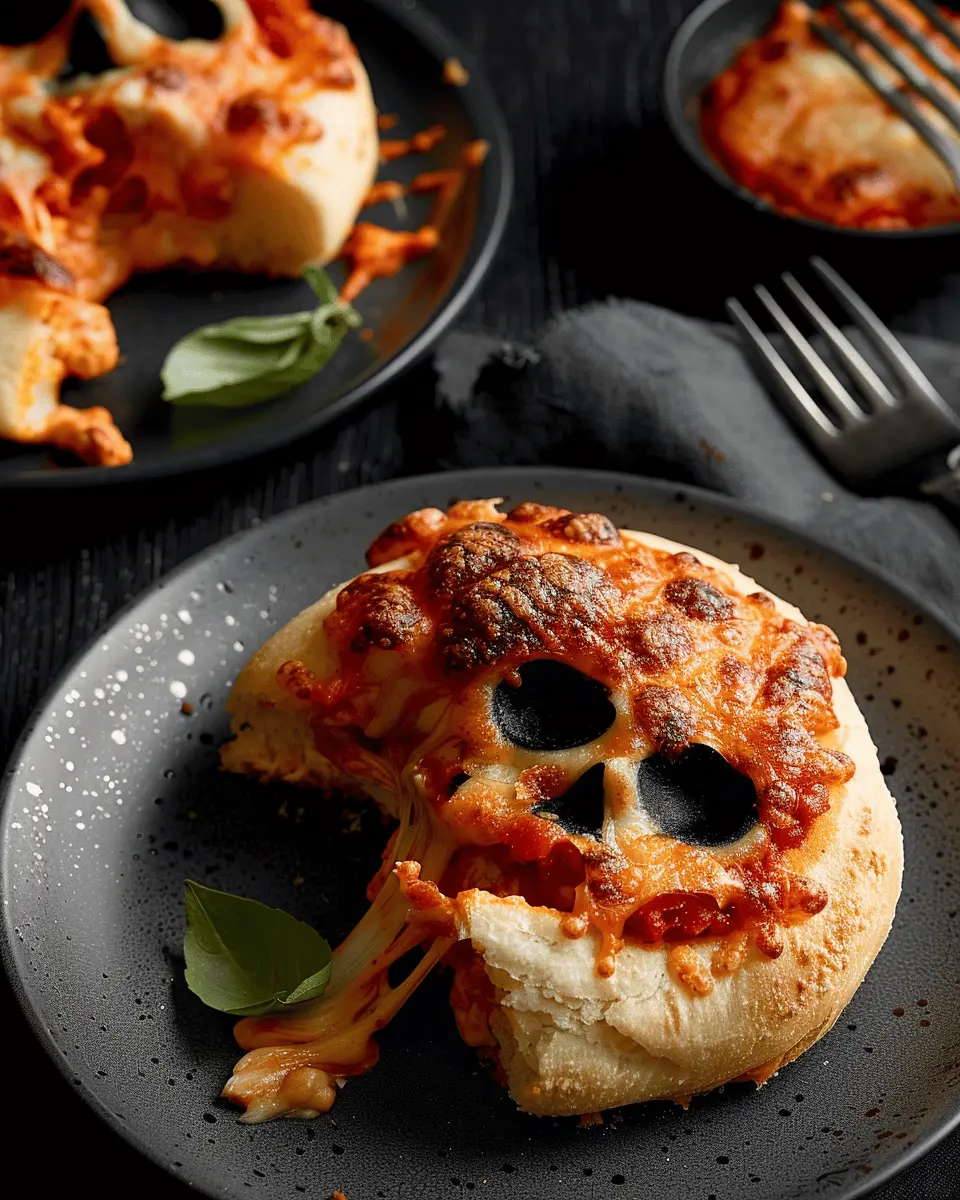
When it comes to Halloween, few treats are as delightfully eerie as Pizza Skulls. Not only do they look great on your spooky celebration table, but they’re also a delicious and cheesy way to impress your friends. Let’s get you prepped and rolling with this fun and festive recipe!
Gather Your Ingredients
To kick things off, you’ll want to ensure you have all your ingredients lined up. Here’s what you will need:
- Pizza dough (store-bought or homemade)
- Mozzarella cheese (shredded)
- Turkey bacon (cooked and chopped)
- Chicken ham (diced)
- Fresh vegetables (like bell peppers or mushrooms)
- Tomato sauce (for that savory kick)
- Italian seasoning (optional, for added flavor)
Feel free to customize your fillings! Whether you prefer veggies, assorted meats, or extra cheese, the sky’s the limit. For guidance on how to make homemade pizza dough, check out King Arthur Baking.
Preheat the Oven
Next up is the oven prep. Preheating your oven to 375°F (190°C) ensures that your pizza skulls bake evenly and emerge with that ideal golden crust. Skip this step, and you risk a doughy disaster! Consider using an oven thermometer if you want to double-check your oven temperature. An accurate oven can make all the difference, especially in recipes like this one.
Prepare the Skull Baking Mold
If you have a skull-shaped baking mold, brush it with oil or non-stick spray. This little preparation makes all the difference, ensuring that your Pizza Skulls come out intact and easy to serve. If you don’t have a skull mold, you can also use a standard muffin tin to create small, skull-like shapes. Just be innovative with your presentation and make it uniquely yours!
Shape and Fill the Pizza Dough
Now, this is where the fun begins! Roll out your pizza dough on a floured surface. You want to achieve a thickness of about 1/4 inch. Then, using the skull mold as your guide, cut out enough pieces to form the top and bottom of each skull.
- Take one piece and push it firmly into the bottom half of the skull mold.
- Spoon in a generous amount of tomato sauce, followed by the shredded mozzarella, turkey bacon, chicken ham, and any other fillings you fancy.
Be careful not to overfill—about three-quarters full is just right. You want there to be enough room for it all to bubble and shine as it bakes.
Seal the Pizza Skulls
Once filled, it’s time to cap off your creations. Place another piece of dough on top of each filled mold and gently press around the edges to seal. This step is crucial for ensuring that all the gooey goodness stays inside. You can also use a fork to crimp the edges together, which not only seals them but adds a nice decorative touch!
Bake Until Golden and Delicious
Finally, place your ready-to-bake pizza skulls in your preheated oven and let them work their magic! Bake for 15-20 minutes, or until they’re beautifully golden and aromatic. Using a timer is a smart move; it’s all too easy to get distracted and let them go a little too long.
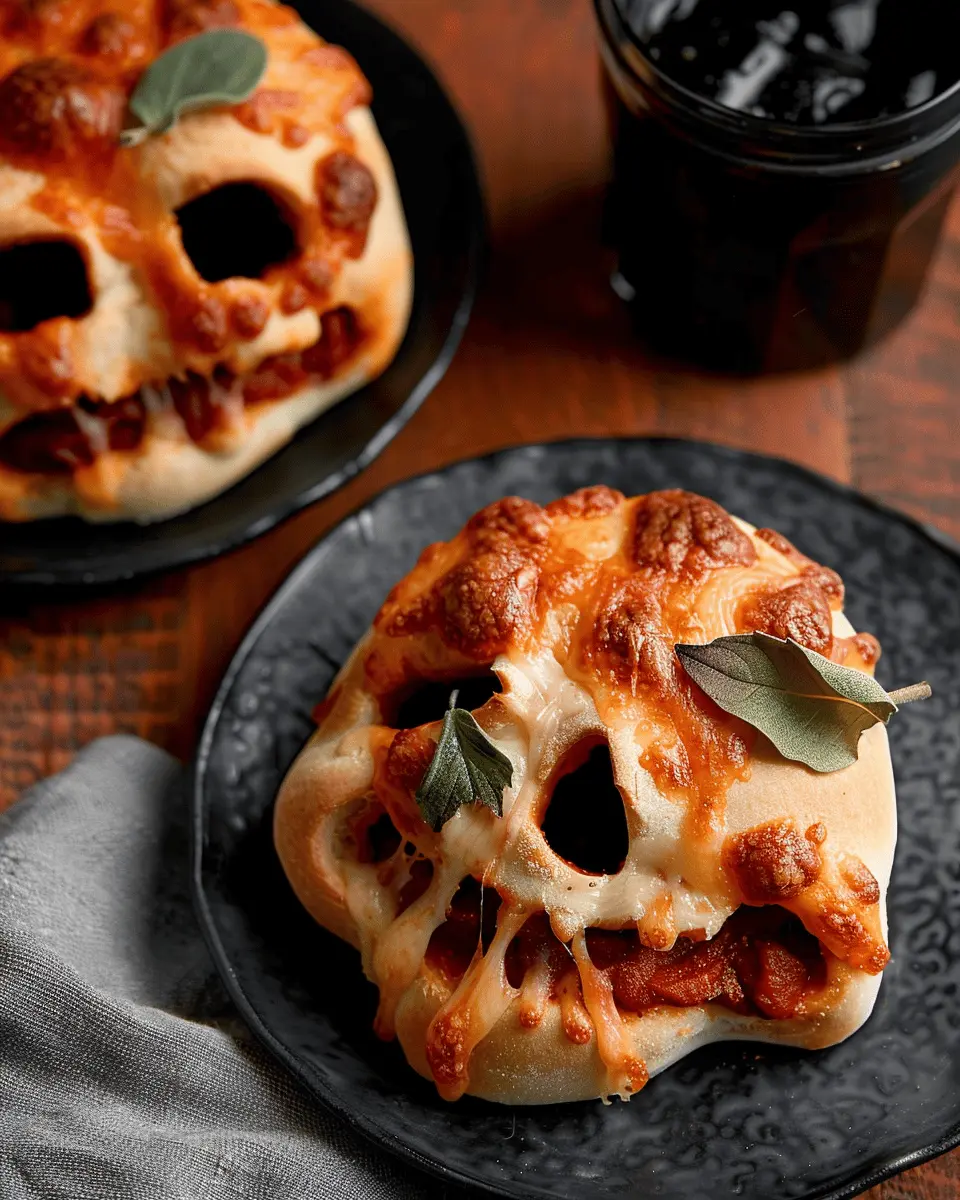
As they bake, your kitchen will fill with that irresistible pizza aroma—a sure sign that A Spooky and Cheesy Halloween Favorite is on the way.
After removing them from the oven, allow them to cool for a minute or two before attempting to pop them out of the mold. And voilà! You have a platter of Pizza Skulls ready for a ghoulish gathering. Enjoy your delightful creation and be ready for compliments from your guests!
Whether you’re preparing these for a Halloween party or just a fun themed dinner night, these pizza skulls are a treat that’s sure to impress. Happy cooking!
Variations on Pizza Skulls
Creating your own pizza skulls can unleash your creativity, especially when you think outside the box. Here are two fun variations that keep the spirit of A Spooky and Cheesy Halloween Favorite alive while catering to different tastes.
Vegetarian Pizza Skulls
For those who prefer a meat-free option, vegetarian pizza skulls are a fantastic choice. You can stuff them with a blend of fresh vegetables and various cheese options.
- Suggested Fillings:
- Sautéed mushrooms
- Spinach or kale
- Roasted peppers
- Ricotta or mozzarella cheese
- A sprinkle of Italian herbs
Not only does this variation add color and texture, but it’s also packed with nutrients. Plus, it’s a delightful way to ensure no one misses out on the fun – even your vegetarian friends can join the Halloween festivities. Looking for inspiration? Check out Healthline’s guide on the benefits of vegetables!
Spicy Pizza Skulls
If you like to add a kick to your meals, spicy pizza skulls will become your new favorite. Infuse your filling with flavors that excite the palate:
- Suggested Fillings:
- Spicy turkey bacon or beef sausage
- Jalapeños or crushed red pepper flakes
- Pepper jack cheese for an extra heat boost
- A tangy barbecue sauce
These spicy skulls are perfect for those who enjoy a bit of a thrill in their food. Adjust the heat level to your preference, and watch as these delightful treats bring some scary good excitement to your Halloween spread. If you’re curious about the health benefits of spicy foods, WebMD provides interesting insights on how they can benefit your metabolism.
Whichever variation you choose, these pizza skulls are sure to be a hit this Halloween season!
Cooking Tips for Pizza Skulls
Avoiding Overfilling
When crafting these spooky and cheesy Halloween favorites, it’s tempting to pack in as much filling as possible. However, resist the urge! Overfilling can lead to a messy bake, causing your delightful Pizza Skulls to burst open in the oven. Instead, aim for about one tablespoon of filling per skull. This will give you just the right balance of gooey cheese and savory fillings, creating that perfect bite without the chaos.
Keep Your Dough Cold for Easier Handling
Keeping your dough cold is one of the best tips for achieving crisp, golden-brown Pizza Skulls. When you start working with your dough, take it out of the fridge and shape it quickly. If the dough warms up, it becomes stickier and harder to handle, which can be frustrating. Pro tip: Pop it back in the fridge for a few minutes if it feels too soft. Not only will this make it easier to work with, but it will also help maintain that delightful texture once baked.
Discover more about dough handling at sites like Serious Eats, which offers a wealth of baking tips!
Serving suggestions for Pizza Skulls
Best dips for pizza skulls
When it comes to serving Pizza Skulls, the right dip can elevate your spooky snack into an unforgettable masterpiece. Think outside the box with these delicious options that will surely wow your guests:
- Marinara Sauce: This classic pairs beautifully with the cheesy pizza filling and adds a tangy touch.
- Ranch Dressing: Creamy ranch complements the savory flavors, making it a tasty dip that many love.
- Garlic Butter Sauce: A warm drizzle of garlic butter can bring out an indulgent richness that pairs perfectly with the dough.
Creative presentation ideas
How you present your A Spooky and Cheesy Halloween Favorite can turn a simple gathering into a themed celebration. Consider these fun ideas:
- Serve in Cauldron Pots: Place your pizza skulls in small, black cauldron pots for an eerie effect.
- Garnish with Spooky Edibles: Use edible eyes or pumpkin-shaped sprinkles to add a festive touch to your serving platter.
- Create a “Bone” Display: Use pretzel sticks or breadsticks as bones arranged around the pizza skulls for a delightful visual.
These tips not only make your Pizza Skulls more appealing but also add an element of fun to your Halloween festivities.
Time Breakdown for Pizza Skulls
Preparation time
Getting ready to make these Pizza Skulls will take you about 20 minutes. You’ll want to gather your ingredients, which include your favorite cheeses, turkey bacon, and chicken ham, along with any fun toppings. It’s all about setting the stage for your spooky feast!
Cooking time
Once your skulls are assembled, they’ll need around 25 minutes in the oven to achieve that perfect golden brown finish. The warm, melty cheese will make your kitchen smell irresistible—trust me, you’ll have people lingering!
Total time
In total, you’re looking at about 45 minutes from start to finish. That’s a small investment of time for a spooky and cheesy Halloween favorite that will knock the socks off your friends at any gathering or party. For more spooky recipes and ideas, check out sites like Food Network or Bon Appétit for inspiration!
Nutritional Facts for Pizza Skulls
Calories per serving
Indulging in Pizza Skulls has its perks! Each serving packs around 250 calories, making them a flavorful, yet manageable treat for your Halloween gathering. It’s all about balance—enjoy your favorites while keeping an eye on your portions.
Key Nutritional Highlights
These festive, cheesy delights bring more to the table than just taste. Here are some important nutritional points to consider:
- Protein Power: With ingredients like Turkey Bacon and Chicken Ham, you’ll get a boost of protein, aiding in muscle health and satiety.
- Calcium Rich: Thanks to the gooey cheese, each bite provides calcium—essential for healthy bones.
- Customizable Goodness: Feel free to load them up with veggies like bell peppers or spinach for added fiber and nutrients.
- Low Sugar: These treats have little to no added sugar, making them a smarter choice compared to many Halloween candies.
If you’re curious about balancing indulgence with nutrition, check out this guide on healthy snacking for more tips. So, when you bring these spooky and cheesy Halloween favorites to the table, you’re not just serving deliciousness but nourishing goodness too!
FAQs about Pizza Skulls
Can I use my own dough recipe?
Absolutely! One of the beauties of making pizza skulls, which is truly a spooky and cheesy Halloween favorite, is that you can customize it to your heart’s content. If you have a favorite dough recipe, feel free to use it. Just keep in mind that your dough should be easy to roll out and handle; a good pizza dough recipe will work wonders. Whether it’s a classic yeast dough or even a gluten-free version, your creativity is the limit!
How to store leftover pizza skulls?
If you find yourself with leftover pizza skulls (which is often unlikely, but just in case!), you’ll want to store them properly to keep that cheesy goodness alive.
- Refrigeration: Let them cool completely, then place them in an airtight container or wrap them in plastic wrap. They should stay fresh for about 3-4 days in the fridge.
- Freezing: For longer storage, wrap each skull in plastic wrap and place them in a freezer-safe bag. They can last up to three months. To reheat, simply pop them in the oven at 350°F until heated through.
What other fillings can I try?
The fun doesn’t stop at cheese and pepperoni! Here are some creative fillings that you can experiment with:
- Vegetarian Options: Spinach and ricotta or a medley of roasted vegetables for a healthy twist.
- Meaty Choices: Swap in chicken ham, turkey bacon, or even beef for a richer flavor profile.
- Sweet Surprises: Consider dessert versions filled with Nutella and marshmallows for a sweet treat.
Getting creative with your fillings is a great way to make this recipe your own, so don’t shy away from trying something new! For more inspiration, check out this article that offers tons of fun filling ideas!
Conclusion on Pizza Skulls
Making pizza skulls is not just about enjoying a delicious treat; it’s also about embracing the homemade fun of Halloween. Gathering in the kitchen with friends or family to create these spooky yet cheesy delights can turn a simple recipe into a memorable experience. Whether you’re filling these ghoulish delights with savory Turkey Bacon, Chicken Ham, or your favorite veggies, the possibilities are endless.
So, this Halloween, let your creativity shine and prepare A Spooky and Cheesy Halloween Favorite that everyone will love. Don’t forget to share your creations on social media or with your neighbors!
PrintA Spooky and Cheesy Halloween Favorite: Turkey Bacon & Chicken Ham Delight

A delightful and spooky dish perfect for Halloween gatherings, filled with cheesy goodness and savory meats.
- Prep Time: 15 minutes
- Cook Time: 30 minutes
- Total Time: 45 minutes
- Yield: 6 servings 1x
- Category: Appetizer
- Method: Baking
- Cuisine: American
- Diet: Gluten-Free
Ingredients
- 1 pound turkey bacon
- 1 pound chicken ham
- 2 cups shredded cheese
- 1 cup cream cheese
- 1 teaspoon garlic powder
- 1/2 teaspoon black pepper
- 1 tablespoon olive oil
- 1 bell pepper, diced
- 1 onion, chopped
Instructions
- Preheat the oven to 375°F (190°C).
- In a skillet, heat olive oil over medium heat; add onion and bell pepper, sauté until softened.
- Add turkey bacon and chicken ham, cooking until heated through.
- Mix in cream cheese and shredded cheese until melted and combined.
- Transfer the mixture into a baking dish and bake for 20-25 minutes.
- Serve hot, and enjoy your spooky treat!
Notes
- For a spicier version, add jalapeños or red pepper flakes.
- Pair with spooky-themed sides for a complete Halloween feast.
Nutrition
- Serving Size: 1 serving
- Calories: 350
- Sugar: 2g
- Sodium: 800mg
- Fat: 25g
- Saturated Fat: 10g
- Unsaturated Fat: 15g
- Trans Fat: 0g
- Carbohydrates: 5g
- Fiber: 1g
- Protein: 20g
- Cholesterol: 100mg
Keywords: Halloween, Turkey Bacon, Chicken Ham, Cheesy, Spooky