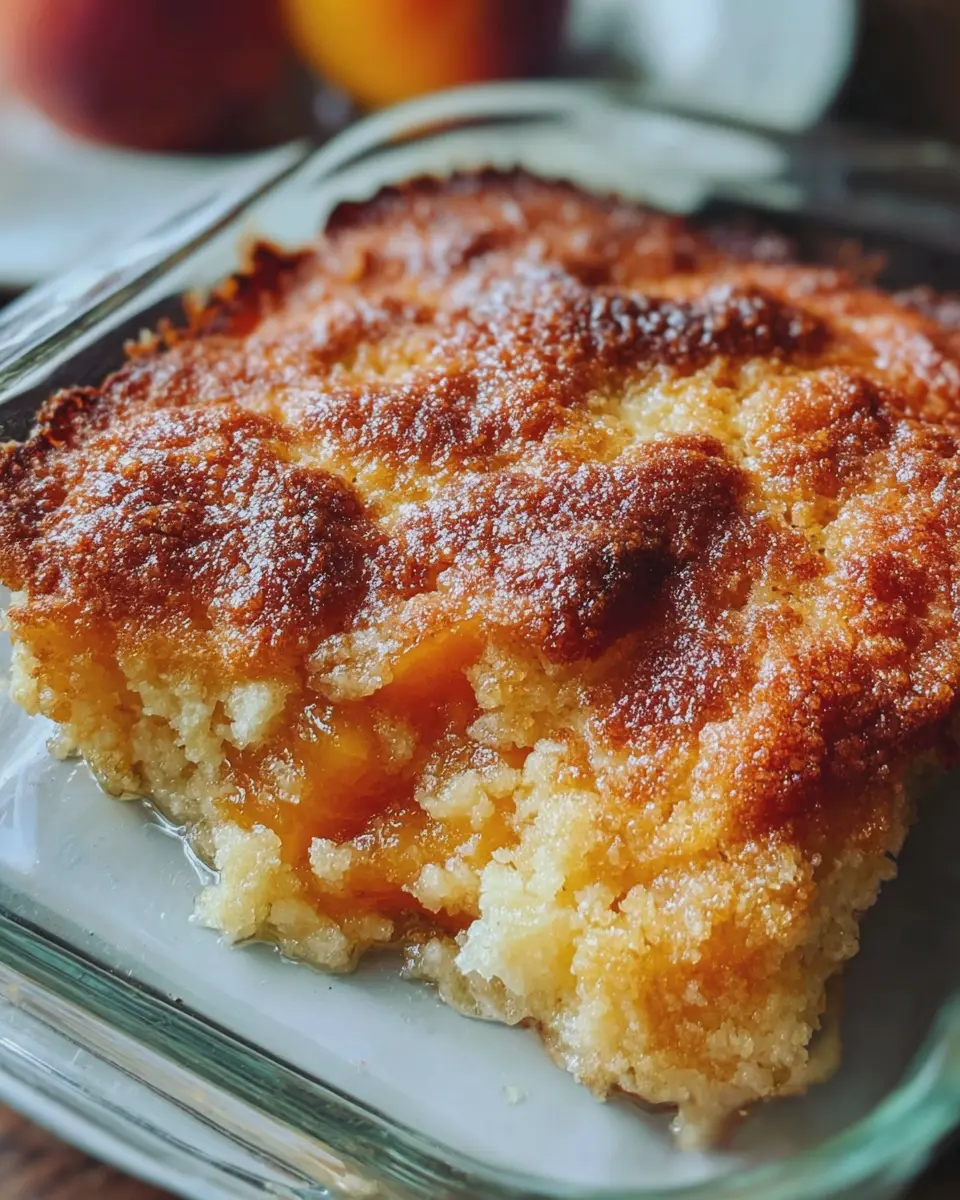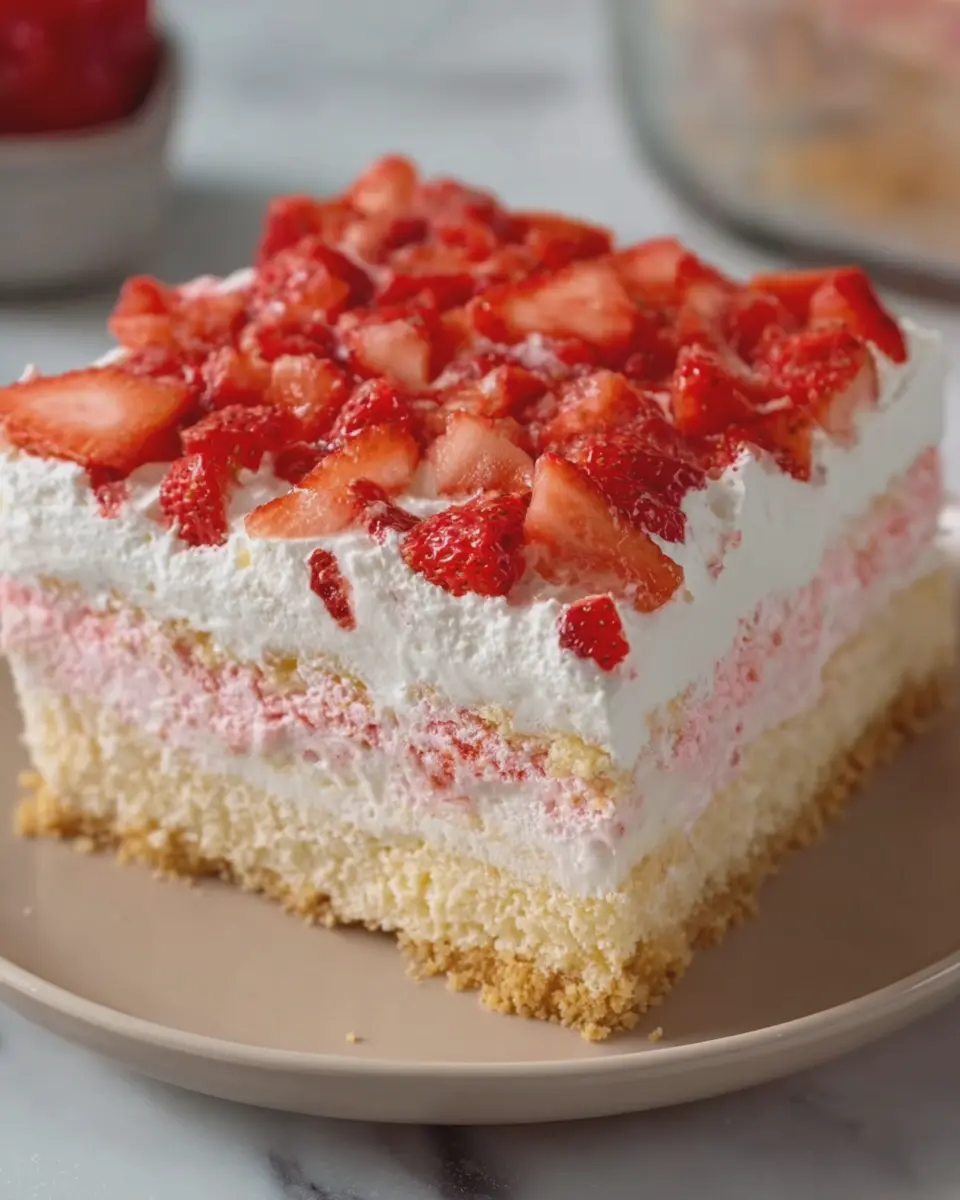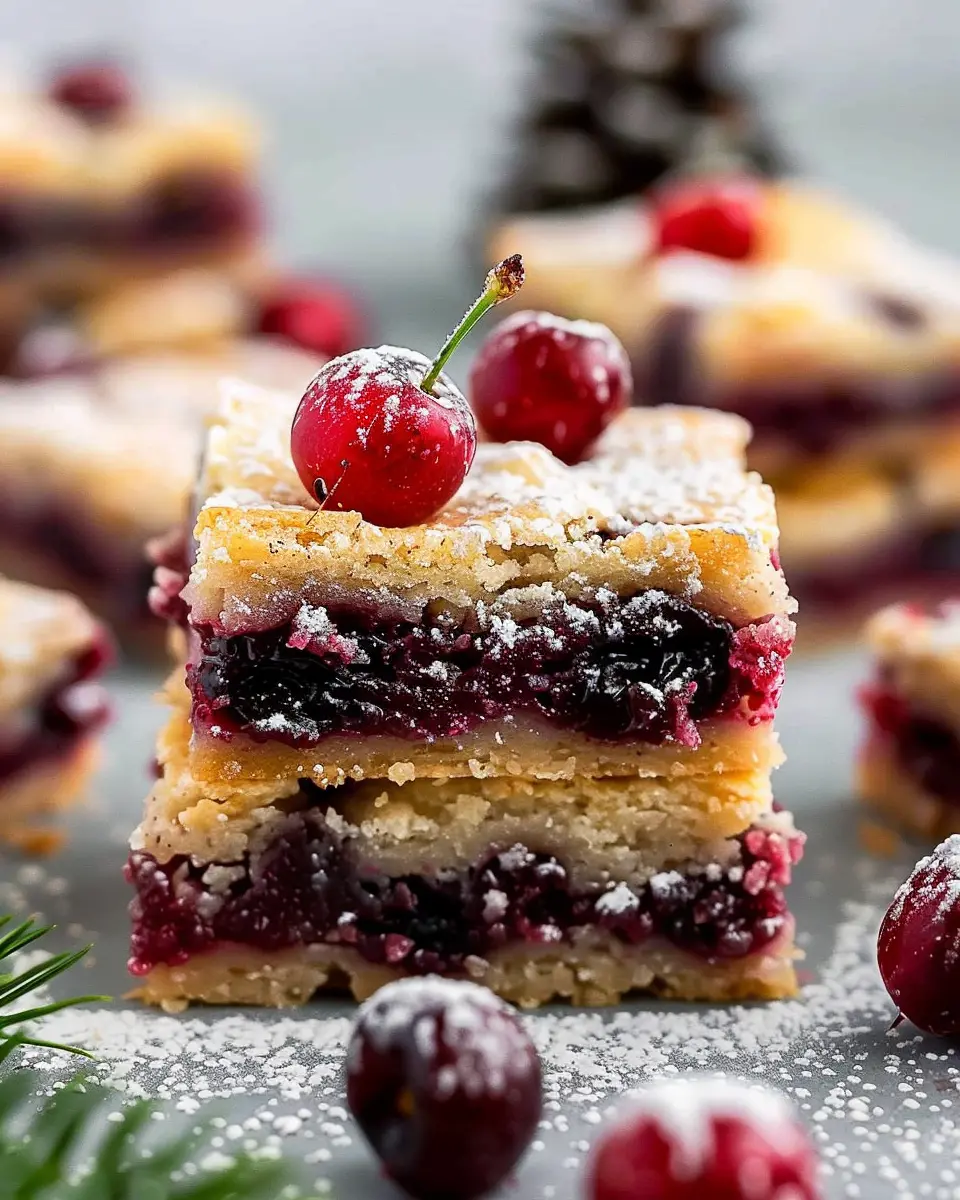
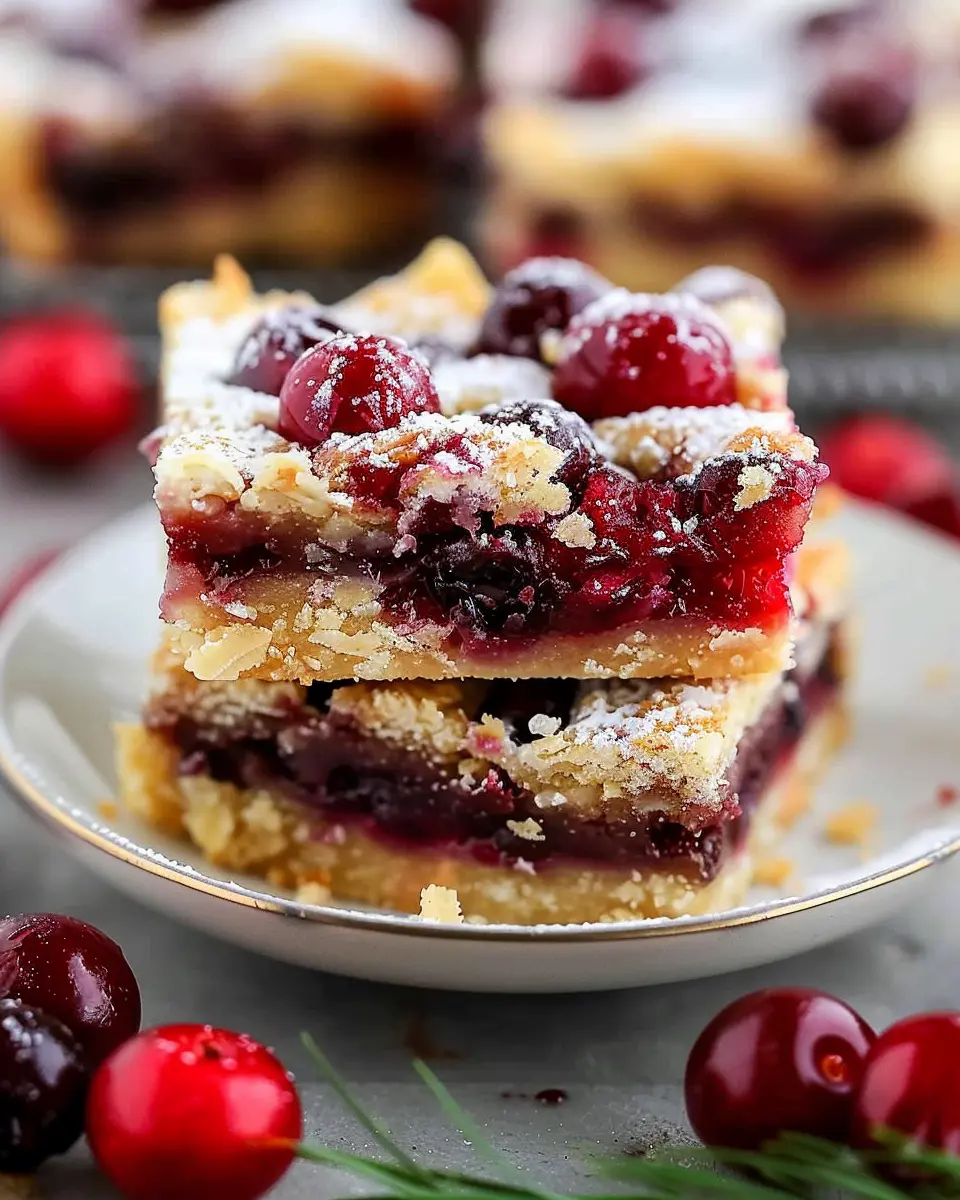
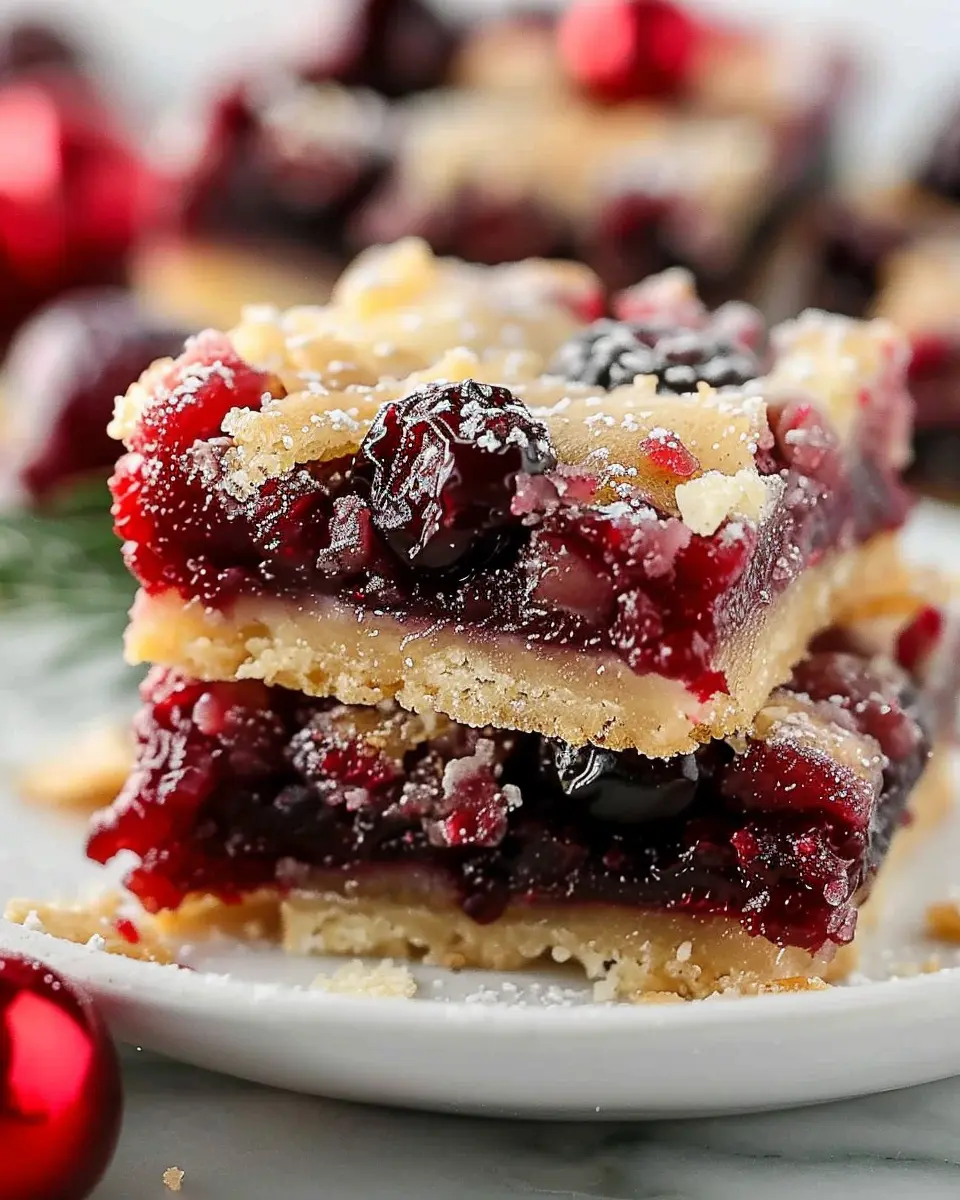
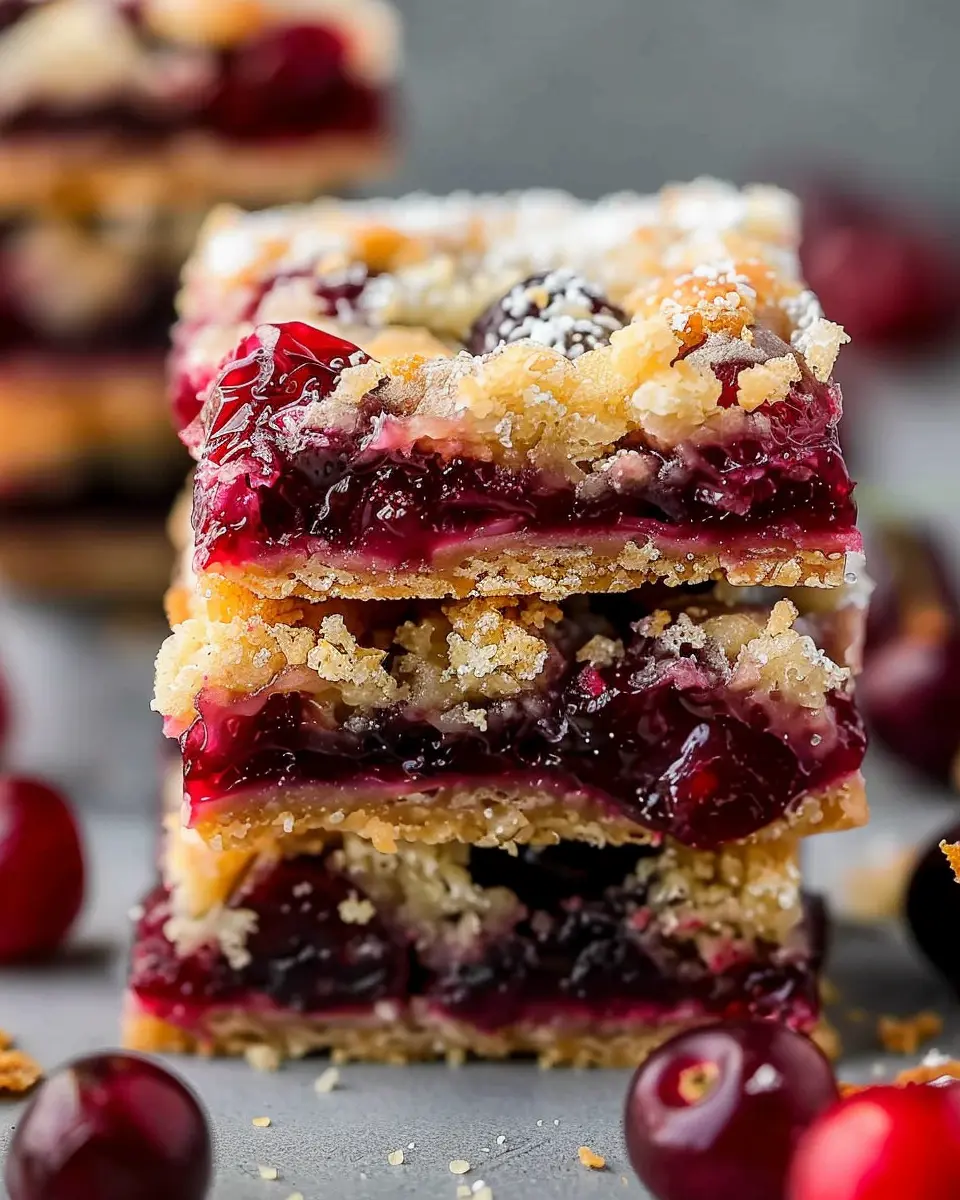
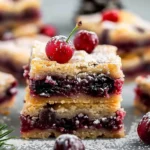
Introduction to Christmas Cherry Bars
The holiday season is just around the corner, and it’s the perfect time to whip up some festive treats that will make your celebrations even sweeter. Enter the delightful Christmas Cherry Bars. These bars are not only visually appealing, with their vibrant red cherries, but they’re also bursting with flavor, making them an ideal addition to your holiday dessert repertoire.
Why Christmas Cherry Bars are the Perfect Holiday Treat
Have you ever felt overwhelmed by the endless options for holiday desserts? Christmas Cherry Bars stand out for their unique combination of sweet and tart flavors, straight from the heart of winter. Popping a bite-sized piece into your mouth feels like an instant festive cheer! Here’s why they should be on your holiday table:
-
Easy to Make: With straightforward ingredients and a simple method, these bars are perfect for both baking novices and seasoned chefs alike. You can easily whip them up while checking off your holiday shopping list.
-
Versatile and Customizable: While the classic version is undeniably delicious, feel free to play around! Incorporate different nuts, swap cherries for cranberries, or even add a hint of coconut if you’re feeling adventurous.
-
Beautiful Presentation: The stunning red cherries provide a festive look that can brighten any dessert tray. They’re not just tasty; they’re eye-catching, making them a generous gift for friends and family.
-
Perfect for Sharing: It’s the season of giving! Whether you’re hosting a holiday party or visiting friends and family, these Christmas Cherry Bars are easy to transport and share. Plus, they stack neatly, ensuring none of your treats get crushed in transit.
If you’re hungry for more festive ideas, consider checking out some great holiday baking resources from The Spruce Eats or AllRecipes. Both sites are treasure troves of recipes that can inspire your holiday baking.
So, as you gather around with loved ones, consider making Christmas Cherry Bars a new holiday tradition. Not only will they bring joy and deliciousness to your festive celebrations, but they’ll also create lasting memories—all while being simple enough to let your holiday spirit shine!
Ingredients for Christmas Cherry Bars
Making Christmas Cherry Bars is a delightful way to infuse holiday cheer into your kitchen! This tasty treat combines flavors and textures that are sure to impress your guests. Here’s what you’ll need to gather:
Key Ingredients
- Cherry Pie Filling: 1 can (21 oz) – The star of the show! Opt for premium brands for a real flavor boost.
- Sugar: 1 cup – Sweetens the deal.
- Butter: 1/2 cup (melted) – Adds richness; don’t skimp on quality here!
- Flour: 1 1/2 cups – Provides the structure for those beautiful bars.
- Baking Powder: 2 tsp – Helps the bars rise perfectly.
- Vanilla Extract: 1 tsp – A dash of this brings all the flavors together.
- Eggs: 2 large – Essential for binding the ingredients and adding moisture.
- Chopped Nuts: 1/2 cup (optional) – Toasted walnuts or almonds add a lovely crunch.
Gather these ingredients, and you’re on your way to creating festive Christmas Cherry Bars that everyone will love! For a more delightful touch, consider exploring some creative variations that can elevate your bars even further. You can learn more about altering recipes to suit your taste on Food Network.
Ready to whip up these festive treats? Let’s dive in!
Preparing Christmas Cherry Bars
The holiday season is synonymous with delicious treats, and these Christmas cherry bars are a fantastic addition to your festive spread. Not only are they scrumptious, but they also provide a delightful mix of flavors that celebrate the spirit of the season. Whether you’re looking for an easy dessert to share at a gathering or a new recipe to impress family, these bars are a must-try. Let’s dive into the simple steps that lead to these cherry-laden delights!
Gather Your Ingredients
Before we begin, it’s important to gather all the necessary ingredients. This will make the cooking process smooth and fuss-free. For Christmas cherry bars, you’ll need:
- 1 cup unsalted butter, softened
- 1 cup granulated sugar
- 2 large eggs
- 1 teaspoon pure vanilla extract
- 2 cups all-purpose flour
- 1 teaspoon baking powder
- 1/2 teaspoon salt
- 1 can (21 oz) cherry pie filling
- Optional: powdered sugar for dusting on top
Having everything prepped ahead of time not only saves you from mid-baking brain freezes but also adds an element of joy to your cooking experience!
Preheat the Oven and Prepare the Baking Pan
Set your oven to 350°F (175°C) and give it a few moments to warm up. While that’s happening, grab a baking pan—around 9×13 inches works perfectly. Grease the pan lightly with butter or non-stick spray, which will ensure easy removal of those freshly baked Christmas cherry bars. You can also line the pan with parchment paper for an extra layer of assurance.
Cream the Butter and Sugar
In a large mixing bowl, combine the softened butter and granulated sugar. Using an electric mixer on medium speed, cream them together until the mixture turns light and fluffy. This step is crucial as it incorporates air into your batter, resulting in moist and tender bars. You can think of this as the foundation for your delicious dessert!
Incorporate the Eggs and Vanilla
Next, it’s time to mix in the eggs and vanilla extract. Add the eggs one at a time, ensuring each is fully incorporated before adding the next. Stir in the vanilla extract for that irresistible aromatic quality that makes any dessert feel special. Mixing these wet ingredients well blends the flavors beautifully, paving the way for that iconic cherry taste.
Mix in the Dry Ingredients
Now, take another bowl and whisk together the flour, baking powder, and salt. Gradually add this dry mixture to your wet mixture, stirring gently until it’s just combined. Be careful not to overmix; we want a tender texture for those Christmas cherry bars! This is where you can really take a moment to appreciate how these simple ingredients can create something so inviting.
Layer and Bake the Bars
Pour half of the batter into the prepared baking pan, spreading it evenly. Now, it’s time to layer! Spoon the cherry pie filling over the batter, spreading it out to cover as much surface area as possible. Then, gently dollop the remaining batter over the cherries, being sure to leave some visible cherry peeking through. This is what makes the finished product look so inviting!
Pop your pan into the preheated oven and bake for about 30-35 minutes. Keep an eye on them in the last few minutes—your kitchen will smell amazing, and you’ll want to catch them just before they turn golden brown. Once baked, let them cool before cutting them into bars. Dust with powdered sugar if you like a little extra flair.
And there you have it! These Christmas cherry bars are sure to become a new holiday tradition in your home—easy to make and even easier to enjoy with friends and family. Make sure to share your creations and enjoy every scrumptious bite!
Variations on Christmas Cherry Bars
Adding Almond Extract for an Extra Flavor Boost
One delightful way to enhance your Christmas Cherry Bars is by incorporating almond extract into the batter. This ingredient pairs beautifully with cherries, offering a nutty undertone that elevates the overall flavor profile. Just a teaspoon or two can transform your bars from ordinary to extraordinary.
To add almond extract, simply mix it into the batter after creaming the butter and sugar. It’s a subtle change that makes a big difference. If you’re particularly adventurous, consider mixing in some finely chopped almonds for added texture and crunch. This twist can wow your friends and family and garner rave reviews during holiday gatherings.
Using Different Fruit Fillings
While cherries are the star of the show, don’t hesitate to play around with different fruit fillings in your Christmas Cherry Bars. Imagine the sweet tartness of cranberries or the vibrant flavor of blueberries! Each alternative brings its unique charm and can be easily substituted in the original recipe.
Here are a few ideas to consider:
- Cranberries: Their slight tartness pairs well with the buttery crust.
- Blueberries: A juicy, sweet addition that perfectly complements almond extract.
- Raspberries: Adds a tangy kick and a burst of color.
Feel free to mix and match fruit fillings for a fun holiday treat that caters to everyone’s taste buds. Variety not only keeps things exciting but also allows you to showcase your creative side in the kitchen. You might even want to check out resources like King Arthur Baking for tips and tricks on crafting delicious bar recipes.
So get ready to impress your guests with your personalized twist on these classic Christmas Cherry Bars. Happy baking!
Cooking Tips and Notes for Christmas Cherry Bars
When preparing your Christmas Cherry Bars, the right techniques can make all the difference. Here are some friendly tips to elevate your baking game:
Use Fresh Ingredients
Opt for fresh, high-quality ingredients. This includes luscious cherries—fresh or canned in juice rather than syrup. If using canned, drain them well to avoid excessive moisture. You’ll be amazed at how this little detail enhances flavor!
Mind the Oven Temperature
Precision is key. Preheat your oven to the appropriate temperature, typically around 350°F (175°C). An oven thermometer can ensure accuracy, so your bars bake evenly.
Chill Before Cutting
Allow your Christmas Cherry Bars to cool completely before slicing. This ensures clean cuts and keeps the delicious layers intact. For an extra treat, refrigerate them for an hour after baking.
Experiment with Flavors
Don’t hesitate to play with spices! A pinch of cinnamon or nutmeg can add warmth that complements the cherries beautifully. For more inspiration, check out Food Network’s baking tips.
Remember, baking is not just about following recipes; it’s about enjoying the process. Happy baking!
Serving suggestions for Christmas Cherry Bars
When it comes to sharing your delightful Christmas Cherry Bars, the presentation can make all the difference. Here are some thoughtful suggestions on how to serve and enjoy these festive treats with friends and family.
Pair with Festive Beverages
Complement your bars with warm holiday drinks. Consider serving them alongside a rich hot chocolate or spiced apple cider. The sweetness of the Christmas Cherry Bars balances beautifully with the warmth of these drinks, making your dessert truly memorable.
Ideal for Gatherings
These bars aren’t just delicious; they’re also easy to share! Perfect for holiday parties or potlucks, cut them into small squares, and arrange them on a decorative platter. A garnish of powdered sugar or fresh cherries adds a festive touch and makes for an Instagram-worthy display.
Personal Touch with Toppings
Elevate your Christmas Cherry Bars by offering a variety of toppings. Why not create a little topping station with cream cheese frosting, chopped nuts, or whipped cream? Guests will love customizing their servings, making each bite uniquely their own.
For more inspiration on festive desserts, check out Food Network or Epicurious. Happy baking!
Time breakdown for Christmas Cherry Bars
When it comes to preparing delicious Christmas Cherry Bars, knowing how long each stage will take can help you plan your baking day better. Here’s a handy breakdown to keep everything running smoothly.
Preparation time
You’ll want to set aside about 15-20 minutes for preparation. This includes gathering your ingredients and whipping up that delightful cherry batter. Pro tip: Measure out your ingredients and have everything ready to go for a seamless baking experience!
Baking time
Once your bars are in the oven, let them bake for 25-30 minutes. The lovely aroma of the Christmas Cherry Bars will fill your kitchen, making it hard to resist sneaking a taste!
Total time
In total, you’re looking at roughly 45 minutes to 1 hour from start to finish. That means you’ll have plenty of time to enjoy a warm slice with a cup of tea or coffee while you catch up on your favorite holiday movie.
For more festive ideas, check out this article on holiday baking tips that might inspire your next baking adventure!
Nutritional facts for Christmas Cherry Bars
If you’re excited to indulge in Christmas Cherry Bars this holiday season, knowing their nutritional content is helpful. Let’s break it down:
Calories
One serving of these delightful bars typically contains around 150 calories. Perfect for satisfying your sweet tooth without going overboard during holiday feasts!
Sugars
These festive treats include approximately 10 grams of sugar per bar. While the natural sweetness of cherries shines through, you’ll want to balance your intake with other festive goodies.
Carbohydrates
With about 20 grams of carbohydrates per serving, Christmas Cherry Bars offer a cozy mix of flavors and energy. These bars are an excellent option for a little pick-me-up during busy holiday preparations.
Incorporating Christmas Cherry Bars into your holiday celebrations adds a sweet and balanced treat that’s sure to please. If you want to learn more about cherry’s health benefits, check out the Health Benefits of Cherries. Ready to make them? Let’s dive into the recipe!
FAQs about Christmas Cherry Bars
Can I use fresh cherries instead of pie filling?
Absolutely! Using fresh cherries adds a delightful twist to your holiday Christmas Cherry Bars. Just remember to pit and chop the cherries before incorporating them into the recipe. You might want to sprinkle a bit of sugar on them to enhance their sweetness, especially if they’re slightly tart. This substitution will require some adjustments to the moisture levels, so keep an eye on the baking time to ensure perfect bars.
How do I store leftover Christmas Cherry Bars?
Storing your delicious Christmas Cherry Bars is simple! Once cooled, cover them with plastic wrap or transfer them to an airtight container. They can be stored at room temperature for about 3-5 days, or in the fridge for up to a week. For longer storage, consider freezing them. Just make sure to wrap them tightly in plastic and then in foil or a freezer bag to prevent freezer burn. When you crave a sweet treat, simply thaw them overnight in the refrigerator.
Can these bars be made in advance?
Certainly! Making your Christmas Cherry Bars in advance is a great way to ease holiday stress. You can bake them up to two days ahead of your festivities; just store them properly as described above to maintain their freshness. If you want to bake even further in advance, consider freezing them after they’ve cooled. This will keep them fresh for up to three months. When you’re ready to enjoy, let them thaw in the fridge and serve at room temperature for the best flavor.
For more delicious holiday recipes, you might enjoy visiting Food Network or AllRecipes. Happy baking!
Conclusion on Christmas Cherry Bars
As the festive season approaches, Christmas Cherry Bars can truly elevate your holiday gatherings. This delightful treat, with its vibrant cherry filling and buttery crust, captures the essence of Christmas in every bite. Imagine sharing a plate of these bars with your friends and family while reminiscing about cherished memories.
To make your Christmas Cherry Bars extra special, consider pairing them with a scoop of vanilla ice cream or a dollop of whipped cream for that perfect contrast. If you’re feeling adventurous, try customizing the recipe with your favorite nuts or spices.
For more delightful treats, check out this article on holiday desserts. Remember, cooking is about enjoying the process as much as indulging in the final product. Happy baking!
PrintChristmas Cherry Bars: Easy Festive Treats for Your Holiday Table
Delight your guests this holiday season with these easy and delicious Christmas Cherry Bars, a perfect festive treat for your holiday table.
- Prep Time: 15 minutes
- Cook Time: 35 minutes
- Total Time: 50 minutes
- Yield: 12 bars 1x
- Category: Dessert
- Method: Baking
- Cuisine: American
- Diet: Vegetarian
Ingredients
- 1 cup all-purpose flour
- 1 cup granulated sugar
- 1/2 cup butter, softened
- 2 large eggs
- 1 teaspoon vanilla extract
- 1 jar (10 oz) cherry pie filling
- 1/2 teaspoon baking powder
- 1/4 teaspoon salt
Instructions
- Preheat the oven to 350°F (175°C). Grease a baking dish.
- In a mixing bowl, cream together softened butter and sugar.
- Add eggs and vanilla, mixing until combined.
- Gradually add flour, baking powder, and salt, stirring until just combined.
- Spread half the batter into the prepared baking dish.
- Top with cherry pie filling, then spoon the remaining batter on top.
- Bake for 30-35 minutes, or until golden and a toothpick comes out clean.
- Let cool before cutting into bars.
Notes
- For extra flavor, consider adding almond extract in addition to the vanilla.
- Serve warm with a scoop of vanilla ice cream for a delightful dessert.
Nutrition
- Serving Size: 1 bar
- Calories: 180
- Sugar: 16g
- Sodium: 120mg
- Fat: 8g
- Saturated Fat: 5g
- Unsaturated Fat: 3g
- Trans Fat: 0g
- Carbohydrates: 23g
- Fiber: 1g
- Protein: 2g
- Cholesterol: 40mg
Keywords: Christmas Cherry Bars, festive treats, holiday recipes