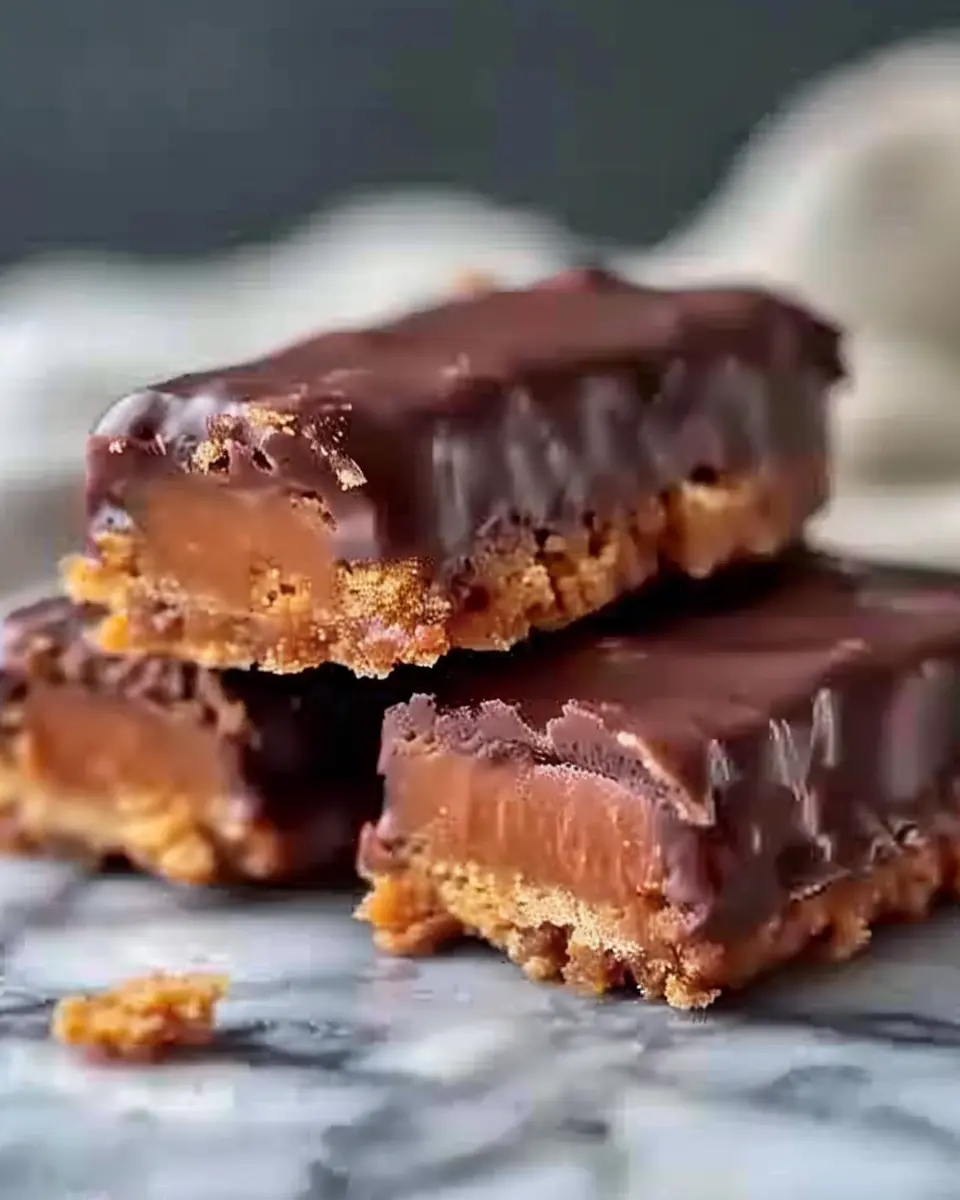
Introduction to Healthy Homemade Butterfingers
If you’re a fan of that sweet, nutty crunch of a classic Butterfinger, you’re not alone. Many of us have childhood memories tied to this delectable candy bar. But what if I told you that you can enjoy healthy homemade Butterfingers without the guilt? That’s right! Making your own version allows you to indulge in all that deliciousness while also keeping your health goals in check.
Why Homemade Butterfingers?
Creating your own Butterfingers at home has several advantages that go beyond just being healthier.
-
Control over Ingredients: When you whip up your own batch, you can choose nutrient-rich ingredients, cutting out refined sugars and unhealthy fats. This means you can replace processed ingredients with natural options, which is a big win for your body!
-
Customization: Love peanut butter? You can add a little extra. Prefer a dairy-free version? Simply swap out traditional chocolate for a plant-based alternative. The possibilities are endless!
-
Cost-Effective: Store-bought candies can add up quickly, especially if you have a sweet tooth. Making them at home not only saves you money but also ensures you have the freshest ingredients on hand.
-
Fun Activity: Making candy can be a delightful experience! Gather some friends or involve the kids. It can turn into a fun, creative cooking session and a great way to bond.
The Health Boost
According to nutrition experts, homemade treats can be far more nutritious than their commercial counterparts. For instance, using whole ingredients like natural sweeteners and nut butters can offer higher levels of protein and fiber. You’ll give your body the energy it craves without the sugar crash later. Plus, knowing exactly what goes into your treat can provide peace of mind—a critical factor in today’s health-conscious world.
If you’re ready to ditch the guilt and enjoy a healthier twist on an old favorite, stay tuned for the full recipe! Your taste buds and body will thank you.
For more information on the benefits of homemade snacks, check out reputable sources like Harvard Health and Nutrition.org.
Ingredients for Healthy Homemade Butterfingers
Creating healthy homemade Butterfingers is not only satisfying, but it’s also a way to control what goes into your treats. Here’s what you’ll need to whip up these delicious snacks that are sure to impress both your friends and your taste buds.
Essential Ingredients
- 1 cup natural peanut butter: Go for unsweetened to keep things healthy.
- 1/4 cup honey or maple syrup: This will help bind everything together and add some natural sweetness.
- 1 cup whole grain oats: These provide a hearty texture and extra fiber.
- 1/2 cup dark chocolate chips: Opt for 70% cacao or higher for a rich taste with health benefits.
- 1 teaspoon vanilla extract: A little dash to elevate the flavor.
- Pinch of salt: To balance the sweetness and enhance the chocolate.
These ingredients come together beautifully to create a guilt-free treat that doesn’t compromise on flavor. If you want to make it even healthier, consider using sugar-free chocolate or experimenting with different nut butters. For tips on using oats in healthy recipes, check out resources from Healthline or Verywell Fit.
So, gather these ingredients and get ready to indulge in some deliciously healthy homemade Butterfingers!
Preparing Healthy Homemade Butterfingers
Creating your own healthy homemade Butterfingers can be a delightful, rewarding experience. Not only do you control the ingredients, ensuring a healthier version, but you also get the satisfaction of crafting something delicious from scratch. Let’s break down this process step-by-step!
Step 1: Prepare the baking pan
Start by preparing your baking pan. A simple 9×9 inch pan works perfectly for this recipe. Line the bottom and sides with parchment paper, leaving a bit of overhang on the edges. This will make it easy to lift out your healthy homemade Butterfingers once they’re set. Make sure to grease the parchment lightly to avoid sticking, which is vital for successful bar removal.
Step 2: Mix the peanut butter base
Next, grab your mixing bowl and blend together your base ingredients. You’ll need:
- 1 cup of natural peanut butter (or almond butter if you prefer)
- 1/4 cup of honey or maple syrup for sweetness
- A pinch of salt if your peanut butter is unsalted
Mix until smooth and well combined. This mixture is the heart of your healthy homemade Butterfingers, adding that rich, nutty flavor we all love. Remember, the quality of your ingredients matters, so opt for organic where possible. Check out Healthline for the benefits of using pure nut butters!
Step 3: Crush the cornflakes
Now, onto the crunchy aspect of our bars! Take about 2 cups of whole-grain cornflakes and crush them. You can use a rolling pin or simply place the flakes in a plastic bag and crush them with your hand. Aim for a consistency that’s fine but not powdery. The crunch adds texture and an authentic Butterfinger feel. Whole-grain options are perfect for maintaining that wholesome aspect, and they bring extra fiber to your treat.
Step 4: Combine and press the mixture
In a large bowl, combine your peanut butter mixture with the crushed cornflakes. Stir until the flakes are fully coated in the peanut butter mix, and everything is thoroughly combined. Now, transfer this mix into your prepared baking pan. Press it down firmly, ensuring it’s evenly distributed. This step is crucial as it ensures your bars hold together nicely after chilling. Use the back of a measuring cup to make this easier!
Step 5: Chill the mixture
Now it’s time to chill your masterpiece. Place the pan in the refrigerator for at least an hour or until the mixture is firm. This step helps the bars set up properly so they maintain their shape when cut. If you’re feeling impatient, you can pop them into the freezer for about 30 minutes, but it’s best to chill them gently to avoid any texture changes.
Step 6: Melt the chocolate coating
While your mixture is chilling, get started on the chocolate coating. Use:
- 1 cup of dark chocolate chips (dairy-free if needed)
- 1 tablespoon of coconut oil
Melt the chocolate and coconut oil together in a microwave-safe bowl, heating in short intervals (15 to 30 seconds). Stir until smooth and glossy. This chocolate layer will provide that signature Butterfinger finish while also keeping things healthier with dark chocolate.
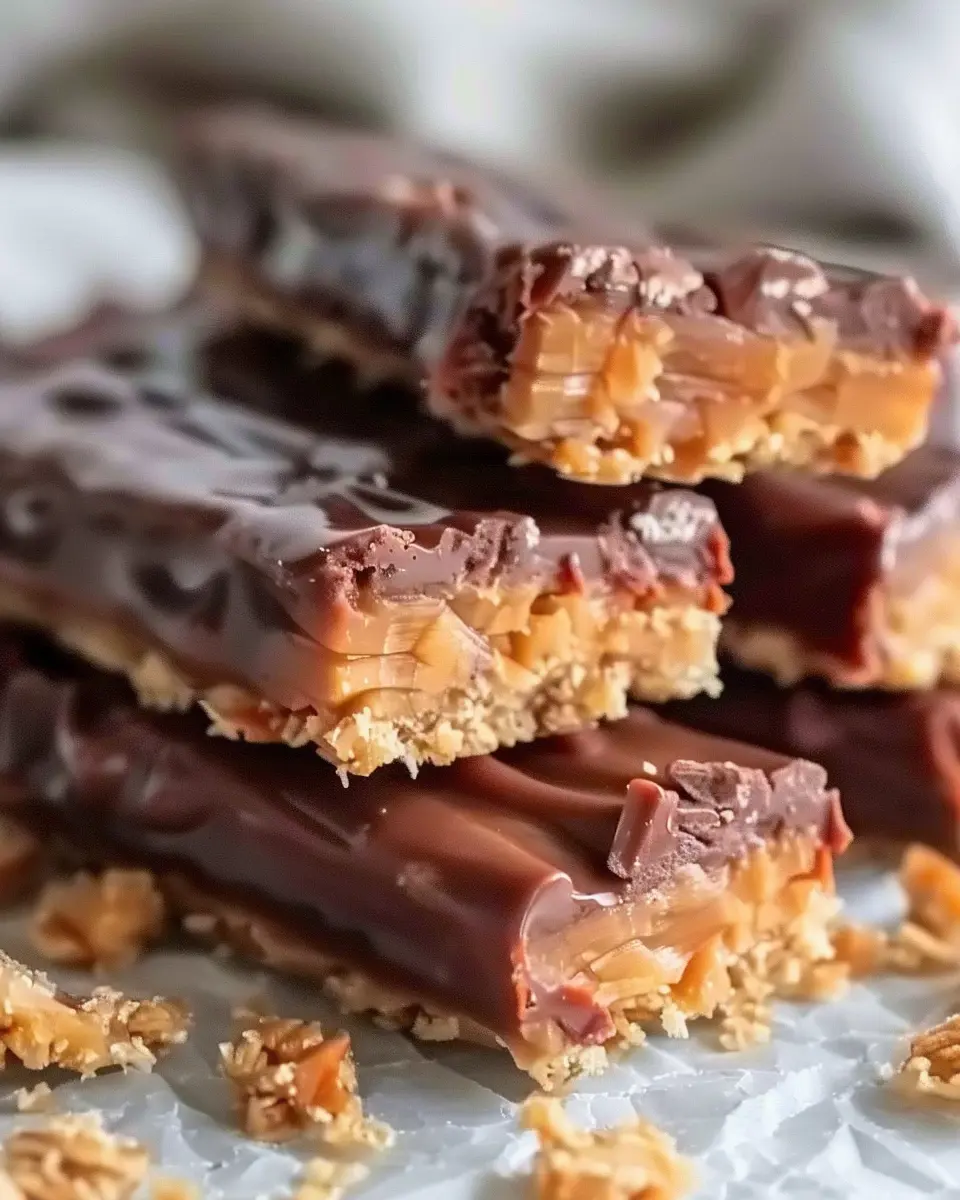
Step 7: Cut and coat the bars
Once your mixture is firm, remove it from the refrigerator and lift it out of the pan using the parchment paper overhang. Use a sharp knife to cut it into bars or squares (you make the portions, so feel free to adjust sizes). Then, dip each bar into the melted chocolate, ensuring it’s fully coated. Place them on a wire rack or parchment paper to allow the chocolate to set.
Enjoy your healthy homemade Butterfingers as a guilt-free treat. Not only will they satisfy your sweet tooth, but you’ll also feel good about the ingredients you used. For more variations, consider adding in nuts or coconut flakes! Here’s to making healthier snacking fun and delicious!
Variations on Healthy Homemade Butterfingers
When it comes to making healthy homemade Butterfingers, the great news is that you can tailor them to your taste preferences and dietary needs. Let’s explore some exciting variations to elevate your treat game!
Crunchy Nut Butter Alternatives
The foundation of your Butterfingers is the nut butter, and the choices here are abundant. While classic recipes often call for peanut butter, consider these alternatives:
- Almond Butter: Rich in vitamin E, almond butter lends a deliciously nutty flavor.
- Cashew Butter: Creamy and slightly sweet, cashew butter can give your bars a decadent twist.
- Sunflower Seed Butter: Great for nut-free diets, sunflower seed butter is packed with nutrients and has a mild, pleasant taste.
Choosing a nut butter you love can make your healthy homemade Butterfingers all the more enjoyable.
Different Chocolate Options
Chocolate coating is crucial for that signature Butterfinger bite. Here are some fantastic alternatives to traditional chocolate:
- Dark Chocolate: Opt for high-cocoa content chocolate to indulge your sweet tooth while keeping it healthy, as it’s loaded with antioxidants.
- Cocoa Powder: Mix cocoa with a little coconut oil for a lighter coating that still satisfies those chocolate cravings.
- White Chocolate: For a sweeter, creamier experience, consider using a healthier version of white chocolate. Look for options sweetened with coconut sugar or stevia.
Add-ins for Extra Flavor
Why stop at just nut butter and chocolate? Adding a few extras can enhance the taste and texture of your healthy homemade Butterfingers:
- Sea Salt: A sprinkle of sea salt on top can heighten the sweetness and create a delectable contrast.
- Coconut Flakes: Adding unsweetened coconut can provide a lovely chewiness.
- Spices: Consider a dash of cinnamon or vanilla extract to give your bars a unique twist.
Feel inspired to mix and match these variations! Not only will you create your own delicious version of healthy homemade Butterfingers, but you’ll also take a satisfying step towards healthier snacking. For more insights on nutritious ingredients, you can check this resource for expert nutrition advice.
Cooking tips and notes for Healthy Homemade Butterfingers
Choosing the right peanut butter
When making healthy homemade Butterfingers, the choice of peanut butter is crucial. Opt for natural, unsweetened peanut butter that contains just peanuts and salt. This ensures that you’re not adding unnecessary sugars and preservatives. Brands like Nut Butter Bliss or Laura Scudder’s offer great options. How smooth do you like your candy? Crunchy peanut butter can add delightful texture—but smooth is classic!
Achieving the perfect texture with cornflakes
To achieve that signature crunch in your healthy homemade Butterfingers, use high-quality cornflakes. Look for ones with minimal added sugar to keep your bars guilt-free. Crush them slightly—too fine can lead to a clump, while too coarse might not bind well. You want that delicate balance that provides both texture and bite!
Working with chocolate
The final touch is chocolate, and for the best results, choose high-quality dark chocolate with at least 70% cocoa. Not only does it impart a rich flavor, but it’s also packed with antioxidants. Melt it slowly to avoid burning—using a double boiler is a foolproof method. Just remember, patience is key. Letting the chocolate cool slightly before dipping keeps your healthy homemade Butterfingers coating smooth and shiny.
For more tips on using healthier ingredients, check out Healthline’s guide on nutritious alternatives. Happy cooking!
Serving Suggestions for Healthy Homemade Butterfingers
Pairing with Fruit or Snacks
Healthy homemade Butterfingers can elevate your snack game when paired with fresh fruits or complementary snacks. Think about serving these delightful treats alongside slices of crisp apples or juicy pears. The sweetness of the fruit balances the richness of the Butterfingers, creating a satisfying contrast. If you’re feeling adventurous, try dipping your Butterfinger pieces in some yogurt or a healthy homemade chocolate sauce for an extra indulgent treat.
Creative Ways to Serve at Gatherings
Looking to impress guests at your next gathering? Present your healthy homemade Butterfingers on a classy platter with a variety of toppings, such as shredded coconut, chopped nuts, or even a sprinkle of sea salt. This not only enhances their visual appeal but allows your guests to customize their treats. You can also cut them into bite-sized portions and serve them at a sweets table, encouraging everyone to grab and go! For a refreshing drink option, consider pairing these Butterfingers with herbal iced tea or sparkling water infused with citrus—perfect for lightening up the mood!
For more serving ideas that can enliven your gatherings, check out the wide range of options from EatingWell.
Time breakdown for Healthy Homemade Butterfingers
Preparation time
Making your healthy homemade butterfingers is a breeze! You’ll need about 15 minutes to gather your ingredients and mix everything together. Don’t be afraid to get a little messy—cooking is half the fun!
Chill time
After preparation, the next step is the chilling period, which takes around 45 minutes. This waiting game is essential to ensure your bars set up perfectly and achieve that delightful crunch.
Total time
In total, you’re looking at just about 1 hour of hands-on time to whip up these wholesome treats. With such a quick turnaround, you can have a tasty, nutritious snack ready to enjoy in no time! Interested in exploring more healthy snack options? Check out my favorite healthy snacking ideas.
Nutritional Facts for Healthy Homemade Butterfingers
When you indulge in your healthy homemade Butterfingers, it’s good to know what’s going into these delicious treats. Let’s break down the nutritional facts so you can enjoy guilt-free!
Calories per bar
Each healthy homemade Butterfinger bar typically contains around 150 calories. This means you can enjoy a sweet treat without veering too far from your daily caloric goals!
Key nutrients
These homemade bars are more than just a sweet fix; they also pack a nutritional punch. Here are some of the key nutrients you can find in them:
- Protein: A great source for muscle repair, especially from nut butters.
- Healthy Fats: The fats from nuts and coconut keep you full longer.
- Fiber: Essential for digestive health, helping you feel satisfied without overindulging.
By making your own healthy homemade Butterfingers, you control the ingredients, letting you ditch the unhealthy additives often found in store-bought versions. Plus, check out resources like the Harvard T.H. Chan School of Public Health for more information on the impacts of nutrition on overall health. Isn’t it great to treat yourself while still nourishing your body?
FAQs about Healthy Homemade Butterfingers
Creating your own healthy homemade Butterfingers can leave you with questions, and that’s completely normal! Let’s dive into some common inquiries to make your experience even more enjoyable.
Can I use other nut butters?
Absolutely! While almond butter is my go-to choice for these healthy homemade Butterfingers, feel free to experiment with other nut butters like peanut butter or cashew butter. Just be mindful that each nut butter has a unique flavor and texture that may slightly alter the final outcome. For instance, if you use peanut butter, you might enjoy a bolder, earthier taste. You can learn more about various nut butters here.
How long do these bars last?
Once you’ve whipped up your batch of healthy homemade Butterfingers, store them in an airtight container. They typically last about one week at room temperature or can be kept for two weeks in the fridge. If you want to prolong their shelf life, consider freezing them, where they can stay fresh for up to three months. Just remember to wrap them individually to preserve that delightful crunch!
Is this recipe suitable for dietary restrictions?
Yes! This recipe can easily be tailored to accommodate various dietary needs. For a vegan version, use maple syrup instead of honey and select nut butter that’s explicitly labeled vegan. If you’re gluten-free, simply check all ingredients to ensure they are certified gluten-free. You can make your treats as versatile as you want while keeping them delicious.
Feel free to customize your healthy homemade Butterfingers to suit your preferences and dietary requirements! If you have other questions or tips, drop them in the comments!
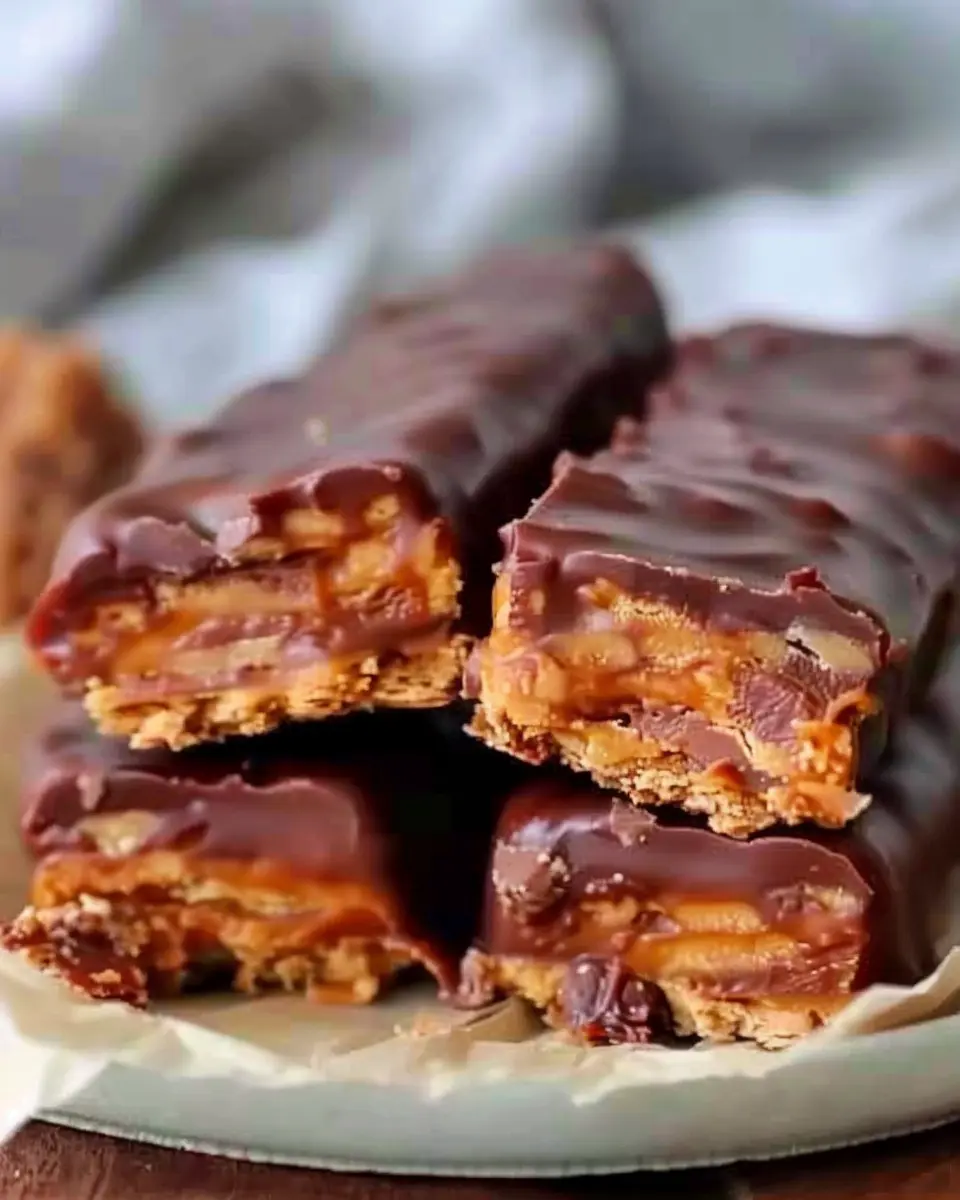
Conclusion on Healthy Homemade Butterfingers
Creating healthy homemade Butterfingers is not only a fun culinary adventure but also a rewarding way to enjoy a childhood favorite with a nutritious twist. By using simple ingredients like nut butter, dark chocolate, and a hint of sweetness from natural sweeteners, you can whip up these delicious treats without the guilt.
Whether you’re nibbling on them for a midday snack or sharing with friends, these bars are sure to impress. Remember, moderation is key, and homemade options often allow you to control the ingredients. For more ideas on healthy snacking, check out sites like Healthline or EatingWell. Happy baking!
PrintHealthy Homemade Butterfingers: Indulgent Treat You’ll Love

This Healthy Homemade Butterfingers recipe offers a guilt-free indulgence that satisfies your sweet tooth without compromising on health.
- Prep Time: 15 minutes
- Cook Time: 0 minutes
- Total Time: 1 hour 15 minutes
- Yield: 12 bars 1x
- Category: Dessert
- Method: No-Bake
- Cuisine: American
- Diet: Gluten-Free
Ingredients
- 1 cup natural peanut butter
- 1/4 cup honey or maple syrup
- 1 teaspoon vanilla extract
- 1 cup rolled oats
- 1 cup dark chocolate chips
- 1 tablespoon coconut oil
Instructions
- In a mixing bowl, combine the peanut butter, honey or maple syrup, and vanilla extract until smooth.
- Stir in the rolled oats until fully mixed.
- Press the mixture into a lined baking dish.
- In a microwave-safe bowl, melt the dark chocolate chips and coconut oil together until smooth.
- Spread the melted chocolate over the peanut butter mixture.
- Refrigerate for at least 1 hour until set, then cut into bars.
Notes
- For a crunchier texture, you can add chopped nuts.
- These bars can also be made vegan by using maple syrup.
Nutrition
- Serving Size: 1 bar
- Calories: 200
- Sugar: 8 grams
- Sodium: 150 mg
- Fat: 10 grams
- Saturated Fat: 3 grams
- Unsaturated Fat: 5 grams
- Trans Fat: 0 grams
- Carbohydrates: 25 grams
- Fiber: 3 grams
- Protein: 5 grams
- Cholesterol: 0 mg
Keywords: Healthy Homemade Butterfingers, snack, dessert, healthy treats