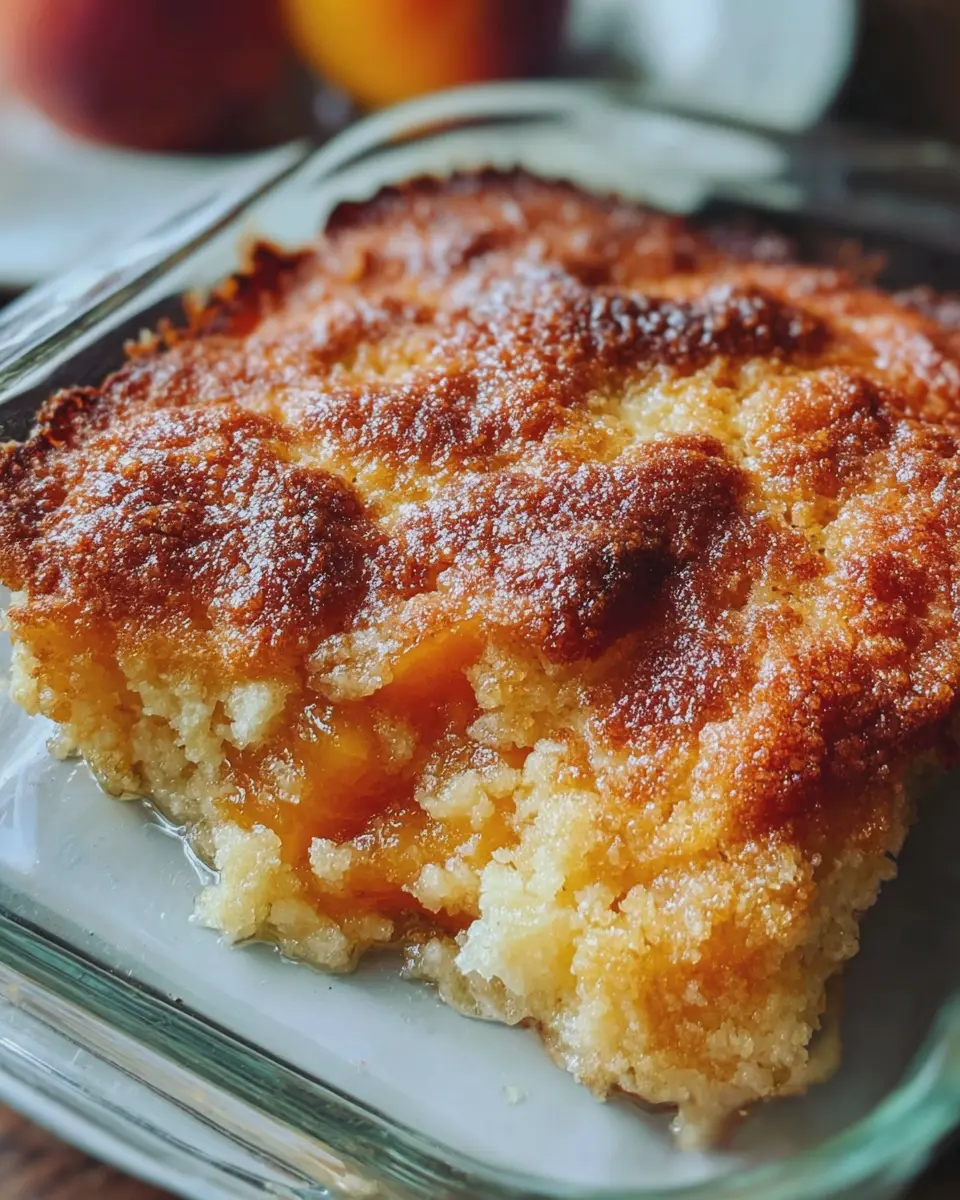
Introduction to Pumpkin Crisp
As the days get shorter and the weather cooler, many of us start craving the cozy flavors of fall. One dessert that perfectly encapsulates this season’s essence is pumpkin crisp. This delightful dish marries the rich, warm spices of pumpkin pie with a comforting, crumbly topping that adds a layer of texture you’re sure to love.
Why Pumpkin Crisp is the Perfect Fall Dessert
Have you ever found yourself wondering why certain flavors just feel like fall? Pumpkin crisp shines here, combining ingredients that evoke warmth and nostalgia. The blend of pumpkin puree with cinnamon, nutmeg, and ginger brings back memories of family gatherings, beautiful autumn leaves, and evenings by the fire. Did you know that pumpkin is packed with nutrition? It’s high in vitamins A and C, making this not only a treat but also a dash of health too!
This dessert’s unique texture is another reason why it stands out. The crisp topping—often made of oats and brown sugar—complements the smooth pumpkin layer, creating a satisfying contrast. It’s a dish that’s equally satisfying whether you enjoy it warm with a scoop of ice cream or cold right from the fridge.
And let’s not forget about the delightful aroma. Baking pumpkin crisp fills your home with a scent that invites everyone to gather in the kitchen. The mingling aromas of baked pumpkin and spices have even been shown to elevate mood and create a sense of comfort, according to several studies. So, not only does your pumpkin crisp make your taste buds happy, but it also turns your home into a haven of warmth and joy.
Whether you’re hosting a cozy dinner with friends or just looking for a sweet way to wind down after a long week, pumpkin crisp is an inviting choice. It’s effortless to whip up and can be made ahead of time, freeing you up to spend more time with your loved ones.
You can find some fantastic insights on making perfect pumpkin desserts on blogs like Love and Olive Oil or The Baker Mama that provide tips and inspiration just like this recipe.
Embrace the flavors of fall with a pumpkin crisp that feels like a hug in dessert form!
Ingredients for Pumpkin Crisp
Creating a delicious pumpkin crisp is all about using the right ingredients to bring out those cozy autumn flavors. Let’s break down what you’ll need for each layer of this delightful dessert.
Essential ingredients for the pumpkin pie layer
For the base of your pumpkin crisp, you’ll want to gather:
- Canned pumpkin: Opt for pure pumpkin puree for the best flavor.
- Brown sugar: This adds natural sweetness and a hint of molasses goodness.
- Granulated sugar: A touch for the harmony of flavors.
- Eggs: Binding everything together and adding richness.
- Evaporated milk: It gives that creamy texture we all crave.
- Pumpkin pie spice: A must-have for that signature fall flavor.
- Salt: Just a pinch to enhance the flavors.
If you’re looking for additional tips on how to select quality pumpkin, check out this resource from Food Network.
Key ingredients for the cinnamon streusel topping
Now, let’s whip up the crunchy topping that enhances your pumpkin crisp. Gather these ingredients:
- Old-fashioned oats: They provide a hearty and chewy texture.
- All-purpose flour: A classic choice to help bind your streusel.
- Granulated sugar: For sweetness in every bite.
- Brown sugar: This balances the flavors perfectly.
- Cinnamon: The aromatic spice that brings warmth.
- Butter: Chilled and cut into cubes for a flaky texture.
The combination of these ingredients will make your pumpkin crisp irresistible. If you’d like to learn more about the benefits of using oats, check out this article on health benefits from the National Institutes of Health.
Gather these goodies and get ready to create something delicious!
Preparing Pumpkin Crisp
Making a delicious pumpkin crisp is a delightful experience that captures the essence of fall while being easy enough for weeknight baking. This warm dessert, topped with a crispy streusel layer, has a comforting flavor that’s perfect for gatherings or a cozy night in. So let’s dive right into the steps to create a scrumptious pumpkin crisp that will make your taste buds sing!
Preheat the oven and prepare your baking dish
Before we get all fancy with the ingredients, let’s set the scene. Preheating your oven to 350°F (175°C) is essential, as it ensures even baking. While that heat is building up, grab a 9×13-inch baking dish and lightly grease it with cooking spray or butter. This small step will keep your pumpkin crisp from sticking to the dish and make serving it a breeze.
Mix the pumpkin pie filling ingredients
Now onto the fun part—creating that luscious pumpkin pie filling! In a large mixing bowl, combine the following ingredients:
- 1 can (15 oz) pumpkin puree
- 1 cup heavy cream (or evaporated milk for a lighter option)
- ¾ cup brown sugar
- 1 tablespoon pumpkin pie spice (or a mix of cinnamon, nutmeg, and ginger)
- 3 large eggs
- 1 teaspoon vanilla extract
- A pinch of salt
Whisk these ingredients together until smooth. The mixture should be creamy with a hint of that warm spice aroma. According to the Pumpkin Research Institute, pumpkin is not just delicious but also packed with vitamins A and C, making your pumpkin crisp a treat that’s good for you too!
Create the cinnamon streusel topping
While that filling is waiting to be poured into your dish, let’s prepare the cracking topping! In another bowl, mix together:
- 1 cup rolled oats
- 1 cup all-purpose flour
- ½ cup brown sugar
- 1 teaspoon ground cinnamon
- ½ cup cold butter, diced into small cubes
Use your fingers or a pastry cutter to combine until the mixture resembles coarse crumbs. A good streusel should have some chunky bits to create that satisfying crunch when baked. This layer is what elevates your pumpkin crisp from ordinary to extraordinary!
Assemble the layers in the baking dish
With your filling and topping ready, it’s time to assemble everything. Pour the pumpkin filling into your prepared baking dish, spreading it evenly with a spatula. Then sprinkle the cinnamon streusel topping generously on top. Feel free to add a handful of chopped nuts like pecans or walnuts for an extra layer of texture and flavor.
Bake and monitor for the perfect golden finish
Place your assembled pumpkin crisp into the preheated oven and bake for about 45-50 minutes. Keep an eye on it during the last 10 minutes; you want a beautiful golden brown color on your topping. To check for doneness, gently shake the dish; the filling should be set but still slightly wobbly in the center. Once it’s done, let it cool for about 15 minutes to allow those flavors to meld beautifully.
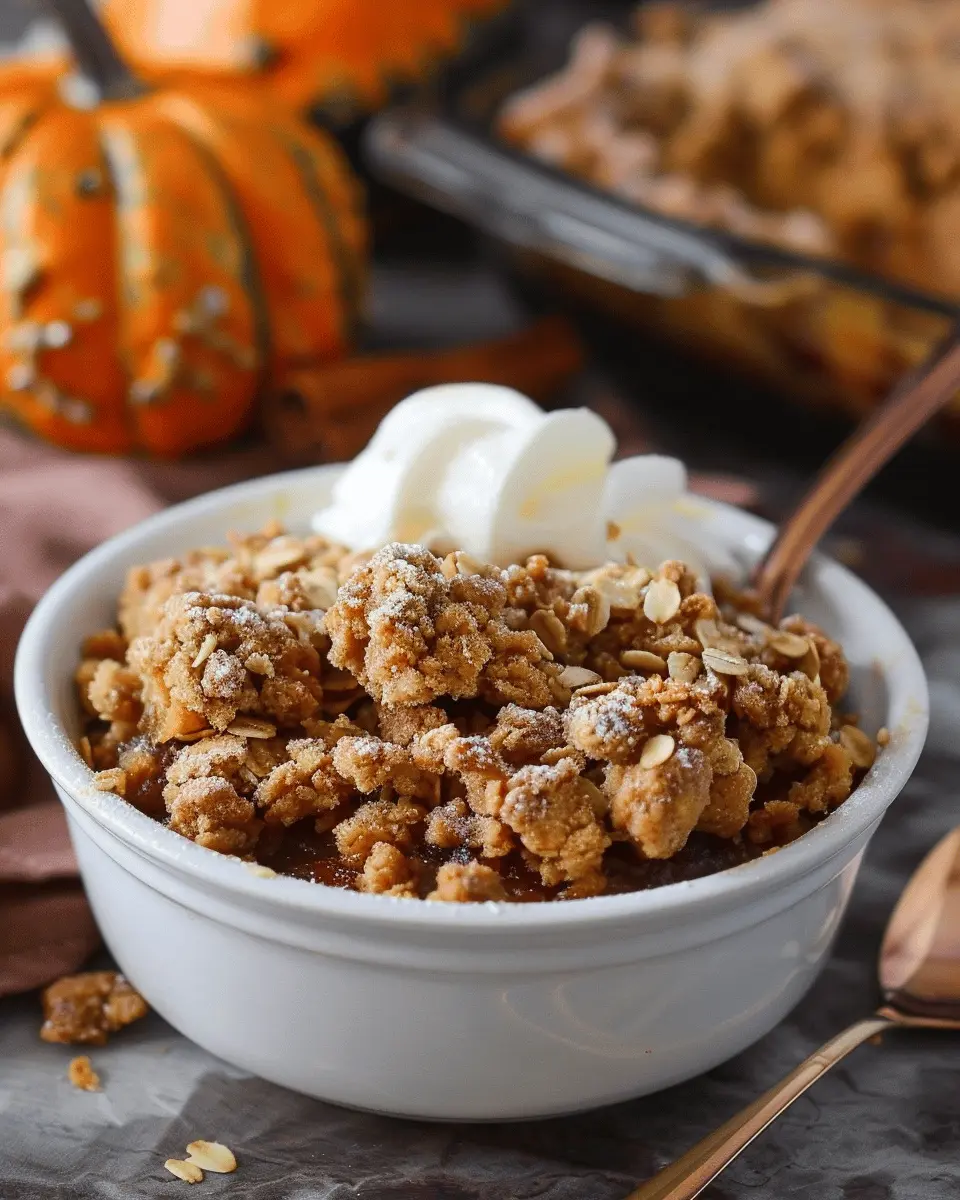
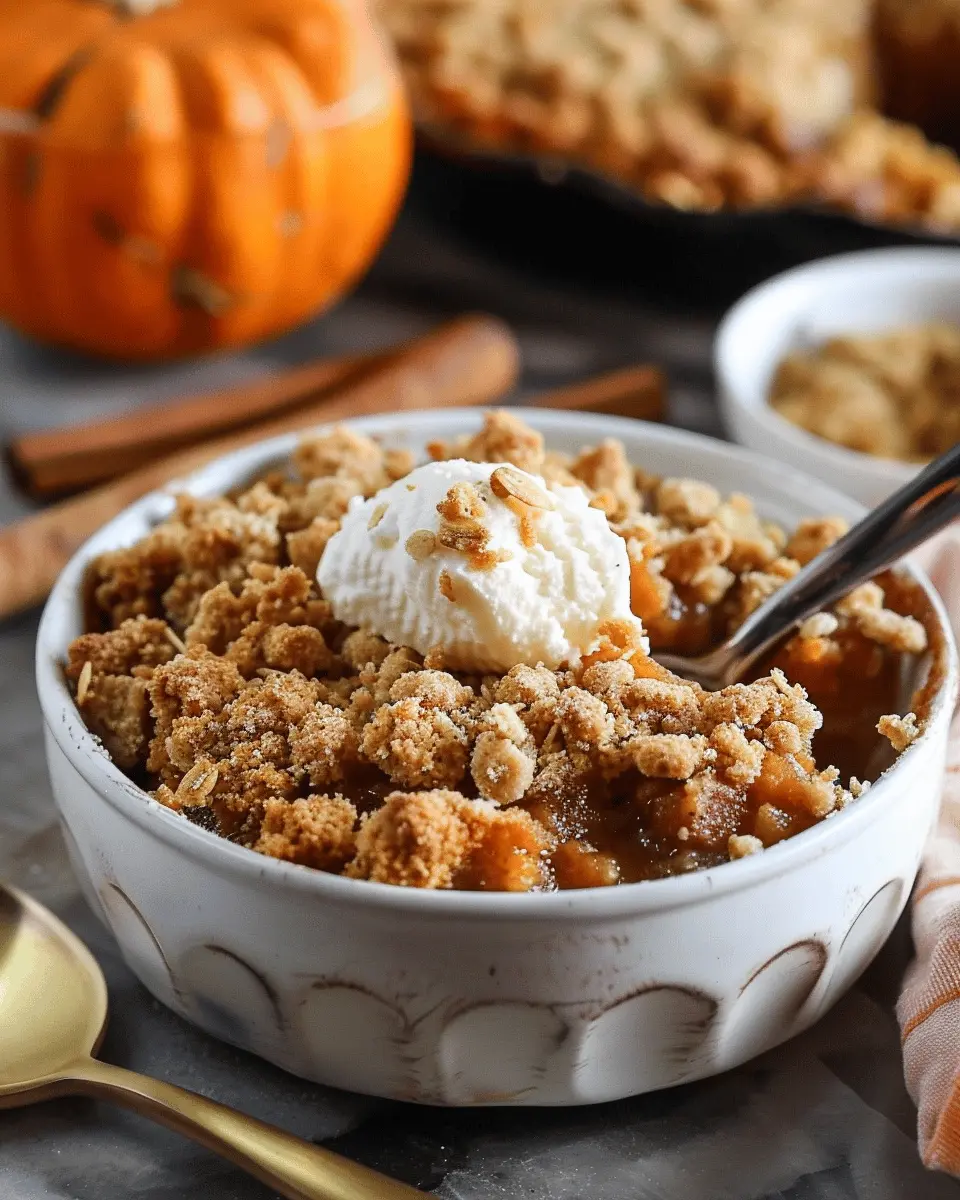
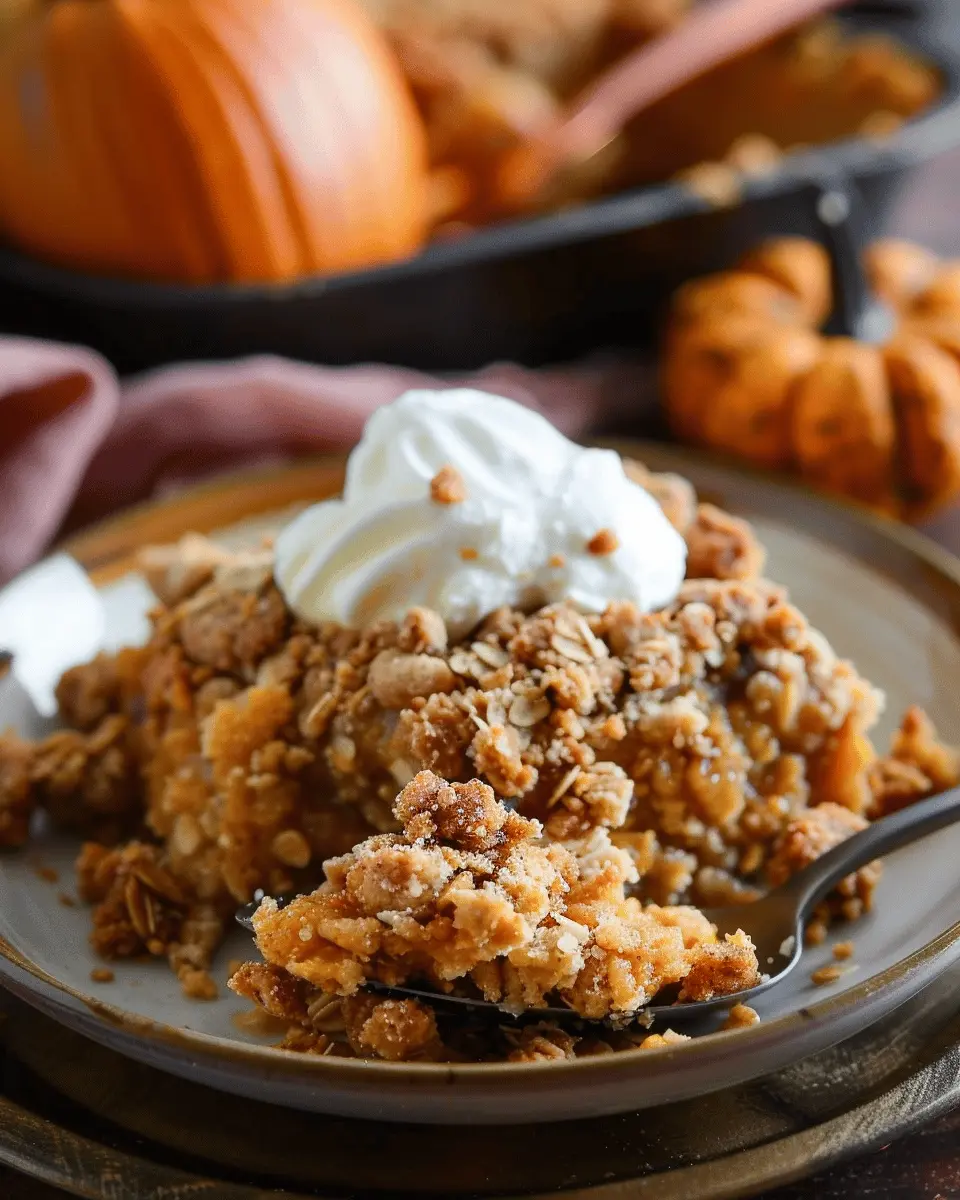
Now, doesn’t that sound luscious? Serve your pumpkin crisp warm, perhaps with a scoop of vanilla ice cream or a dollop of whipped cream. Indulging in this treat while knowing you made it from scratch adds a layer of joy to your baking experience. Feel free to share your creations with friends and family — or keep it all for yourself; we won’t tell! Happy baking!

Variations on Pumpkin Crisp
When it comes to pumpkin crisp, the possibilities are nearly endless! This fantastic dessert can easily adapt to meet various dietary preferences and elevate your baking game.
Vegan Pumpkin Crisp Options
For those observing a vegan lifestyle, don’t fret! You can swap out traditional ingredients effortlessly. Use plant-based butter or coconut oil instead of regular butter. Replace the eggs with flaxseed meal or unsweetened applesauce. These alternatives will keep your pumpkin crisp moist and delicious while ensuring no animal products are included. Check out VegNews for more vegan baking tips that could inspire your kitchen adventures!
Gluten-Free Adaptations
If you’re going gluten-free, fear not! Substitute regular flour with a high-quality gluten-free blend. Oats are an excellent choice too—just ensure they are labeled gluten-free. This adaptation will give your pumpkin crisp that same delightful texture without sacrificing flavor. Adding spices like cinnamon and nutmeg enhances the seasonal vibe and masks any weird aftertaste from gluten-free flours.
Add-ins: Nuts, Chocolate, or Dried Fruits
Looking to jazz up your pumpkin crisp? Adding ingredients like chopped pecans or walnuts can provide a delightful crunch. For a more indulgent twist, consider mixing in chocolate chips! Dark chocolate pairs beautifully with the pumpkin and spices, creating a decadent treat. Dried fruits like cranberries or raisins add a surprising burst of flavor that balances the sweetness perfectly.
Remember, experimenting is part of the fun! Get creative and find your ideal combination. Your guests will surely appreciate whatever unique twist you bring to the table. Happy baking!
Cooking Tips and Notes for Pumpkin Crisp
Ingredient Substitutions for Dietary Needs
Making your pumpkin crisp more accessible is easy! If you’re looking to cut down on sugar, consider using coconut sugar or a sugar substitute like stevia. For a gluten-free option, almond flour or oat flour works wonderfully. Vegan? Swap the butter with coconut oil or a vegan margarine. For a dairy-free option, try using coconut milk instead of regular milk.
How to Prevent Over-Browning of the Topping
To ensure that the topping of your pumpkin crisp doesn’t over-brown, cover it with foil for the first half of the baking time. This technique allows the pumpkin to cook through while protecting the crisp from burning. Keep an eye on it during the last few minutes and remove the foil to achieve that golden-brown finish.
Storage Tips for Leftovers
If you’re fortunate to have leftovers (which isn’t guaranteed!), store your pumpkin crisp in an airtight container in the fridge for up to 4 days. It’s great warmed in the microwave or served cold! For longer storage, consider freezing it. Just slice it into portions, wrap tightly, and enjoy it up to three months later. Just remember to let it cool completely before freezing!
By following these tips and notes, you’ll not only elevate your pumpkin crisp game but also please a variety of dietary preferences without any hassle. For more on ingredient substitutions, check out sites like EatingWell or Minimalist Baker. Happy baking!
Serving Suggestions for Pumpkin Crisp
Ideal accompaniments for your pumpkin crisp
When it comes to pumpkin crisp, the accompaniments can elevate your dessert from delicious to unforgettable. Here are some fantastic pairing ideas:
- Whipped Cream: A dollop of lightly sweetened whipped cream adds a luxurious touch.
- Ice Cream: Vanilla or cinnamon ice cream can complement the warm spices beautifully.
- Chopped Nuts: Sprinkle some toasted pecans or walnuts for added crunch and flavor.
You could also consider serving it with a spiced chai latte or a hot apple cider to enhance that cozy, autumnal vibe.
Creative presentation ideas
The way you present your pumpkin crisp can make a big difference! Here are a few fun ideas:
- Individual Servings: Use ramekins for single servings topped with a sprig of mint.
- Serving Board: Arrange slices of pumpkin crisp on a wooden board with different toppings, inviting everyone to customize their servings.
Having just the right setup not only impresses your guests but also sparks conversation. So, which presentation will you choose for your next gathering?
For more inspiration, check out these tips from The Kitchn for making your holiday desserts shine!
Time Breakdown for Pumpkin Crisp
When it comes to delicious desserts, pumpkin crisp is not only a crowd-pleaser but also quite simple to make. Here’s a handy time breakdown to help you plan your baking session effortlessly.
Preparation time
Gathering your ingredients and preparing the dish will take about 20 minutes. This includes chopping, measuring, and mixing the ingredients for that perfect pumpkin crisp topping.
Cooking time
Once your oven is preheated, baking the crisp will take around 40 minutes. This step ensures that the pumpkin filling is cooked through and the topping becomes golden and crispy.
Total time
All in all, you’re looking at a total of 1 hour from start to finish. This short commitment is well worth it for the delightful flavors and heartwarming scents you’ll enjoy. Want to dive deeper into the pumpkin crisp world? Check out sources like The Kitchn or Food Network for more tips and variations!
Nutritional Facts for Pumpkin Crisp
When it comes to dessert, pumpkin crisp can be both delicious and nutritious. Let’s break down what you’re getting in each satisfying serving.
Calories per serving
Each serving of pumpkin crisp typically contains around 200-250 calories. This makes it a delightful treat that won’t derail your healthy eating goals.
Main nutritional components
- Dietary Fiber: With pumpkin as a star ingredient, expect a good dose of fiber—great for digestion.
- Vitamins A and C: Pumpkins are rich in antioxidants, including vitamins A and C, key for maintaining healthy skin and boosting your immune system.
- Carbohydrates: The crisp also has sugars primarily from the pumpkin and any sweeteners you might use, making it a great option for a quick energy boost.
- Healthy Fats: If you use nuts or oats in your topping, you’re adding healthy fats that can help keep you full longer.
For more details on the benefits of pumpkin in your diet, check out Healthline. It’s amazing how such a tasty dessert can pack in so many nutrients, isn’t it? Enjoy your pumpkin crisp guilt-free!
FAQ about Pumpkin Crisp
Can I make pumpkin crisp ahead of time?
Absolutely! Pumpkin crisp is a fantastic make-ahead dessert. You can prepare it a day in advance, allowing the flavors to meld beautifully. Simply prepare the filling and topping, then layer them in your baking dish. Cover and refrigerate. When you’re ready to serve, bake it right before your guests arrive for a warm, comforting treat.
How do I store pumpkin crisp?
Proper storage will keep your pumpkin crisp delicious for days! Here’s how:
- Room Temperature: If you plan to eat it within a day, cover it loosely with foil and leave it at room temperature.
- Refrigerator: For longer storage, place it in an airtight container or cover the baking dish with plastic wrap. It will keep well in the fridge for up to five days.
- Freezing: Want to save some for later? You can freeze pumpkin crisp. Just make sure it’s completely cool, then wrap it tightly in plastic wrap and aluminum foil to prevent freezer burn. It can last for up to three months.
What can I use instead of heavy cream?
If you’re looking to lighten things up or avoid heavy cream, there are several alternatives that work beautifully in pumpkin crisp recipes:
- Coconut Milk: Adds a subtle tropical flavor and creamy texture.
- Greek Yogurt: A healthy option that will lower fat while still providing creaminess.
- Silken Tofu: Blended silken tofu gives you the richness without dairy.
For more tips on substitutions, check out this guide for healthy cooking alternatives. Enjoy your pumpkin crisp adventures!
Conclusion on Pumpkin Crisp
Embrace the flavors of fall with pumpkin crisp
As the seasons change, there’s nothing quite like enjoying a warm slice of pumpkin crisp on a chilly evening. This delightful dessert beautifully balances the rich flavors of pumpkin and warm spices, making it the perfect way to celebrate autumn.
When you serve it warm, drizzled with a little caramel sauce or topped with whipped cream, you create a cozy atmosphere that invites relaxation and conversation. Plus, the easy preparation means you can whip this dish up for family gatherings, cozy nights in, or festive celebrations with friends.
So gather around and share the joy of pumpkin crisp this fall. For more autumn-inspired recipes, check out Food Network or Bon Appétit.
PrintPumpkin Crisp: The Best Cozy Dessert to Delight Your Taste Buds
Indulge in the warm flavors of fall with this Pumpkin Crisp, a delightful dessert that combines the rich taste of pumpkin with a crumbly topping.
- Prep Time: 15 minutes
- Cook Time: 35 minutes
- Total Time: 50 minutes
- Yield: 8 servings 1x
- Category: Dessert
- Method: Baking
- Cuisine: American
- Diet: Vegetarian
Ingredients
- 1 can pumpkin puree
- 1 cup brown sugar
- 1 teaspoon cinnamon
- 1/2 teaspoon nutmeg
- 1/2 teaspoon ginger
- 1/4 teaspoon salt
- 1 cup rolled oats
- 1/2 cup all-purpose flour
- 1/2 cup melted butter
Instructions
- Preheat your oven to 350°F (175°C).
- In a mixing bowl, combine the pumpkin puree, brown sugar, cinnamon, nutmeg, ginger, and salt.
- Spread the pumpkin mixture into a greased baking dish.
- In another bowl, mix the oats, flour, and melted butter until crumbly.
- Sprinkle the oat mixture evenly over the pumpkin layer.
- Bake for 30-35 minutes or until golden brown.
- Allow to cool slightly before serving.
Notes
- Serve warm with whipped cream or ice cream.
- This dessert can be made a day ahead and stored in the refrigerator.
Nutrition
- Serving Size: 1 serving
- Calories: 250
- Sugar: 15 grams
- Sodium: 200 mg
- Fat: 10 grams
- Saturated Fat: 5 grams
- Unsaturated Fat: 4 grams
- Trans Fat: 0 grams
- Carbohydrates: 35 grams
- Fiber: 3 grams
- Protein: 3 grams
- Cholesterol: 25 mg
Keywords: Pumpkin Crisp, dessert, cozy dessert, fall recipe