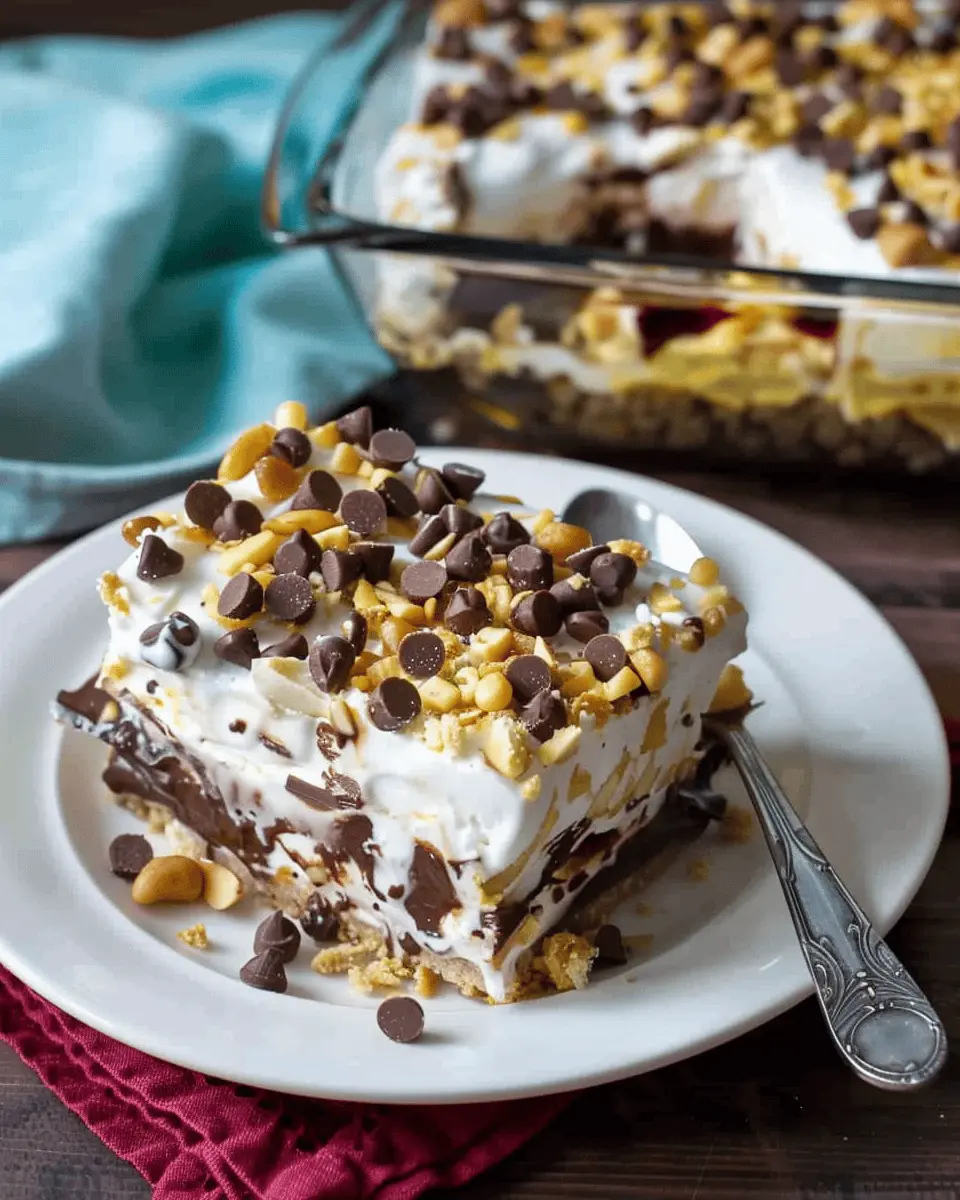
Introduction to Seven Layer Pudding Dessert
Creating a dessert that’s both visually stunning and delicious can sometimes feel like a daunting task. Enter the Seven Layer Pudding Dessert, a delightful treat that layers flavors and textures in a way that will impress your friends and family. So, why exactly seven layers? Let’s dig into the magic behind this multi-layered wonder!
Why seven layers?
Imagine a dessert that feels like a mini celebration in every bite. The concept of having seven layers is not just for show; it offers a beautifully balanced combination of flavors and textures. Each layer serves its purpose, making this dessert a feast for both the eyes and the palate. From creamy puddings to crunchy toppings, every layer contributes to an exciting dessert experience.
Consider these delicious layers you might include:
- Creamy Vanilla Pudding: The base layer that sets the sweet tone.
- Chocolate Pudding: For that rich, decadent twist.
- Whipped Cream: Adds a light and airy touch.
- Crushed Cookies or Graham Crackers: Perfect for a delightful crunch.
- Fruit Layers: Fresh strawberries or bananas for a zing of freshness.
- Nuts or Coconut Flakes: To take the texture up a notch.
- Chocolate Shavings: A final flourish for that gorgeous finish.
What’s compelling about the Seven Layer Pudding Dessert is the endless customization potential—you can switch up flavors based on your mood or the seasons. Want something tropical? Throw in pineapple and coconut! Craving chocolate? Double down with two chocolate layers!
When it comes to assembling your dessert, the beauty is in the simplicity. Each layer can be prepped ahead and assembled right before serving, making it a fantastic choice for gatherings. Plus, it looks spectacular when presented in a clear glass dish, showcasing those vibrant colors and tempting textures. You can find excellent tips and other variations for similar desserts at resources like Martha Stewart or Bon Appétit.
Whether you’re a seasoned baker or a kitchen novice, the Seven Layer Pudding Dessert is sure to impress. So, grab your ingredients, invite some friends over, and get ready to enjoy a dessert that’s as fun to make as it is to eat!
Ingredients for Seven Layer Pudding Dessert
Creating a delightful Seven Layer Pudding Dessert is not only fun but also visually impressive! Here’s what you need to get started.
Essential ingredients for the classic version
To whip up this fantastic dessert, these essential ingredients will set the foundation:
- Pudding Mix: Vanilla and chocolate are the classic choices, but feel free to mix and match!
- Milk: Whole milk creates a creamy texture, but you can substitute with almond or oat milk for a dairy-free option.
- Whipped Topping: This light and airy ingredient adds that perfect lightness.
- Crushed Cookies: Typically, graham crackers or Oreos provide a delightful crunch.
- Fresh Fruit: Berries like strawberries or blueberries enhance both flavor and look.
- Nuts: Chopped pecans or almonds for added crunch in layers.
- Caramel or Chocolate Sauce: For drizzling that sweet finish.
Optional toppings and variations
Get creative with your Seven Layer Pudding Dessert! Consider adding:
- Coconut Flakes: For a tropical twist.
- Chocolate Shavings: To pamper the chocolate lovers.
- Granola: For a healthier crunch.
- Candy: Small chocolate pieces or toffee bits can add a fun surprise.
Experimenting with these flavors makes your dessert uniquely yours. For more tips, check out Serious Eats for inspiration on similar desserts. Enjoy layering!
Preparing Seven Layer Pudding Dessert
Creating a delicious Seven Layer Pudding Dessert is a delightful culinary adventure that not only tantalizes your taste buds but also impresses your guests. This layered pudding is perfect for any occasion, whether it’s a casual gathering or a formal dinner party. Let’s dive into the step-by-step process to whip up this delightful dessert!
Gather and prep your ingredients
Before diving into the fun of layering, it’s crucial to gather all your ingredients. Here’s what you’ll need:
- Pudding Mix: Chocolate and vanilla work excellently together.
- Milk: Whole milk will give your pudding a rich texture.
- Whipped Topping: Either store-bought or homemade; just make sure it’s fluffy and sweet!
- Crushed Cookies: Oreos or any chocolate wafer cookies serve as a delightful crunch.
- Chopped Nuts: Pecans or walnuts add a great texture and flavor.
- Sliced Bananas: Fresh and ripe for a fruit layer.
- Finely Shredded Coconut: Toasted, if you like a hint of nuttiness.
Once you have everything, make sure to prepare your pudding according to the package instructions. It’s best to have your pudding set up in advance, allowing it to thicken as you work on assembling layers.
Create the pudding layers
Now comes the fun part—creating your pudding layers! If you’ve prepped your pudding mix according to the package instructions, you should have silky smooth pudding ready to layer. You can separate your pudding into different bowls for a more visually enticing dessert.
- For the chocolate layer: Use chocolate pudding and let it chill for about five minutes.
- For the vanilla layer: Repeat the steps with vanilla pudding.
Not only does this look stunning, but it also provides a burst of flavor with each layer. If you’re curious about layering techniques, check out this helpful guide on layered desserts for some inspiration.
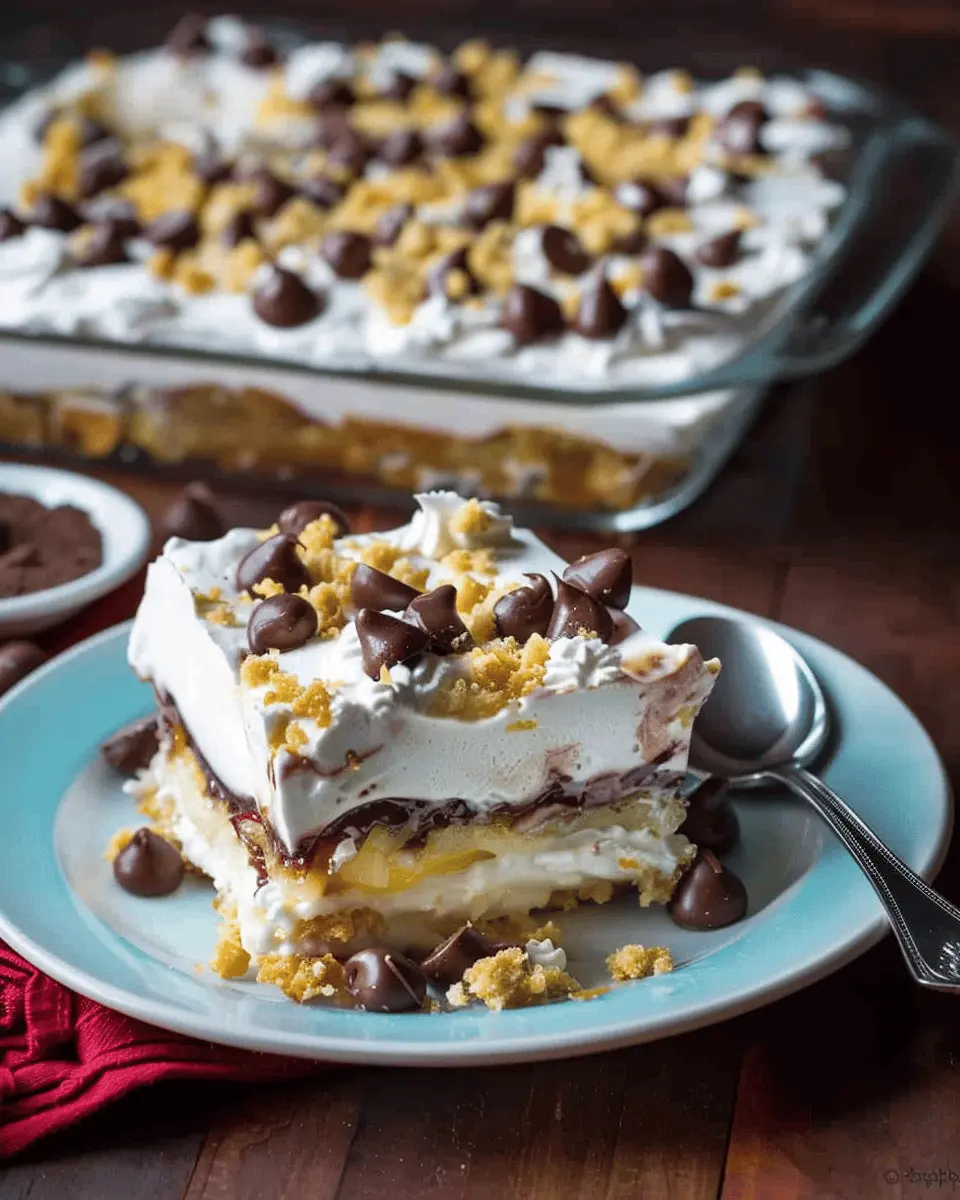
Assemble the layers
Once your puddings are ready, grab your trifle dish or glass cups for presentation—this is where the magic happens. Start by layering the ingredients as follows:
- Layer 1: A base of crushed cookies for that delectable crunch.
- Layer 2: Chocolate pudding spread evenly on top of the crushed cookies.
- Layer 3: A dollop of whipped topping gently placed over the pudding.
- Layer 4: The vanilla pudding comes next, smoothed over the whipped topping.
- Layer 5: Add some sliced bananas or your choice of fruit.
- Layer 6: A sprinkle of chopped nuts for that extra crunch.
- Layer 7: Finish with whipped topping and a sprinkle of shredded coconut.
This Seven Layer Pudding Dessert not only pleases the palate but is also a feast for the eyes!
Chill for perfection
Once your layers are assembled, cover the dish lightly with plastic wrap or a lid to prevent it from absorbing any odors from the fridge. It’s essential to chill your dessert for at least two hours, allowing the flavors to meld and the texture to firm up. Think of it as giving your dessert some time to rest—like a well-deserved break after a busy day.
Add the finishing touches
Before serving, consider giving your dessert some final flourishes. Here are a few ideas to elevate your Seven Layer Pudding Dessert:
- Chocolate Shavings: Add a touch of elegance.
- Fresh Berries: A vibrant pop of color and natural sweetness.
- A Drizzle of Chocolate Syrup: For a decadent finish.
It’s all about making it look as good as it tastes.
So there you have it! With just a bit of preparation and love, you’ve crafted a delicious Seven Layer Pudding Dessert that is sure to become a staple at your gatherings. Enjoy sharing your sweet masterpiece with friends and family!
Variations on Seven Layer Pudding Dessert
The classic Seven Layer Pudding Dessert is not only delicious but also incredibly versatile! Whether you want to indulge in something chocolatey or freshen things up with fruity flavors, there’s a variation for everyone to enjoy.
Chocolatey Bliss in Your Seven Layer Pudding Dessert
For those who can’t resist chocolate, a Chocolate Seven Layer Pudding Dessert is a dream come true! Start with layers of rich chocolate pudding mixed with creamy Cool Whip. Add crushed chocolate cookies instead of graham cracker crumbs for that extra crunch. Here’s how to whip it up:
- Chocolate Pudding Layer: Use instant chocolate pudding mix for ease.
- Crust: Blend chocolate cookie crumbs with melted butter for a decadent base.
- Top It Off: Finish with chocolate shavings or mini chocolate chips for garnish.
This version appeals to chocoholics and is perfect for gatherings. Chocoholics will especially appreciate how easy it is to customize with different chocolate textures.
Fresh and Fruity Twists
On the flip side, a Fruit-Flavored Seven Layer Pudding Dessert is a refreshing option, especially during warmer months. You can use any combination of your favorite fruits to brighten up the dessert. Here’s a simple approach:
- Layering: Start with vanilla pudding and alternate layers of diced strawberries, blueberries, and bananas.
- Whipped Cream: Incorporate a layer of homemade whipped cream for added sweetness.
- Garnish: Top with fresh mint leaves for an aromatic finish, making it both pretty and delicious.
Fruity flavors not only add a pop of color, but they provide a lighter twist to the classic recipe.
No matter the version you choose, these variations of Seven Layer Pudding Dessert will surely impress your friends and family. Want to dive deeper into pudding desserts? Check out sources like Epicurious for more innovative ideas.
Cooking tips and notes for Seven Layer Pudding Dessert
Achieving the perfect texture
Creating the ultimate Seven Layer Pudding Dessert isn’t just about beautiful layers; it’s about that luscious, creamy texture. To achieve this, ensure that your pudding mixes are prepared according to the package instructions for the correct thickness. For an even richer mouthfeel, consider using whole milk instead of skim. If you’re feeling adventurous, you can try adding a splash of whipped cream to your pudding before layering. This little twist not only enhances flavor but also makes everything extra fluffy!
Alternative ingredient suggestions
While traditional recipes are always a hit, don’t hesitate to put your spin on your Seven Layer Pudding Dessert.
- Healthier options: Substitute regular pudding mix with sugar-free versions to cut down on calories without sacrificing taste.
- Nutty flavor: Swap vanilla pudding for butterscotch or chocolate for a delicious twist.
- Go dairy-free: Use almond or coconut milk and vegan pudding mixes for a dairy-free treat.
If you’re craving something unconventional, check out resources like Food Network for more creative tweaks. Experimenting with these alternatives not only diversifies flavors but also makes your dessert unique!

Serving suggestions for Seven Layer Pudding Dessert
Best practices for presentation
When it comes to showcasing your Seven Layer Pudding Dessert, presentation is key. Consider using individual glass cups or jars for serving; this not only looks charming but allows each layer to shine. For an added touch, layer the pudding in clear glass bowls to highlight the beautiful, vibrant hues. Top with a dollop of whipped cream and a sprinkle of crushed nuts or chocolate shavings to elevate the visual appeal. A fresh mint leaf can provide a pop of color and freshness. Remember, we eat with our eyes first!
Pairing ideas: What to serve it with
Wondering what to pair with your Seven Layer Pudding Dessert? Here are some delightful options:
- Fresh Fruits: Serve with seasonal fruits like berries or mango slices to add a refreshing contrast.
- Savory Bites: Complement it with light appetizers such as cucumber sandwiches or Turkey Bacon sliders for a fun palate balance.
- Beverage Choices: Opt for iced tea, lemonade, or sparkling water with citrus slices. These choices keep the meal light and refreshing.
For a deeper dive into dessert pairings, check out this guide on pairing sweet treats with sides here. Enjoy creating a memorable culinary experience!
Time breakdown for Seven Layer Pudding Dessert
Preparation time estimates
Making your Seven Layer Pudding Dessert is a breeze! You’ll spend about 30-40 minutes prepping your ingredients and layering the pudding. This dessert is perfect for those who love to create visually stunning treats without breaking a sweat.
Chilling time
After all that delicious layering, patience is key. You’ll want to let your dessert chill for at least 2-3 hours in the refrigerator. This allows the flavors to meld and the layers to set beautifully.
Total time commitment
In total, expect to dedicate around 3-4 hours from start to finish, including preparation and chilling. If you’re making this for a special occasion, why not make it a fun event? Just imagine your friends’ faces when you unveil your stunning Seven Layer Pudding Dessert! Don’t forget, the waiting makes it even sweeter!
For more tips on enhancing dessert experiences, check out Food Network for inspiration.
Nutritional facts for Seven Layer Pudding Dessert
Caloric content per serving
The Seven Layer Pudding Dessert is as indulgent as it sounds, and knowing its caloric content can help you enjoy it guilt-free. Each serving approximately contains 350-400 calories. While this may seem high, remember that it’s a delightful treat meant for special occasions or a well-deserved dessert after a long week of work.
Breakdown of sugars and fats
When diving into the nutritional profile, you’ll find that this dessert contains about 25 grams of sugar and 15 grams of fat per serving. For those keeping an eye on sugar intake, it may help to balance this dessert with lighter meals throughout the day. Opting for lower-fat dairy options can also reduce those fat grams without sacrificing flavor!
For more in-depth nutritional guidelines, check out the USDA’s Food Data Central. Balancing indulgent desserts like the Seven Layer Pudding Dessert with nutritious meals is all part of a healthy lifestyle. Just remember, moderation is key!
FAQs about Seven Layer Pudding Dessert
When it comes to whipping up a delightful Seven Layer Pudding Dessert, you might have some lingering questions. Let’s tackle them together!
Can I make it ahead of time?
Absolutely! One of the best things about a Seven Layer Pudding Dessert is that it actually benefits from being prepared ahead of time. Making it a day before you plan to serve allows the layers to meld together perfectly, resulting in a more flavorful experience. Just cover it well in the fridge to maintain its freshness!
How do I store leftovers?
If you happen to have any leftovers (which is rare, but it happens!), simply cover the dessert tightly with plastic wrap or transfer it to an airtight container. This will keep it fresh for about 2 to 3 days in the fridge. Remember to enjoy it cold, as the chilled layers make each bite exceedingly refreshing!
What is the best way to layer the dessert?
Layering is key to achieving that stunning effect with your Seven Layer Pudding Dessert. Start with the heaviest ingredients first (like your vanilla pudding), followed by lighter items such as whipped cream or chocolate chips. Here’s a simple structure to follow:
- Bottom layer: Crushed cookies or graham crackers
- Second layer: Vanilla pudding
- Third layer: Whipped cream
- Fourth layer: Chocolate pudding
- Fifth layer: Fresh fruits (like sliced strawberries or bananas)
- Sixth layer: More whipped cream
- Top layer: A sprinkle of nuts or chocolate shavings for that finishing touch
For more tips on perfecting your dessert layers, check out resources like The Kitchn or Serious Eats for expert advice.
With these FAQs in mind, you’re well on your way to creating an unforgettable Seven Layer Pudding Dessert that’ll have everyone raving about your culinary skills!
Conclusion on Seven Layer Pudding Dessert
Creating and sharing a Seven Layer Pudding Dessert is truly a delightful experience. Each layer not only brings a burst of flavor but also a colorful representation of love and effort. Imagine the joy on your friends’ and family’s faces when they see this stunning dessert come to life!
With its creamy textures and rich flavors, this dessert is perfect for any occasion, from casual gatherings to special celebrations. Plus, it’s a fantastic way to engage others in the kitchen—everyone loves to get involved in layering those beautiful ingredients! So why not try making it this weekend? For more inspiration, do check out This Delicious Recipe. Enjoy every bite!
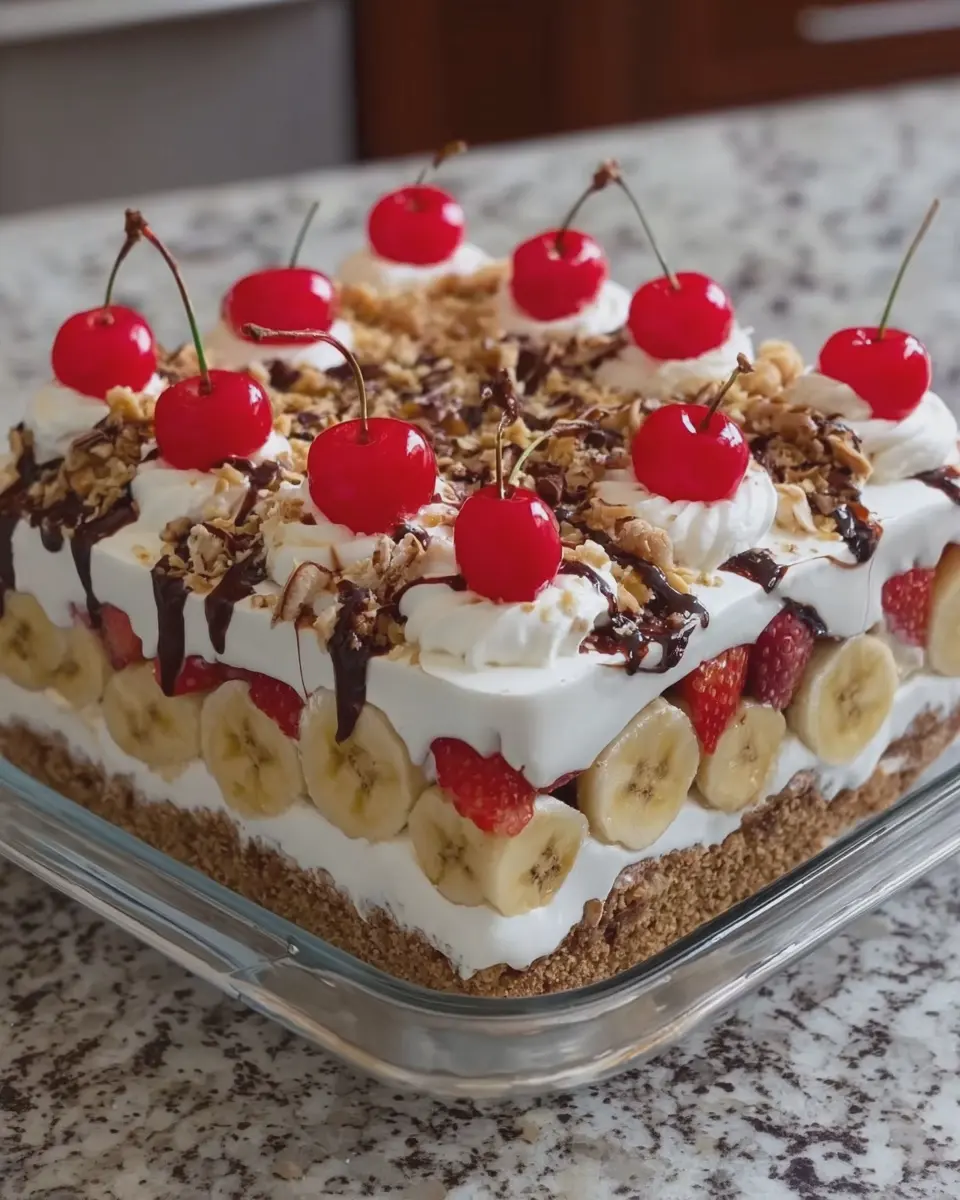
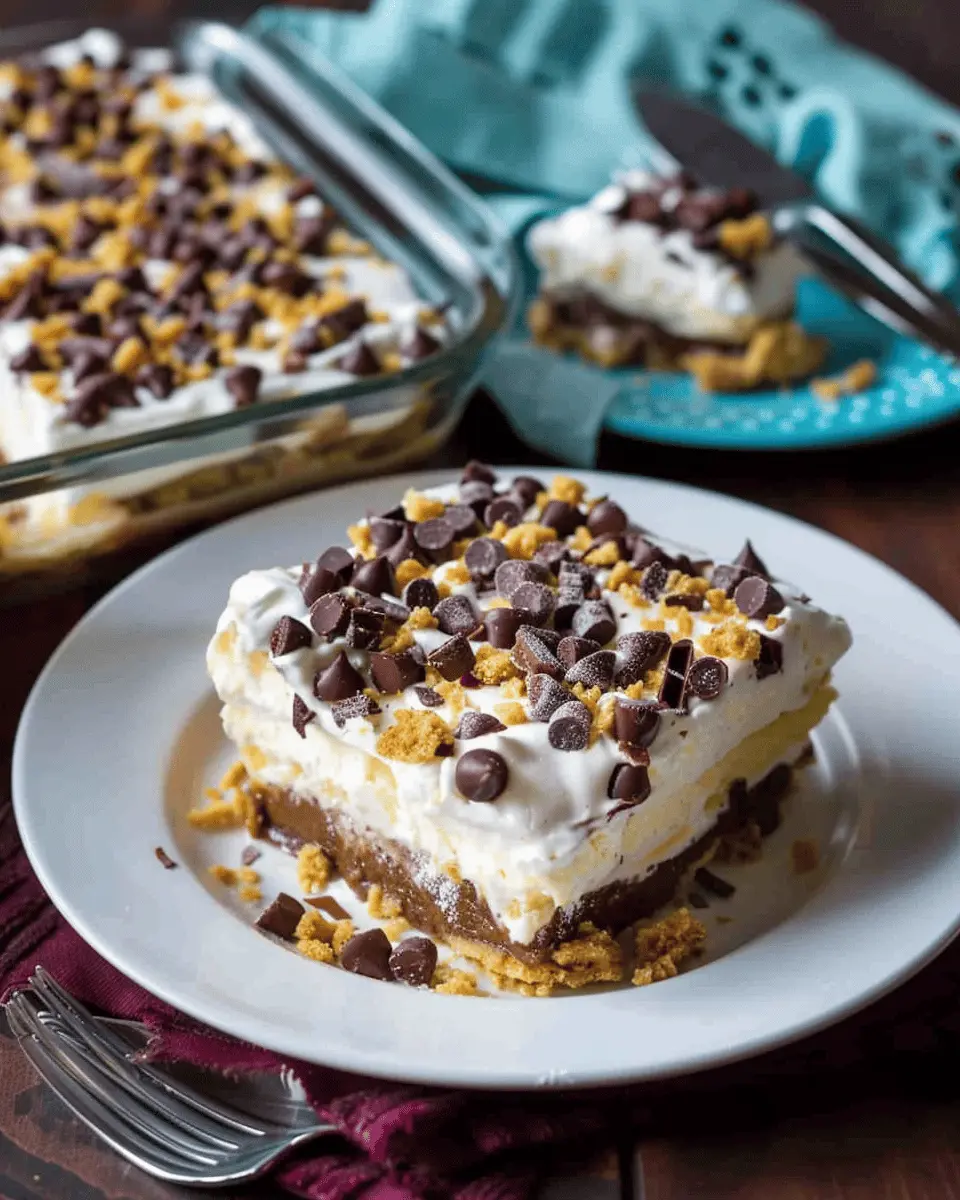
PrintSeven Layer Pudding Dessert: The Indulgent Treat You’ll Love

Experience the rich layers of flavors and textures in this Seven Layer Pudding Dessert, a delightful treat for any occasion.
- Prep Time: 20 minutes
- Total Time: 2 hours 20 minutes
- Yield: 8 servings 1x
- Category: Dessert
- Method: No-Bake
- Cuisine: American
- Diet: Vegetarian
Ingredients
- 1 cup crushed graham crackers
- 1/2 cup unsalted butter, melted
- 1 package vanilla pudding mix
- 2 cups cold milk
- 1 package chocolate pudding mix
- 1 container whipped topping
- 1/2 cup chopped nuts
Instructions
- In a bowl, mix crushed graham crackers with melted butter and press into the bottom of a baking dish.
- Prepare vanilla pudding according to package directions and pour over the crust.
- Prepare chocolate pudding according to package directions and layer on top of the vanilla pudding.
- Spread whipped topping over the pudding layers evenly.
- Sprinkle chopped nuts on top and refrigerate for at least 2 hours before serving.
Notes
- For added flavor, consider adding a layer of sliced bananas or strawberries between the pudding layers.
Nutrition
- Serving Size: 1 slice
- Calories: 350
- Sugar: 25g
- Sodium: 150mg
- Fat: 18g
- Saturated Fat: 10g
- Unsaturated Fat: 6g
- Trans Fat: 0g
- Carbohydrates: 42g
- Fiber: 1g
- Protein: 4g
- Cholesterol: 30mg
Keywords: Seven Layer Pudding Dessert