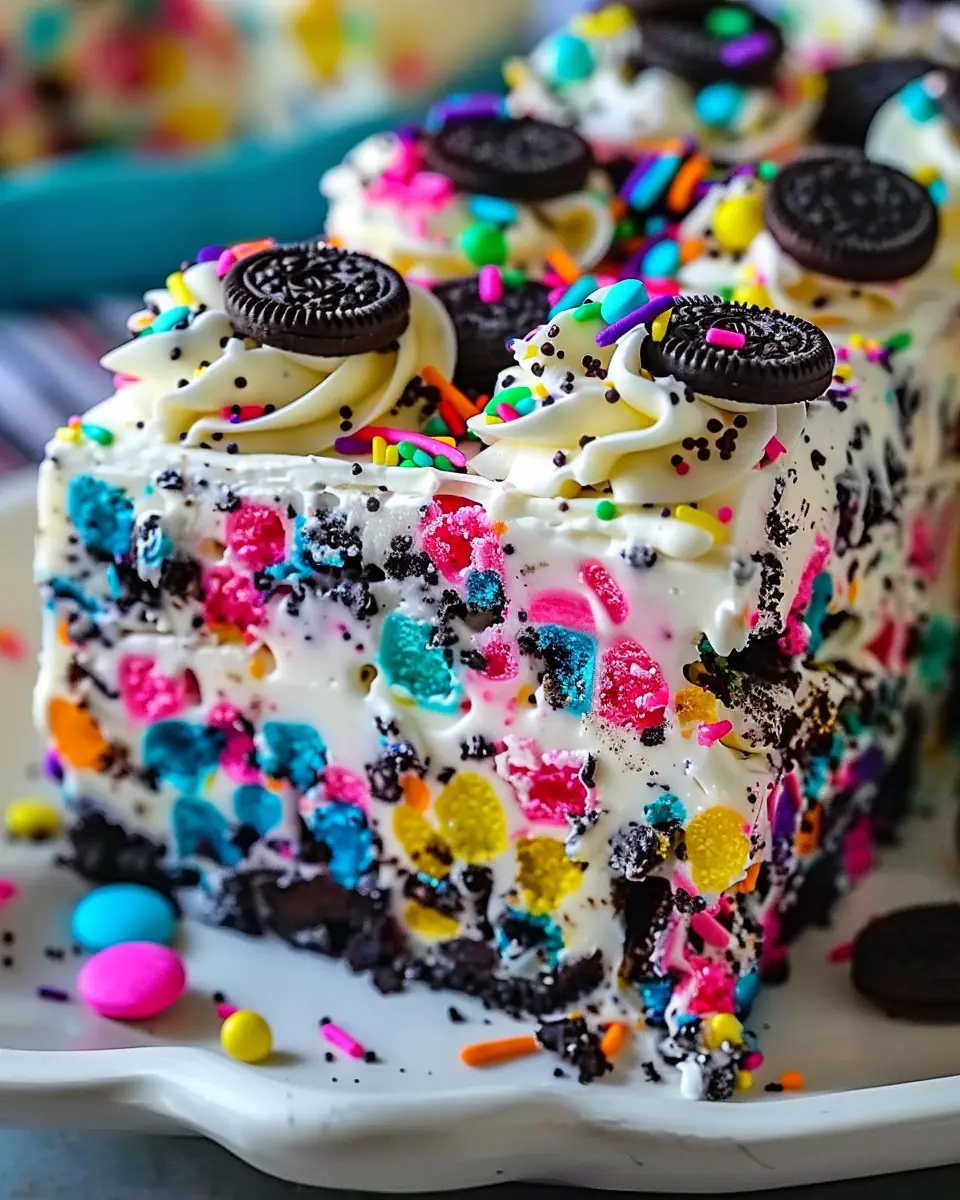
Introduction to No-Bake Funfetti Oreo Icebox Cake
When you’re planning your next gathering, dessert often takes center stage, and what could be easier than a No-Bake Funfetti Oreo Icebox Cake? This delightful treat requires no oven time at all, allowing you to join in the fun while whipping up something everyone will love. No-bake desserts are the ultimate life-saver, especially for those busy weekends or special occasions where you want to impress without the stress.
Why Choose a No-Bake Dessert for Your Next Gathering?
Choosing a no-bake dessert like the Funfetti Oreo Icebox Cake brings several advantages:
-
Simplicity: With no baking involved, you can focus on assembling delicious layers of flavor rather than monitoring the oven. This means less hassle, more time for organizing, and enjoying your gathering.
-
Versatility: This dessert can be customized! Whether you want to switch up the sprinkles or add a unique topping, the possibilities are endless. You can even explore different flavors by incorporating your favorite cookies or cream fillings.
-
Make Ahead: The icebox cake is a perfect make-ahead option. It needs time to chill and set, making it an ideal choice for busy schedules. You can prepare it the day before your event, allowing the flavors to meld beautifully while you focus on other tasks.
-
Crowd-Pleaser: Let’s be honest—who doesn’t love Oreos? The combination of rich cream cheese, whipped topping, and crunchy cookies appeals to both kids and adults alike. You can be sure your guests will be asking for seconds!
For more tips on effortless entertaining, check out Food Network’s Party Planning Tips.
As you can see, the No-Bake Funfetti Oreo Icebox Cake not only simplifies your dessert game but also elevates the dessert table. Whether it’s a birthday party, a casual get-together, or a summer barbecue, this cake adapts to your needs. So grab your ingredients, and get ready to impress without the heat!

Ingredients for No-Bake Funfetti Oreo Icebox Cake
What essential ingredients do you need?
Creating the No-Bake Funfetti Oreo Icebox Cake is a delightful experience that requires just a few essential ingredients:
- Oreo Cookies: The cornerstone of this dessert, these chocolatey treats lend a rich flavor and crumbliness.
- Cream Cheese: Softened to create a lush, creamy filling.
- Whipped Topping: Adds lightness and enhances the cake’s airy texture.
- Funfetti Cake Mix: This is what gives your icebox cake that joyful, colorful surprise.
- Milk: Provides moisture to soften the cookies and blend your filling perfectly.
Are there any alternatives for the ingredients?
Absolutely! If you’re looking to mix things up or accommodate dietary restrictions, consider these alternatives:
- Gluten-Free Oreos: Perfect for those avoiding gluten.
- Greek Yogurt: A healthier substitute for cream cheese that adds a tangy flavor.
- Cashew Cream: A vegan alternative to whipped topping that’s rich and creamy.
- Homemade Funfetti Mix: Simply add sprinkles to a vanilla cake mixture for a custom touch!
Wondering about other creamy dessert ideas? Check out this guide on best no-bake desserts. You’ll be ready to impress at your next gathering!
Preparing No-Bake Funfetti Oreo Icebox Cake
Creating a No-Bake Funfetti Oreo Icebox Cake is both a delightful and uncomplicated project—perfect for young professionals looking to impress friends or enjoy something sweet after a long week. Follow these steps, and you’ll find that your dessert is not only visually engaging but also bursting with nostalgic flavors.
Gather your ingredients and tools
Before diving into the magic of no-baking, it’s essential to get everything ready. Here’s what you’ll need to whip up this scrumptious cake:
Ingredients:
- Oreo cookies (regular and mini for garnish)
- Heavy cream (1 cup)
- Cream cheese (8 oz, softened)
- Powdered sugar (1/2 cup, plus more for taste testing)
- Rainbow sprinkles (for that funfetti flair)
- Vanilla extract (1 tsp)
Tools:
- A large mixing bowl
- An electric mixer (or a good whisk if you’re feeling adventurous)
- A rectangular or square baking dish
- A spatula
- Parchment paper (optional, for easier cleanup)
Once you have your ingredients in hand, you’ll be amazed at how quickly this treat comes together. Plus, no-bake means less time fussing with heat and more time enjoying!
Whip the heavy cream to perfection
Now, let’s work on the heavy cream. Using an electric mixer, pour in the heavy cream and start whipping at a medium speed. As the cream begins to thicken, gradually add in the powdered sugar and continue whipping until soft peaks form. You’re looking for a light and fluffy texture—think whipped clouds!
If you don’t have a mixer, no worries. A good whisk and some elbow grease can do the trick. It just might take a bit longer. You’ll know it’s ready when you can turn the bowl upside down without a drop spilling out (not that we recommend trying that unless you’re really confident!).
Make the Funfetti cream cheese mixture
Next up is the Funfetti cream cheese mixture. In a separate bowl, beat the softened cream cheese until it’s smooth and creamy. Say goodbye to lumps! To this, add your whipped heavy cream, rainbow sprinkles, and vanilla extract. Gently fold everything together until it’s homogenous and speckled with sprinkles. Make sure to save some sprinkles for the top—presentation is everything!
This mix is where the magic really happens. It combines the tanginess of cream cheese with the sweetness you crave, enveloped in a dreamy fluffiness. Did you know that cream cheese can frequently be substituted with Greek yogurt for a healthier twist? Just a fun tidbit to consider if you’re looking to tweak recipes!
Assemble the layers
Now comes the fun part: assembly! Begin by placing a layer of Oreo cookies at the bottom of your baking dish. You can dip them in milk first for an extra sogginess that melts in your mouth!
Next, spread a layer of your Funfetti cream cheese mixture on top. Repeat this process, alternating layers of Oreos and cream mixture until you reach the top of your dish. End with the cream mixture to ensure a smooth finish. Don’t forget to sprinkle that remaining rainbow magic on top!
Refrigerate for the ultimate icebox experience
With your No-Bake Funfetti Oreo Icebox Cake fully assembled, it’s time for the hardest part—waiting! Cover it with plastic wrap and pop it in the refrigerator for at least four hours, though overnight is even better if you can manage the suspense. The chilling time allows the flavors to meld beautifully, and the cake will firm up, creating a sliceable treat.
By the time you serve it to your friends (or enjoy it solo), the rich and creamy layers will have settled into an exquisite dessert that tastes like childhood in every bite. Planning a summer gathering? Don’t miss out on this show-stopper! For tips on presentation and storage, consider checking out resources like Food Network for best practices.
Enjoy your creation, and remember: sweets are meant to be shared!
This No-Bake Funfetti Oreo Icebox Cake is not just easy to make; it’s a guaranteed crowd-pleaser that will leave your taste buds dancing!
Variations on No-Bake Funfetti Oreo Icebox Cake
Funfetti Icebox Cake with Different Cookie Flavors
Who says you have to stick to the classic Oreo for your No-Bake Funfetti Oreo Icebox Cake? Experimenting with different cookie flavors can add unique twists to this dessert. Try using:
- Chocolate Sandwich Cookies: These add a rich chocolate flavor that pairs beautifully with funfetti frosting.
- Ginger Snaps: For a spicy kick that balances out the sweetness.
- Peanut Butter Cookies: If you’re a peanut butter lover, this will create a deliciously creamy texture.
Not only does this make each cake unique, but it also caters to diverse taste buds. As you try various cookie combinations, think about how flavors meld together, similar to how Bakers Royale experiments with her cookie recipes. Mix and match until you find your perfect combination!
Gluten-Free or Dairy-Free Adaptations
Want to enjoy this No-Bake Funfetti Oreo Icebox Cake while keeping dietary restrictions in mind? You’re in luck! Making this dessert gluten-free or dairy-free is simple.
- For Gluten-Free: Use gluten-free sandwich cookies available at your local grocery store. Brands like Schar or Pamela’s provide excellent options that don’t compromise on taste.
- For Dairy-Free: Substitute the cream cheese with a dairy-free version or use silken tofu blended with a little plant milk. Coconut whipped cream can replace the regular whipped cream for that light, airy texture.
By making these substitutions, you ensure that everyone can indulge in this delightful treat, no matter their dietary preferences. To read more about adapting recipes for allergies, check out resourceful sites like the Food Allergy Research & Education.
Whether you’re mixing cookie flavors or tweaking the ingredients, the joy of creating and savoring your No-Bake Funfetti Oreo Icebox Cake is what matters most! Happy baking!
Cooking notes for No-Bake Funfetti Oreo Icebox Cake
Tips for ensuring the best texture
To achieve the perfect texture in your No-Bake Funfetti Oreo Icebox Cake, it’s crucial to let it chill long enough. Aim for at least 6 hours, or ideally overnight, so the layers meld beautifully. The coolness allows the cookies to soften just enough, creating that delightful creamy goodness. For an extra twist, use cold heavy cream while whipping it; this can help achieve a fluffier consistency.
Common mistakes to avoid
While this dessert is simple, a few common pitfalls can derail your efforts:
- Skipping the chill time: Don’t rush it! Cutting corners will result in a cake that lacks structure.
- Using stale Oreos: Fresh cookies are essential for that perfect crunch and flavor.
- Not leveling the layers: Pay attention to layering to avoid an imbalance that can cause the cake to collapse.
If you’re interested in learning more about no-bake desserts, check out this guide. Trust me, it could inspire your next sweet creation!
Serving suggestions for No-Bake Funfetti Oreo Icebox Cake
Creative ways to serve and present your cake
When it comes to serving your No-Bake Funfetti Oreo Icebox Cake, presentation is key! Consider layering slices on a whimsical cake stand, or using clear glasses for individual servings that highlight the colorful layers. You can also top each slice with a dollop of whipped cream and a sprinkle of extra funfetti to keep the celebration vibe alive.
For a fun twist, try using edible glitter or colorful sprinkles for a festive finish, making it perfect for birthdays or casual get-togethers. A drizzle of chocolate or caramel sauce can add a delightful touch and playfully contrast the cake’s creamy texture.
Pairing suggestions for drinks or toppings
To elevate the experience, pair your cake with refreshing drinks. A fizzy lemonade or a fruit-infused iced tea complements the sweet flavors beautifully. For toppings, fresh berries like strawberries or raspberries add a burst of freshness, balancing the richness of the cake.
You can also explore unique toppings such as crushed nuts or a scoop of vanilla ice cream for an indulgent treat. These pairings not only enhance the flavor but make your No-Bake Funfetti Oreo Icebox Cake a hit at any gathering!
Time details for No-Bake Funfetti Oreo Icebox Cake
Preparation time
Getting started on your No-Bake Funfetti Oreo Icebox Cake is a breeze! You’ll need about 20 minutes to combine the ingredients and layer the cake. This is the fun part where you can let your creativity shine with the sprinkles and Oreos.
Refrigeration time
Patience is a virtue! Let your cake chill in the fridge for at least 4 hours, or ideally, overnight. This helps the flavors meld beautifully and allows the layers to set perfectly, resulting in that delightful, creamy texture every dessert lover craves.
Total time
In total, you’re looking at 4 hours and 20 minutes from prep to table. Not too shabby for a dessert that’s visually stunning and incredibly delicious! If you want to dive into the world of cake without the oven fuss, this recipe is your ticket. For more cool dessert ideas, check out Martha Stewart.
Nutritional information for No-Bake Funfetti Oreo Icebox Cake
When you indulge in a slice of the No-Bake Funfetti Oreo Icebox Cake, you might wonder how it fits into your daily nutrition. Let’s break it down:
Calories per serving
This delightful dessert typically offers around 250 calories per serving. It’s a sweet treat that can satisfy your craving without breaking your calorie bank.
Breakdown of fats, sugars, and carbs
- Fats: Approximately 12g, mainly coming from the cream cheese and whipped topping.
- Sugars: About 16g. The Funfetti and Oreos contribute to this sweetness.
- Carbohydrates: Roughly 30g, making it a dessert that’s enjoyable but should be consumed in moderation.
For more detailed nutritional insight, check out resources like USDA FoodData Central or NutritionValue.org. Enjoy your delicious cake thoughtfully!
FAQs about No-Bake Funfetti Oreo Icebox Cake
How long can I store this cake?
One of the best things about the No-Bake Funfetti Oreo Icebox Cake is that it stores well! You can keep it in your refrigerator for up to 5 days. Just be sure to cover it tightly with plastic wrap or place it in an airtight container to maintain its creamy texture. When you’re ready to enjoy a slice, you might find that the flavors meld even more after a day or two, enhancing the delightful taste.
Can I use other cake mixes?
Absolutely! While the recipe calls for a funfetti cake mix, feel free to get creative. You can substitute it with any flavor of cake mix you love—chocolate, vanilla, or even red velvet could work beautifully in this icebox cake. Just remember to match your frosting and topping accordingly to complement the flavors you choose!
What if I don’t have heavy cream?
If heavy cream isn’t on hand, don’t fret! You can whip together an alternative using milk and butter. For every cup of heavy cream required, melt 1/3 cup of butter and mix it with 2/3 cup of milk. Let it cool before incorporating it into your recipe. This substitute won’t be quite as rich, but it will still give you that delicious creamy texture needed for your No-Bake Funfetti Oreo Icebox Cake.
Feel free to reach out in the comments if you have more questions or share your variations! Enjoy baking, or should I say, not baking?
Conclusion on No-Bake Funfetti Oreo Icebox Cake
Why you should try making this delightful dessert today!
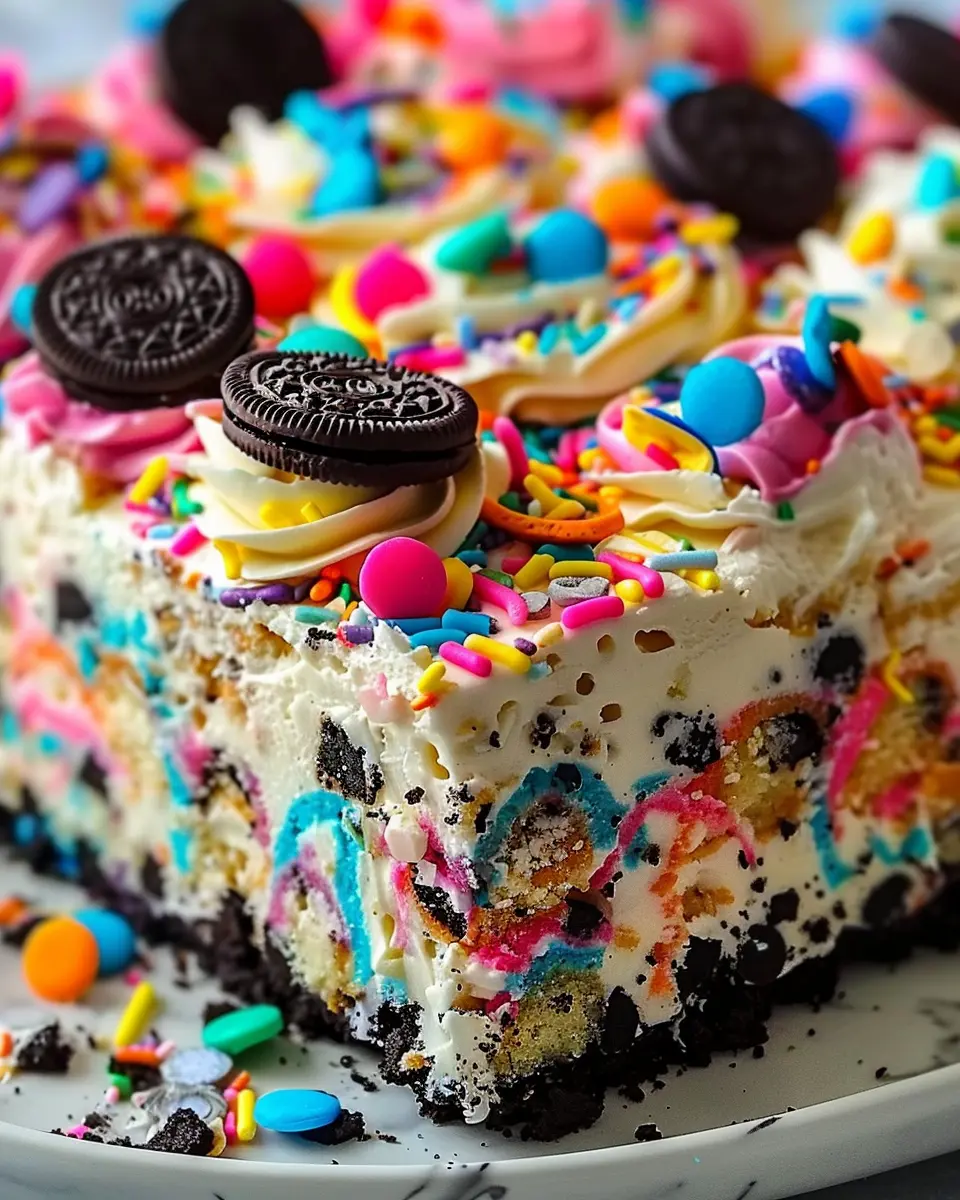
If you’re looking for a show-stopping dessert that’s as easy as it is delicious, the No-Bake Funfetti Oreo Icebox Cake is the perfect choice! This delightful treat not only satisfies your sweet tooth but also brings a festive atmosphere to any gathering. Imagine layers of creamy vanilla goodness paired with the crunch of Oreos and vibrant funfetti; it’s a crowd-pleaser for every occasion, be it a birthday party or a casual get-together.
Why not whip this up today? It requires minimal effort and only a handful of ingredients. Plus, with no baking involved, you’ll have more time to enjoy the company of your friends and family! Trust us—this cake is a game-changer in the dessert department. You can check out more about no-bake desserts here for inspiration, and get started on making your own delicious memories!
PrintNo-Bake Funfetti Oreo Icebox Cake: Easy, Indulgent Treat for All

This No-Bake Funfetti Oreo Icebox Cake is a delightful treat perfect for any celebration. Easy to make and full of fun flavors, this dessert will impress your guests.
- Prep Time: 20 minutes
- Cook Time: 0 minutes
- Total Time: 4 hours 20 minutes
- Yield: 8 servings 1x
- Category: Dessert
- Method: No-Bake
- Cuisine: American
- Diet: Vegetarian
Ingredients
- 1 package Funfetti cake mix
- 1 cup milk
- 2 cups whipped cream
- 1 package Oreo cookies
- sprinkles for topping
Instructions
- In a mixing bowl, combine Funfetti cake mix and milk until smooth.
- Fold in whipped cream until well combined.
- Layer Oreo cookies and the cake mixture in a baking dish.
- Repeat layers until all ingredients are used.
- Top with sprinkles and refrigerate for at least 4 hours before serving.
Notes
- This cake can be made a day ahead of time for better flavor.
- Feel free to add more sprinkles for extra fun!
Nutrition
- Serving Size: 1 slice
- Calories: 300
- Sugar: 20g
- Sodium: 150mg
- Fat: 15g
- Saturated Fat: 8g
- Unsaturated Fat: 5g
- Trans Fat: 0g
- Carbohydrates: 40g
- Fiber: 1g
- Protein: 3g
- Cholesterol: 30mg
Keywords: No-Bake Funfetti Oreo Icebox Cake