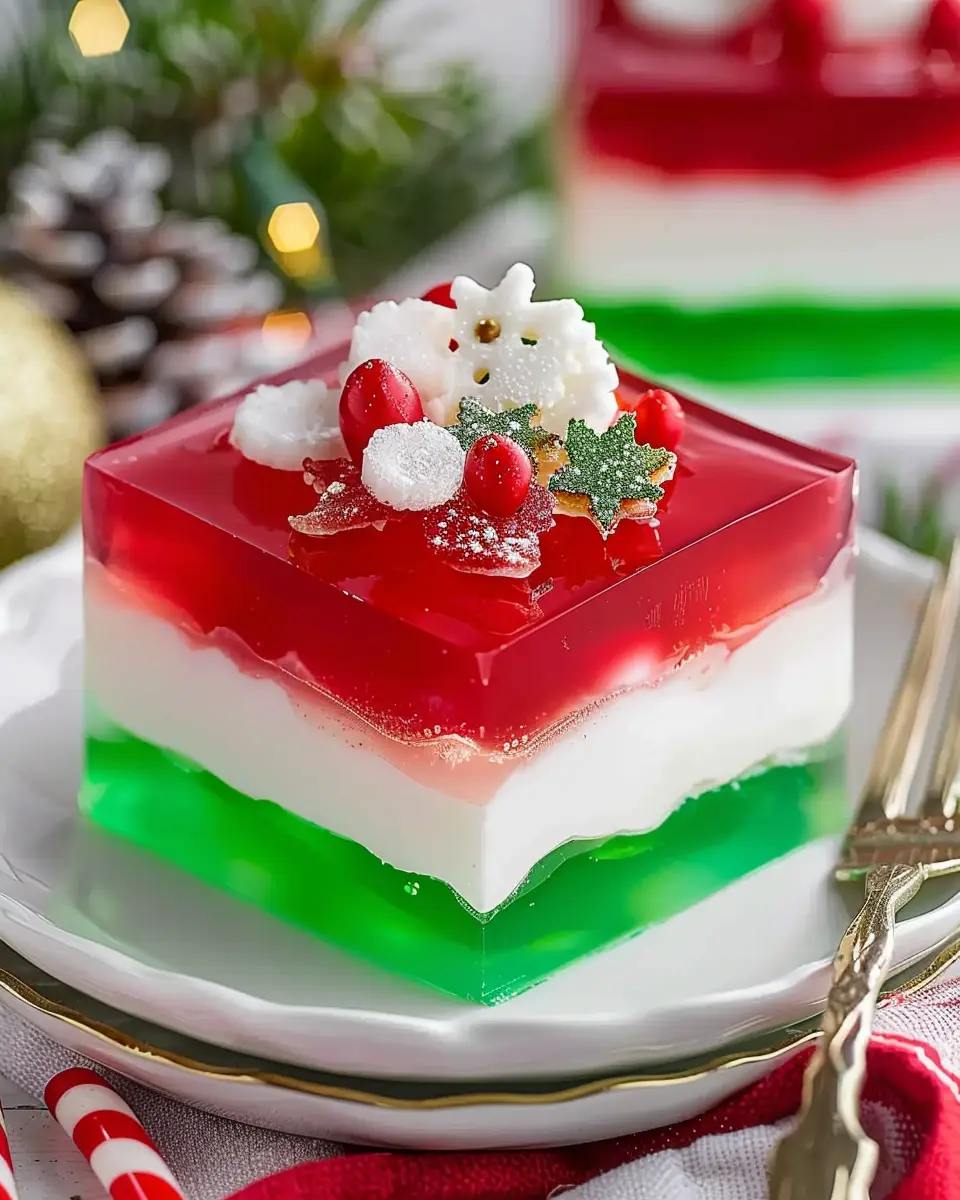
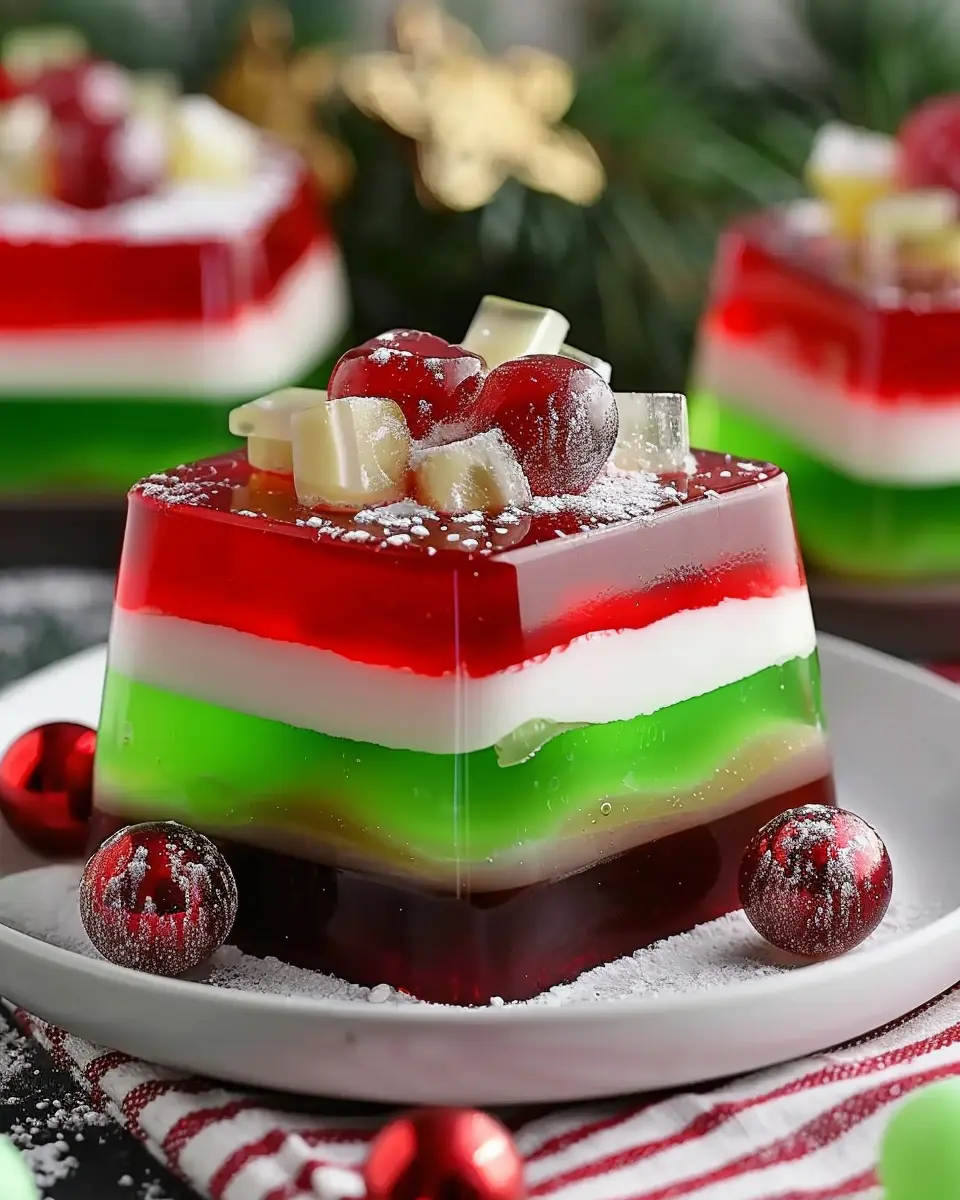
Introduction to Easy Layered Christmas Jello
When the holiday season approaches, the cheerful spirit often calls for festive desserts that are as pleasing to the eye as they are to the palate. One delightful festive treat that embodies both charm and flavor is easy layered Christmas jello. This colorful dessert not only serves as a visual centerpiece for your holiday table but also offers a refreshing burst of sweetness that is perfect for any post-dinner sweet tooth.
Why Easy Layered Christmas Jello is the perfect holiday dessert
So, what makes easy layered Christmas jello the ultimate holiday dessert? Let’s dive into a few reasons:
-
Festive Appeal: Imagine a beautifully layered dessert with vibrant reds, greens, and whites that mirror the holiday spirit! This jello stands out at gatherings and will make your dessert table sparkle with festive joy.
-
Customizable Flavors: The beauty of jello is that the flavor possibilities are endless. Whether you prefer classic berry flavors, citrus bursts, or tropical twists, you can easily customize the layers to match your tastes and those of your guests. You can even incorporate natural fruit juices to add depth to the flavors.
-
Easy to Prepare: If you’re short on time but still want to impress, this recipe is a fantastic option. With just a few ingredients and minimal effort, you can whip up a stunning dessert without spending hours in the kitchen. Plus, it’s a fun activity to involve family or friends—imagine everyone helping out!
-
Great for All Ages: From children to adults, everyone loves a good jello dessert. The wobbly texture is sure to bring a smile to kids, while the vibrant presentation will appeal to adults looking for something light and refreshing after a hearty holiday meal.
Incorporating easy layered Christmas jello into your holiday celebrations can undoubtedly elevate the festive experience for everyone involved. Creating something as visually appealing and delicious as this layered treat gives you a chance to spread cheer, share memories, and delight in the art of holiday cooking.
For detailed instructions on how to create your very own delicious jello masterpiece, make sure to check out this handy guide on layered desserts. Trust me, your guests will be raving about your culinary skills long after the last bite has been enjoyed!
Ingredients for Easy Layered Christmas Jello
Creating your easy layered Christmas jello is as exciting as it is simple! To bring this festive treat to life, you’ll need just a handful of colorful ingredients. Here’s what you’ll require:
Essential Ingredients
- Gelatin: Choose your favorite colors and flavors—traditional red and green work beautifully for Christmas.
- Water: To prepare the gelatin, you’ll need hot and cold water to dissolve the mix properly.
- Sugar: Sweeten your jello layers for that delightful taste; adjust to your preference.
- Whipped Topping: A dollop between the layers adds creaminess and a festive flair.
- Fresh Fruit (optional): Consider adding strawberries or kiwi for extra flavor and texture.
Tips for Success
- Make sure to chill each layer thoroughly before adding the next. This step ensures that each layer stands out beautifully.
- Want to get creative? Use cookie cutters to shape fruit for that extra holiday touch.
If you’re interested in exploring festive jello variations, check out this great resource for more ideas! Happy layering!
Step-by-Step Preparation of Easy Layered Christmas Jello
Creating an easy layered Christmas jello is a fun and festive way to add a colorful touch to your holiday celebrations. It’s perfect for getting into the Christmas spirit, especially if you’re entertaining guests or bringing a dish to a party. With just a few simple steps, you can prepare a beautiful dessert that looks as good as it tastes!
Preparing the Green Layer with Lime Jello
To kick off your easy layered Christmas jello, start with the green layer featuring lime jello. This vibrant layer sets the mood and lays the foundation for your dish.
- Ingredients Needed:
- 1 package of lime jello
- 1 cup of boiling water
- 1 cup of cold water
-
Dissolve the jello: In a medium mixing bowl, combine the lime jello powder and boiling water. Stir it with a whisk until the powder is completely dissolved.
-
Add cold water: After it’s well mixed, pour in 1 cup of cold water to the bowl and give it another whisk to blend everything harmoniously.
-
Set the layer: Grease an 8×8 inch dish lightly with cooking spray, then pour the green mixture into it. Place the dish in the refrigerator for about 2 hours, or until the jello has fully set.
This base adds a refreshing zing, and there’s nothing quite like that nostalgic taste of lime jello!
Creating the Creamy Cheese Layer
Now that your green layer is set, it’s time to prepare the next layer: the creamy cheese layer. This part adds a delightful contrast to the jello layers and a little bit of richness to balance it out.
- Ingredients Needed:
- 1 package of cream cheese (softened)
- 1/2 cup sugar
- 1 cup of whipped cream or cool whip
- 1 teaspoon vanilla extract
-
Mix the cream cheese and sugar: In a large bowl, beat the softened cream cheese and sugar together until smooth and creamy.
-
Incorporate the whipped cream: Gently fold in the whipped cream and vanilla extract. Be careful here; you want to maintain that light and airy texture!
-
Layer it up: Once the green jello is set, spread the creamy cheese layer over the top, smoothing it out gently.
This creamy layer adds a beautiful contrast against the bright colors of the jello layers that will follow.
Crafting the Red Layer with Cherry Jello
Now, let’s get back to the jello with the vibrant red cherry layer! This layer will lend a classic Christmas vibe with its ruby red hue.
- Ingredients Needed:
- 1 package of cherry jello
- 1 cup of boiling water
- 1 cup of cold water
-
Dissolve the cherry jello: Just like you did with the lime jello, mix the cherry jello powder with the boiling water in a mixing bowl, ensuring it dissolves completely.
-
Cool it down: Stir in the cold water. It’s important to let this mixture cool for at least 30 minutes to avoid melting the creamy cheese layer.
-
Pour and chill: After cooling, carefully pour the cherry jello over the cheese layer, and return it to the refrigerator for another 2 hours until set.
The festive red layer adds not just flavor but also a pop of color that really makes your easy layered Christmas jello shine!
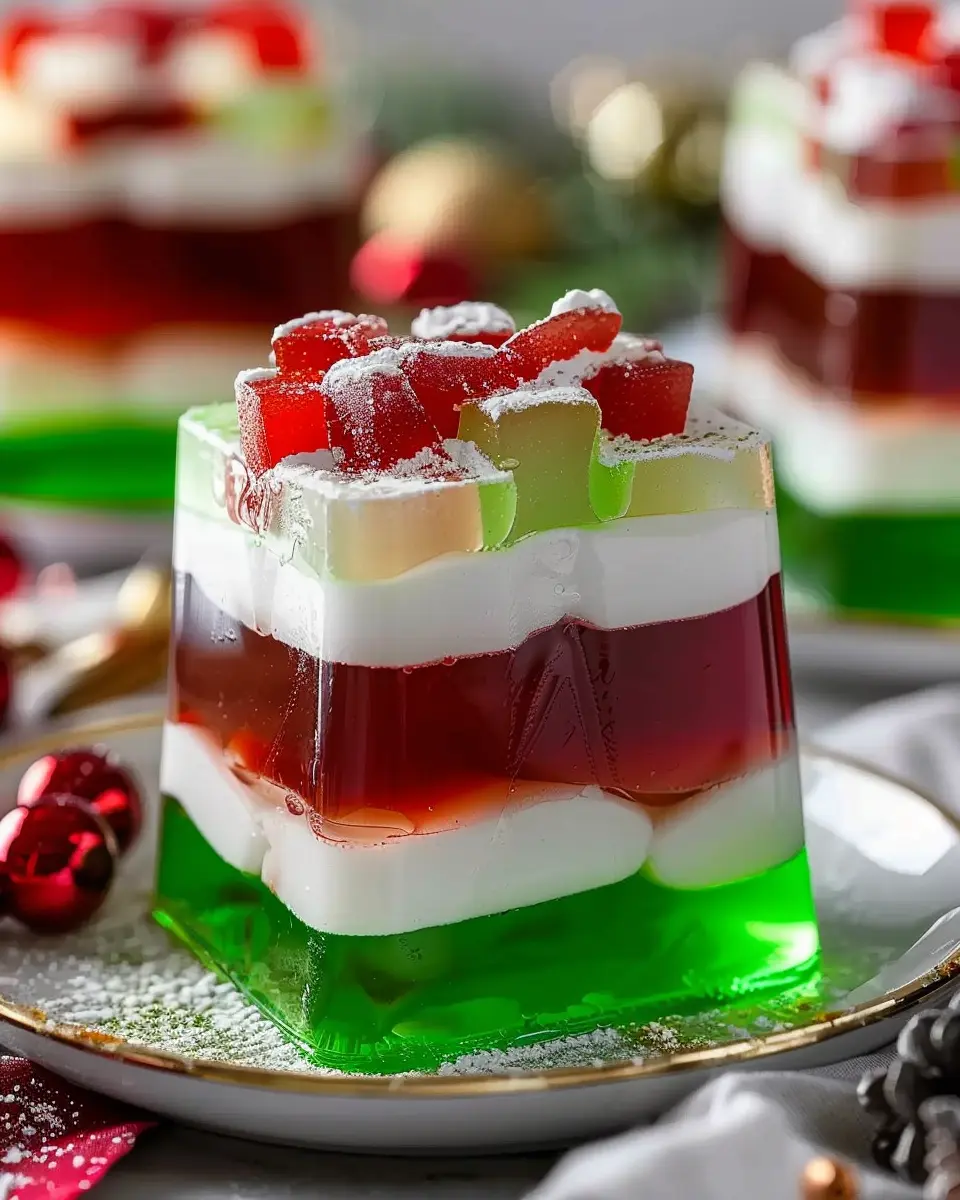
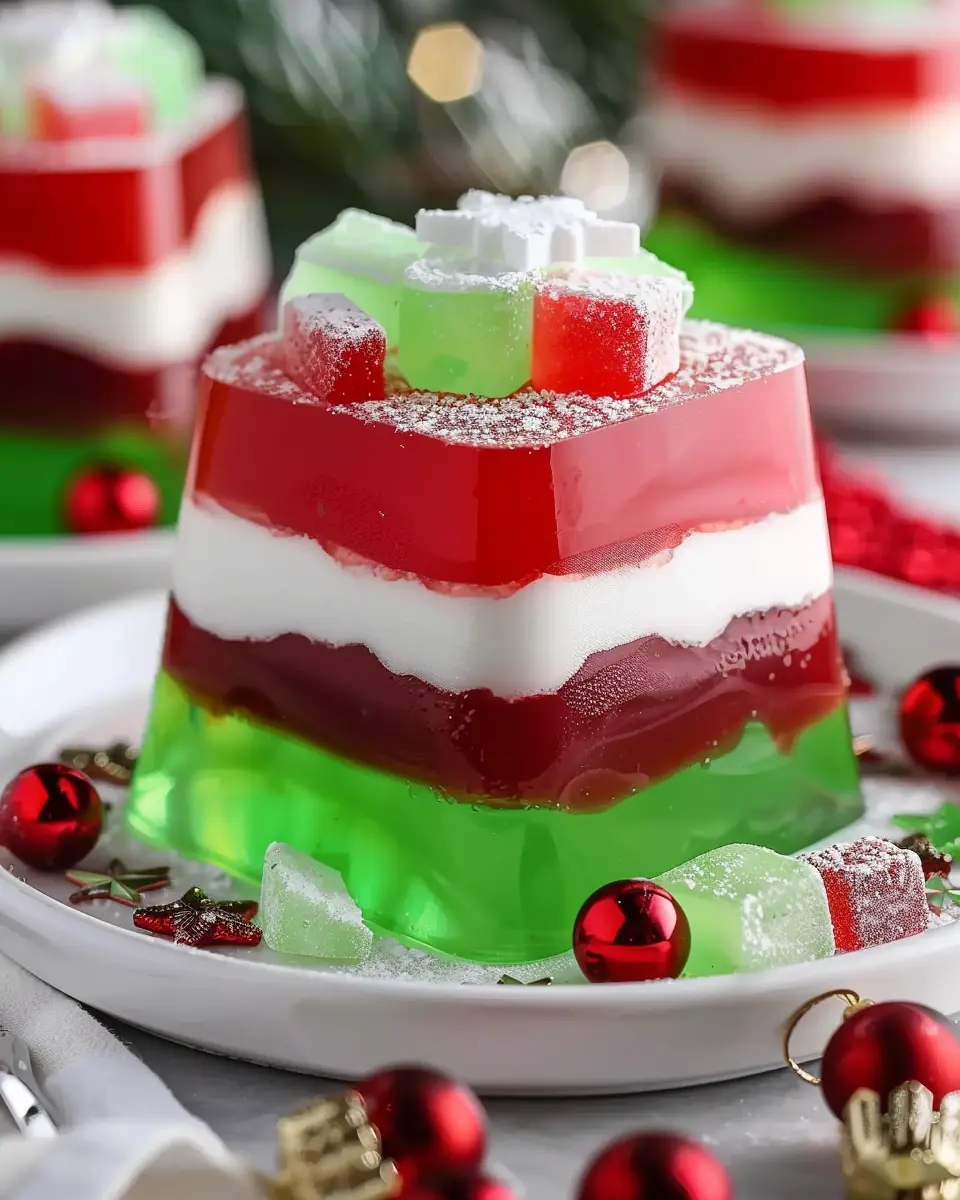
Assembling the Layers
You might think we’re almost done – but patience is key!
- First, check if the layers are properly set before layering.
- Start with the green, followed by the creamy cheese, and then the red layer on top.
- Make sure each layer is smooth, and allow each to set a bit if you’re working quickly.
As you layer, think of all the holiday gatherings this dessert might make even more special!
Chill and Serve
Once all layers are assembled and set, it’s time for the grand finale!
-
Chill: Ensure your jello is refrigerated for at least another 2 hours, ideally overnight, so all flavors can meld together and the texture becomes impeccably smooth.
-
Slice and serve: Using a sharp knife, cut your easy layered Christmas jello into squares. For an extra festive touch, you can garnish with whipped cream or fresh cranberries.
This dessert is a fabulous way to delight your holiday guests, and it’s sure to be a conversation starter!
For further jello inspiration, consider checking out the National Jelly and Jello Association’s website.
So gather your ingredients, roll up your sleeves, and enjoy the cheerful process of making this layered delight that embodies the spirit of Christmas!
Variations on Easy Layered Christmas Jello
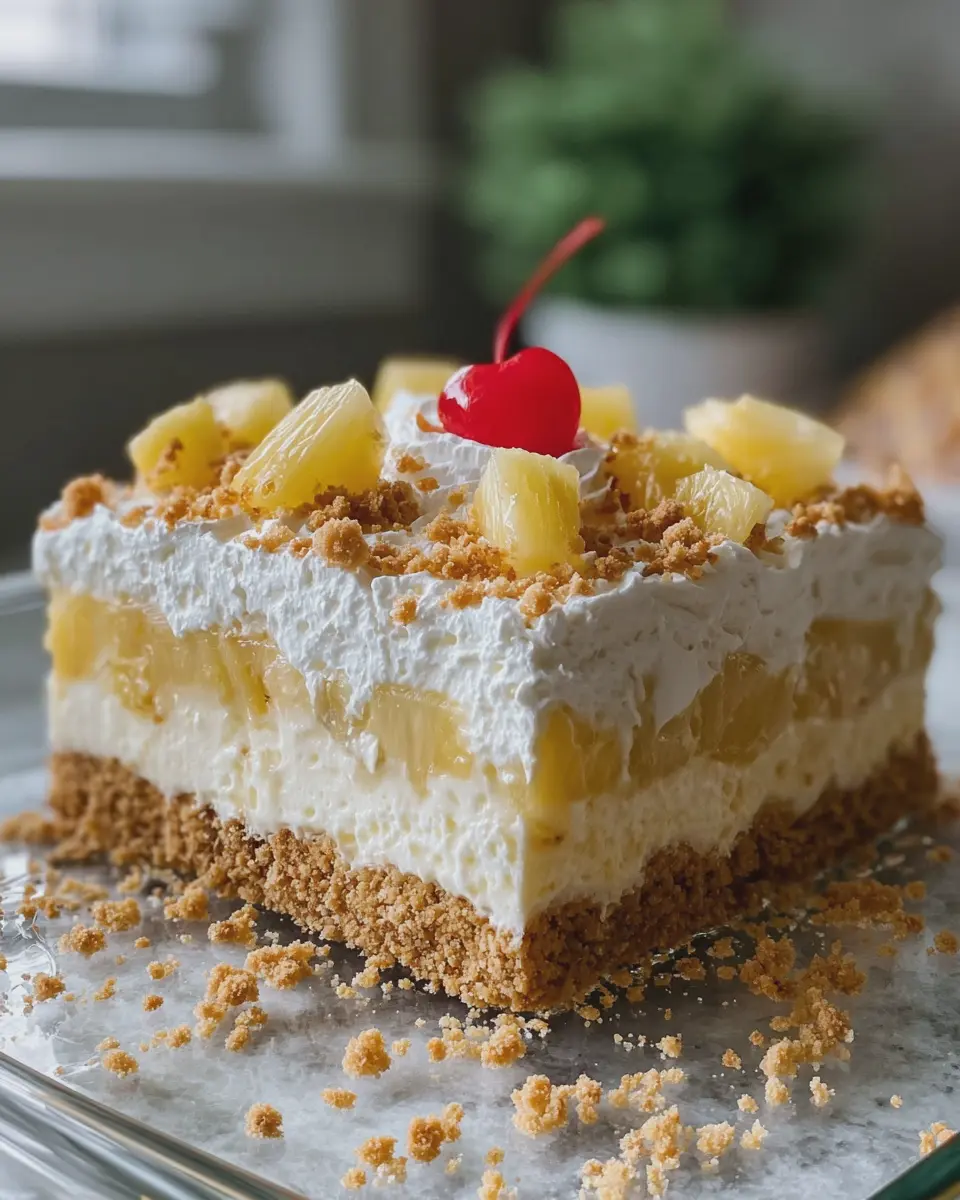
Tropical Twist with Coconut Jello
If you’re looking to shake things up with your easy layered Christmas jello, consider a delicious tropical twist. By substituting a layer of classic gelatin with coconut jello, you can bring that summery vibe right into your holiday gatherings.
What You’ll Need:
- Coconut jello mix
- Pineapple chunks (fresh or canned)
- Whipped cream (to top it off)
To prepare, simply follow the instructions on your coconut jello package, then layer it between your traditional jello layers. The creamy texture paired with bits of pineapple adds a refreshing contrast that brightens up your dessert table.
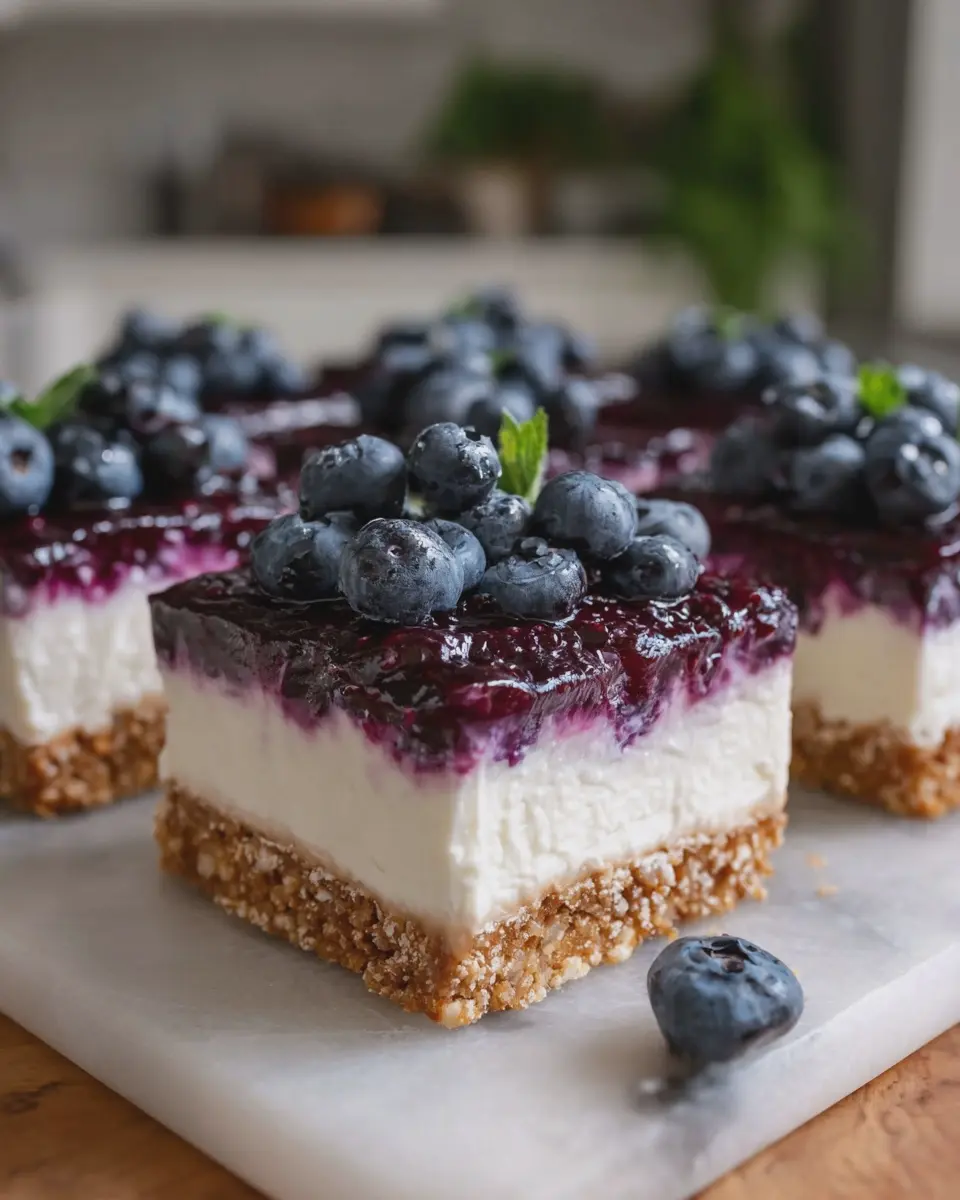
Exploring Different Fruit Combinations
Using a variety of fruit flavors in your easy layered Christmas jello is another fun way to personalize your creation. Consider these combinations:
- Strawberry and Kiwi: The vibrant red and green will have your dish looking festive and tasting refreshing.
- Raspberry and Lemon: The sweet and tart blend is a crowd-pleaser that appeals to many palates.
- Mango and Passionfruit: For something exotic, try using mango jello topped with passionfruit seeds for added texture.
You don’t need to be a culinary wizard to make something delightful. Want to get more adventurous? Add fresh fruit like blueberries or cherries as garnish between layers for added flavor and a pop of color.
For more ideas, you can check out Taste of Home for inspiration on layering techniques and flavor pairings. With these variations and your personal touch, your easy layered Christmas jello is bound to impress family and friends during the holiday season.
Cooking Tips and Notes for Easy Layered Christmas Jello
Creating a festive dessert like easy layered Christmas Jello can be a fun and colorful addition to your holiday table. Here are some tips to make the process smooth and enjoyable.
Choose Your Flavors Wisely
- Color Coordination: Opt for a mix of flavors that complement each other. Think about using raspberry, lime, and orange for a vibrant visual appeal.
- Texture Matters: Consider incorporating fruits or whipped cream to add texture and flavor contrast. Chefs recommend using fresh fruits like strawberries or mandarin oranges—guide on how to incorporate fruits in Jello here.
Timing is Everything
Let each layer set properly before adding the next one. A good rule of thumb is to allow about 30 minutes of chilling time between layers. This helps prevent them from mixing, ensuring that you achieve that beautiful layered effect.
Make it a Family Activity
Get your loved ones involved! As you prepare this easy layered Christmas Jello, turn it into a fun family tradition. You can even set up a “Jello assembly line” with everyone helping out.
For more creative holiday dessert ideas, check out this holiday baking guide.
By following these simple tips, you’ll be well on your way to impressing your guests with this delightful dessert!
Serving Suggestions for Easy Layered Christmas Jello
When it comes to serving your easy layered Christmas Jello, presentation can elevate the entire experience. Here are some delightful ideas to make your dessert stand out during the festive season.
Whimsical Layers
Try serving the jello in individual cups or jars. This not only makes for easy portioning, but it also allows guests to see the beautiful layers. Use clear cups to showcase the vibrant colors, and top each serving with a dollop of whipped cream for an inviting finish. For an extra festive touch, add a few red and green sprinkles on top!
Creative Pairings
Pair your jello with a refreshing drink. Consider serving it alongside a sparkling cranberry or pomegranate soda, which complements the fruity flavors of your easy layered Christmas Jello. Alternatively, a good ol’ fruit punch can also add a festive flair. This can create a delightful balance and enhance the overall treat experience.
Make it a Dessert Bar
For gatherings, set up a dessert bar featuring the jello alongside other festive treats. Think about offering gingerbread cookies or peppermint bark, creating a visually stunning and delightful spread that will have everyone raving.
These serving suggestions not only enhance the dish but also create an inviting atmosphere for your holiday celebrations.
Time Breakdown for Easy Layered Christmas Jello
When it comes to making easy layered Christmas Jello, understanding your time commitments is key. This delightful treat not only impresses with its colorful layers but is also simple to prepare! Here’s how to manage your time effectively.
Preparation time
Getting started is a breeze! You’ll need about 20 minutes to prepare your ingredients and layer your Jello. Assembly is fun as you watch the colors come together. Just make sure to follow the instructions carefully to achieve those beautiful layers.
Chilling time
Patience is a virtue when it comes to setting your Jello. Allow at least 4 hours for it to chill and firm up between layers. If you can, making it the day before will save you stress and ensure it’s perfectly set for your gathering.
Total time
In total, you should plan for around 4 hours and 20 minutes to whip up this festive dessert. It’s well worth the wait when you see everyone’s faces light up as they dig into your easy layered Christmas Jello!
For more tips on creating fun holiday desserts, check out Food Network or All Recipes for inspiration!
Nutritional Facts for Easy Layered Christmas Jello
When preparing easy layered Christmas jello, it’s important to consider its nutritional profile. Each square contains approximately 80 calories, making it a festive yet guilt-free treat.
Sugar Content
A single serving has about 12 grams of sugar, primarily from the fruit-flavored gelatin and any additional sweeteners. If you’re watching your sugar intake, opt for sugar-free gelatin options, which can significantly reduce sugar content.
Other Nutritional Details
- Carbohydrates: Each piece offers around 20 grams of carbs, predominantly from gelatin.
- Fat: This delightful dessert is nearly fat-free, making it a lighter choice for your holiday gatherings.
- Protein: While not a protein powerhouse, it provides a small amount of protein—about 1 gram per serving.
For more on healthy indulgences, check out the Mayo Clinic for expert nutritional advice!
FAQs about Easy Layered Christmas Jello
Creating an easy layered Christmas Jello can be a festive and fun experience, but you might have some questions along the way. Let’s address a few frequently asked queries to help you feel more confident in your jello making adventure.
How can I make sure layers set properly?
One of the keys to achieving perfectly set layers in your easy layered Christmas Jello is patience. After preparing each layer, let it sit in the refrigerator for at least 30 minutes before adding the next. Make sure that the first layer is completely firm; you can test this by gently pressing the surface. If it’s sticky, give it a bit more time. You also want your layers to be similar in temperature before combining, so allow the second layer to cool slightly after mixing.
Can I add other fruit to the jello?
Absolutely! Adding fresh or canned fruit can brighten your easy layered Christmas Jello and provide additional flavor. Berries, mandarin oranges, or even diced pineapples work wonderfully. Just ensure that any fruit is well-drained if using canned varieties. This will help maintain the clarity and beautiful layering in your dessert. For more tips on incorporating fruit, check out this resource.
What alternatives can I use for whipped topping?
If you’re looking to swap out whipped topping, there are several delicious options! You can use homemade whipped cream for a richer flavor, or opt for Greek yogurt for a healthier touch. Coconut cream or whipped coconut topping also makes for a dairy-free alternative. If you want a touch of sweetness, consider mixing in a little vanilla extract or a sweetener of your choice!
Enjoy crafting your festive dessert, and remember, a little creativity goes a long way!
Conclusion on Easy Layered Christmas Jello
Creating easy layered Christmas Jello is not just a fun kitchen project; it’s an opportunity to showcase your festive spirit. This delightful dessert adds a splash of color to your holiday table, making it visually appealing for guests and family alike. Plus, it’s adaptable! You can customize flavors, colors, and even the layers according to your and your loved ones’ preferences.
As you plan your holiday feast, consider how this simple treat could complement savory dishes like Turkey Bacon or Chicken Ham. If you’re looking for more festive inspiration, check out these holiday dessert ideas at Food Network and Serious Eats. So, roll up your sleeves, gather your ingredients, and enjoy making this charming dessert—a sure conversation starter that will be remembered long after the holidays are over!
PrintEasy Layered Christmas Jello: A Festive Treat Everyone Will Love
Delight in the festive flavors of Easy Layered Christmas Jello, a visually stunning dessert that brings cheer to any holiday gathering.
- Prep Time: 30 minutes
- Total Time: 4 hours
- Yield: 12 servings 1x
- Category: Dessert
- Method: Chill
- Cuisine: American
- Diet: Vegetarian
Ingredients
- 1 cup boiling water
- 1 package red gelatin
- 1 cup cold water
- 1 cup cream cheese
- 1 cup whipped topping
- 1 package green gelatin
- 1 cup cold water
Instructions
- In a bowl, dissolve red gelatin in boiling water; mix well and add cold water. Pour into a 9×13 inch pan and refrigerate until set.
- In another bowl, blend cream cheese and whipped topping until smooth. Spread over the set red layer.
- In a separate bowl, dissolve green gelatin in boiling water; mix with cold water and pour over the cream cheese layer. Refrigerate until fully set.
Notes
- For best results, let each layer set completely before adding the next.
- This dessert can be made a day ahead of time and stored in the refrigerator.
Nutrition
- Serving Size: 1 piece
- Calories: 150
- Sugar: 20g
- Sodium: 50mg
- Fat: 5g
- Saturated Fat: 3g
- Unsaturated Fat: 2g
- Trans Fat: 0g
- Carbohydrates: 22g
- Fiber: 0g
- Protein: 2g
- Cholesterol: 10mg
Keywords: Easy Layered Christmas Jello, festive dessert, holiday treats