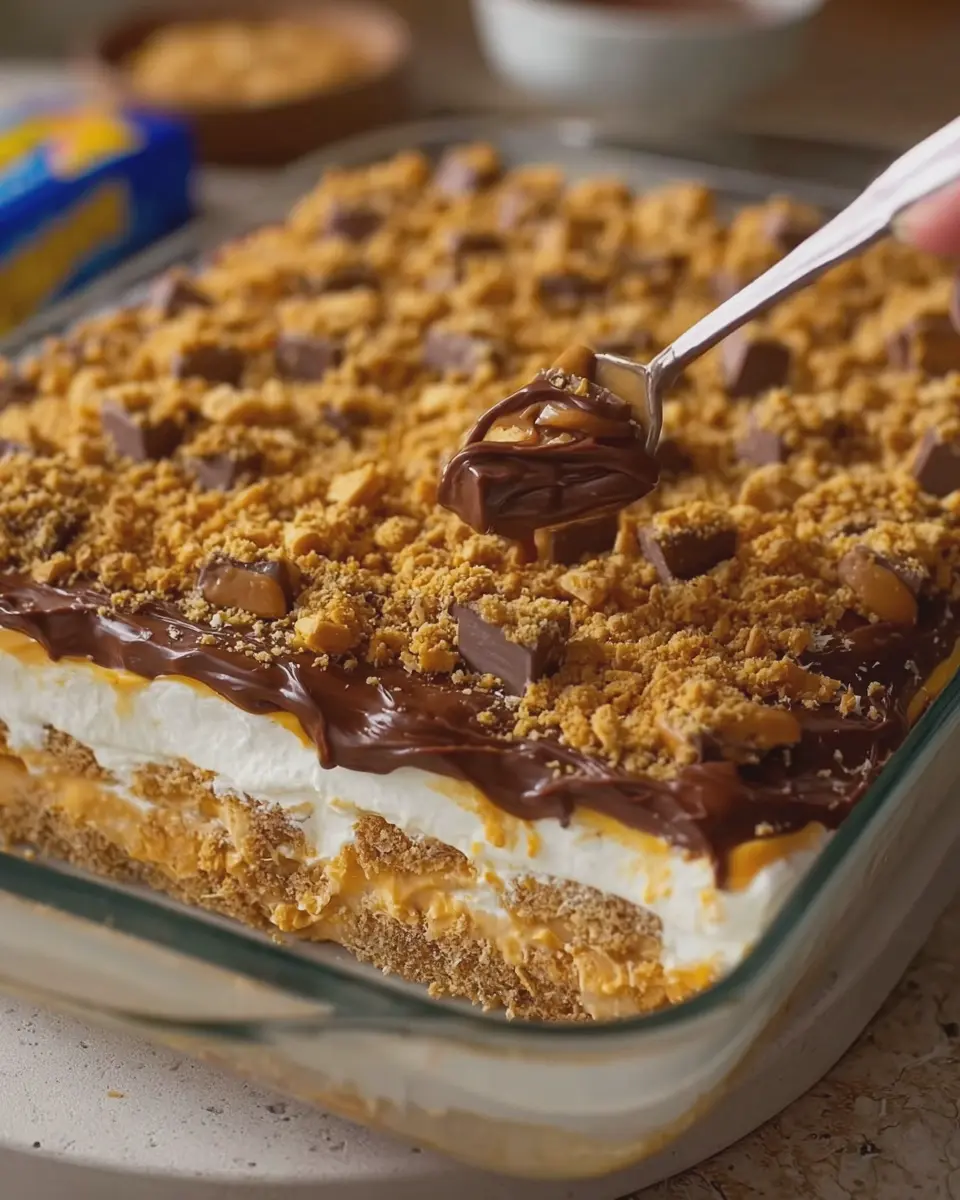
Introduction to No-Bake Butterfinger Lush
When it comes to dessert, who doesn’t have a soft spot for something truly decadent yet deceptively easy to whip up? Enter the no-bake Butterfinger lush. This delightful treat combines creamy layers with a sweet, crunchy surprise that’s sure to impress your friends and family at any gathering. But why should you consider going homemade when store-bought desserts are so easily accessible?
Why opt for homemade desserts?
-
Simplicity: The beauty of this no-bake Butterfinger lush is in its simplicity. There’s no need to turn on the oven or spend hours on complicated techniques. With just a few ingredients, you can create something that looks and tastes gourmet. You’ll find that even those who think baking is beyond them can navigate this recipe.
-
Control Over Ingredients: When you make your own dessert, you have complete control over what goes in it. Want to use organic cream cheese or gluten-free cookies? Go for it! You can easily tailor the no-bake Butterfinger lush to suit your dietary preferences without sacrificing flavor.
-
Cost-Effective: Have you ever noticed how much those fancy desserts cost at bakeries? Making a no-bake Butterfinger lush at home not only saves you cash but also lets you serve ample portions for the same price. It’s a win-win!
-
Personal Touch: There’s a certain joy in creating something from scratch. Whether you’re sharing it at a potluck or enjoying it during a movie night at home, a homemade dessert adds a personal touch that pre-packaged treats can’t match.
Once you dive into making this luscious recipe, you’ll appreciate how easy it is to bring a piece of indulgence into your life. So, let’s not delay—grab your mixing bowls and get ready to impress with this no-bake Butterfinger lush! For tips on elevating your dessert game, check out resources like Serious Eats or New York Times Cooking for inspiration.
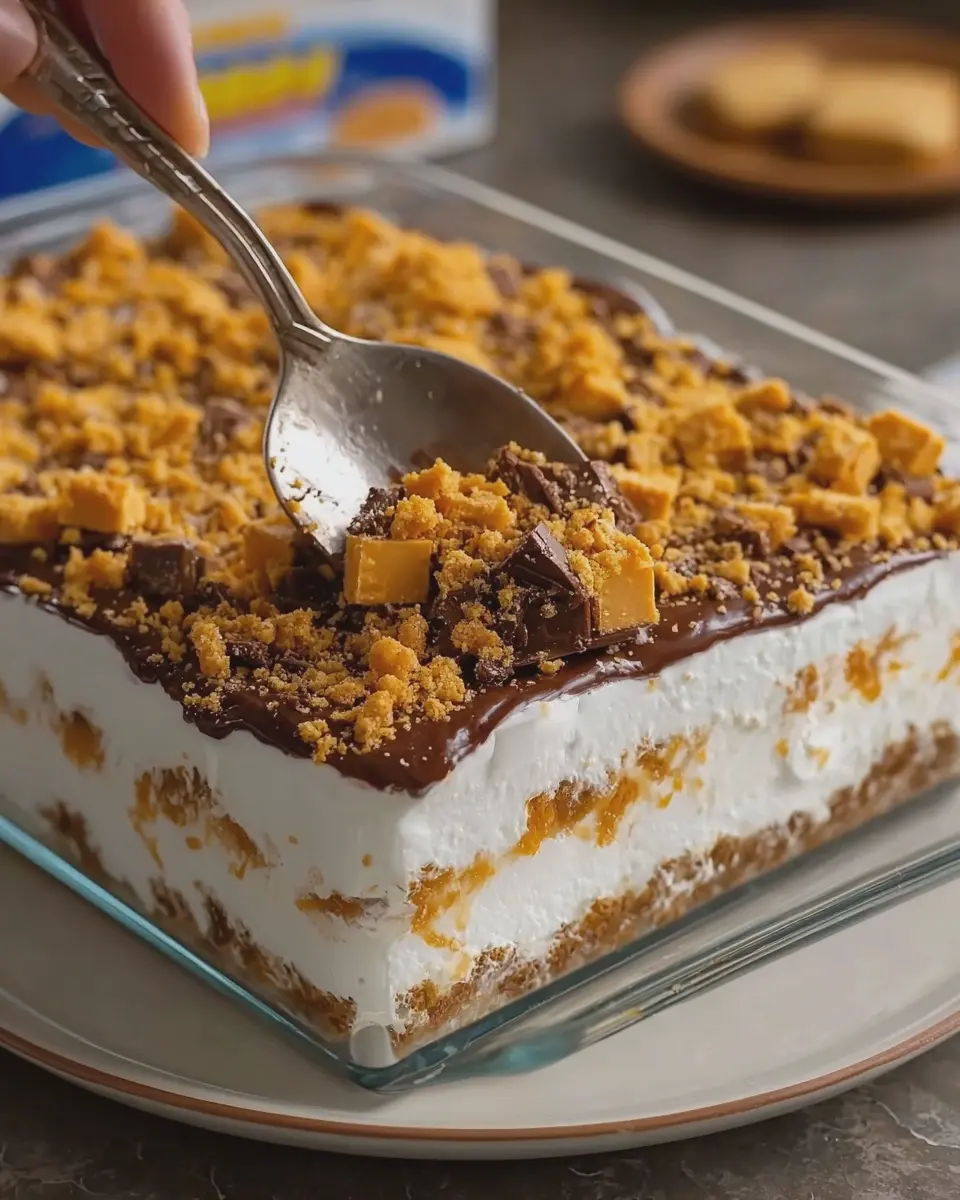
Ingredients for No-Bake Butterfinger Lush
Creating a delightful no-bake Butterfinger Lush is a breeze with the right ingredients. You’ll love how simple it is to whip up this treat!
Essential ingredients you’ll need
To get started on your culinary adventure, gather the following ingredients:
- Butterfinger candies: The star of this dessert! Aim for about 5-6 full-size bars, chopped up to create that irresistible crunch.
- Cream cheese: 8 ounces, softened. This builds the creamy base.
- Whipped topping: You’ll need 8 ounces for a light, fluffy layer.
- Vanilla pudding mix: A 3.4-ounce box is perfect to add sweetness and smoothness.
- Milk: 1 cup, to prepare the pudding and give it that perfect consistency.
- Crushed graham crackers: About 1 ½ cups, which adds a lovely texture.
- Melted butter: ½ cup to mix with the crushed graham crackers.
As you gather these ingredients, you can already imagine the layers of flavor coming together. Have you ever tried a no-bake dessert before? They can save time and dishwashing! For tips on how to choose the best Butterfinger bars, check out Candy.com.
Preparing No-Bake Butterfinger Lush
Embarking on the culinary adventure of making a no-bake Butterfinger lush is like opening a treasure chest filled with layers of rich flavors and delightful textures. Whether you’re preparing for a casual get-together or simply indulging your sweet tooth, this dessert is sure to impress. Let’s jump right into the preparation steps!
Gather Your Ingredients
First things first, let’s talk about what you need! This delightful treat requires a handful of simple ingredients that you probably already have in your kitchen. Here’s a quick list to get you started:
- Oreo cookies or graham crackers (for the crust)
- Butter (melted, about half a cup)
- Cream cheese (softened, around 8 ounces)
- Powdered sugar (1 cup)
- Cool Whip (or whipped topping of your choice, 8 ounces)
- Peanut butter (1 cup, creamy works best)
- Butterfinger bars (3 to 4, crushed for that signature flavor)
Feeling curious? You can read more about the importance of using quality ingredients here.
Create the Cookie Crust
Now that you have your ingredients on hand, let’s move on to creating that delicious cookie crust.
- Crush the cookies: In a large zip-top bag, crush your Oreo cookies or graham crackers into fine crumbs. You can also use a food processor for a quicker option.
- Mix with butter: In a mixing bowl, combine the cookie crumbs with the melted butter until the mixture resembles wet sand.
- Press into pan: Transfer the mixture into a 9×13 dish and press it down firmly with your hands or the back of a measuring cup. Make sure it’s even and compact; this will provide a sturdy base for your layers.
Creating a strong base is essential for your no-bake Butterfinger lush! The crust will hold everything together, ensuring each bite is delicious.
Make the Creamy Filling
Now, let’s whip up that luscious creamy filling that makes this dessert so delectable.
- Beat cream cheese: In a mixing bowl, beat the softened cream cheese until it’s smooth.
- Add sugar and peanut butter: Gradually add in the powdered sugar and creamy peanut butter. Mix until it’s well combined and fluffy.
- Fold in Cool Whip: Finally, gently fold in the Cool Whip. This will give your filling that irresistible lightness we all love in a dessert.
Did you know that peanut butter is not only tasty but also a source of protein? It also makes a fantastic pairing with the crushed Butterfinger bars you’ll add later!
Combine and Layer
Now comes the fun part—layering!
- Spread the filling: Spoon the creamy filling over the cookie crust, spreading it evenly.
- Add Butterfinger pieces: Sprinkle the crushed Butterfinger bars generously on top of the filling. You want that delightful crunch in each bite!
- Top it off: If you have any remaining Cool Whip, spread it over the Butterfinger layer for a beautiful finish.
Take a moment to admire your work—it’s looking pretty delicious already!
Chill and Set
Once you’ve assembled your no-bake Butterfinger lush, it’s time to let it chill out.
- Cover it: Grab some plastic wrap and cover your dish. This helps set the layers and meld the flavors together.
- Refrigerate: Let it refrigerate for at least 4 hours, although overnight is even better. The longer it sets, the more those flavors will develop!
While you’re waiting, this could be a great time to explore some fun serving ideas or even plans for a gathering. Check out delicious serving suggestions here.
With your no-bake Butterfinger lush patiently chilling in the fridge, you’re now one step closer to serving up a dessert that your friends and family will love. Now, all that’s left is to dig in and enjoy!
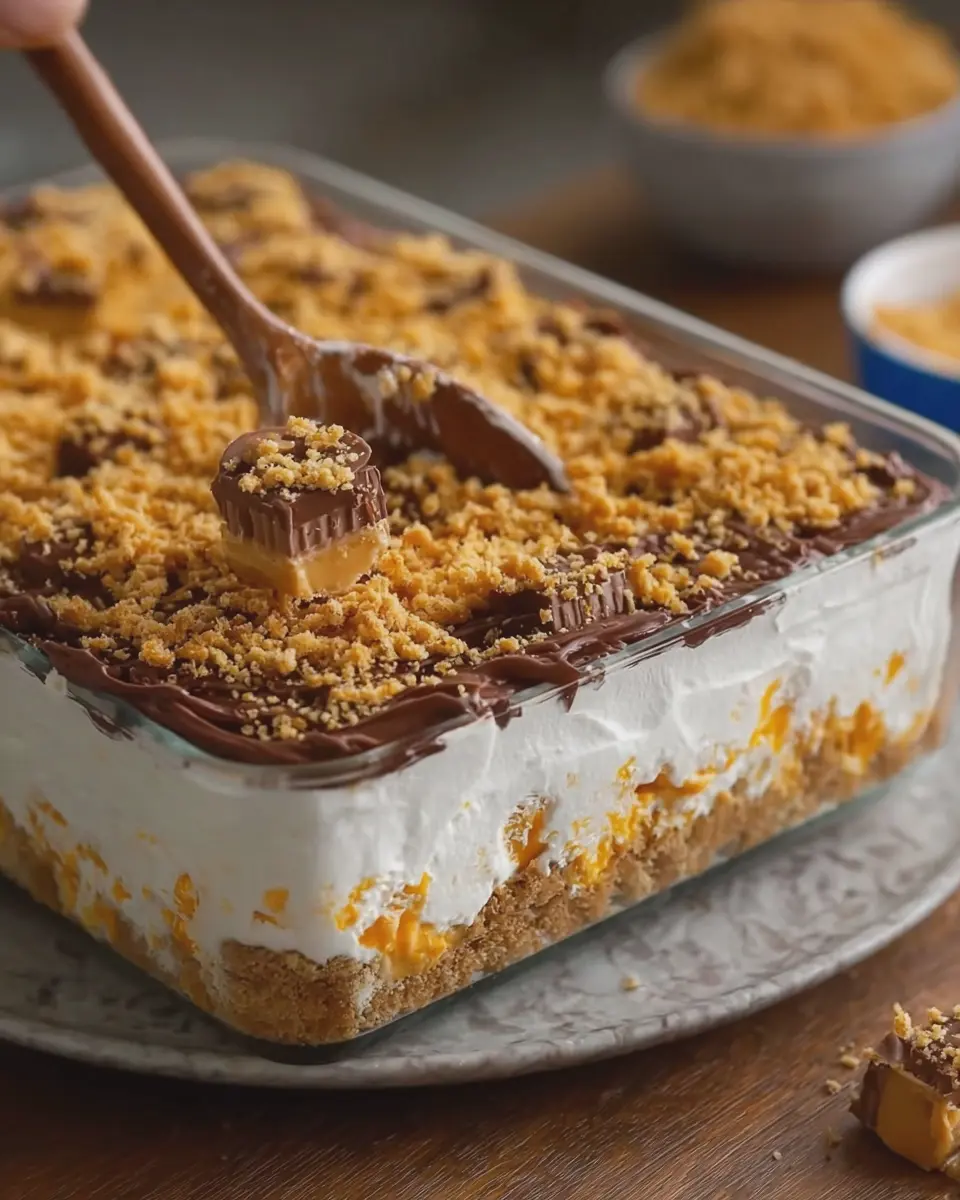
Variations on No-Bake Butterfinger Lush
Peanut Butter Twist
If you’re a fan of both Butterfingers and peanut butter, why not combine the two in your no-bake butterfinger lush? Start by mixing creamy peanut butter into your cream cheese layer for an extra nutty flavor. This delightful twist adds depth and richness that complements the buttery layers perfectly. You can also break up peanut butter cookies to sprinkle between the layers, offering both texture and an enhanced peanut butter kick. Trust us; this combination will leave you craving more!
Chocolatey Lush Alternative
For those chocolate lovers out there, consider swapping out the chocolate pudding layer with a richer option, like homemade chocolate ganache. Simply heat equal parts of heavy cream and semisweet chocolate until smooth, and pour it over your crust. This chocolatey lush alternative will elevate the dessert to a whole new level of indulgence. Don’t forget to garnish with shaved chocolate or mini chocolate chips on top to tantalize the senses even more.
These variations on the classic no-bake butterfinger lush are not only easy to pull together but can also wow your friends and family at your next gathering. Whether you stick to the original recipe or experiment with these delicious twists, you’re bound to create a dessert that’s the talk of the table. For more inspiration on variations of classic desserts, check out Joy of Baking and Bigger Bolder Baking. Happy baking!
Cooking Tips and Notes for No-Bake Butterfinger Lush
The Importance of Temperature
When preparing your no-bake Butterfinger lush, temperature plays a crucial role in achieving the right consistency. Make sure your cream cheese is at room temperature—this ensures it mixes smoothly with the other ingredients, avoiding any lumps. Additionally, allow your whipped topping to sit out briefly; it should be soft and spreadable. If everything is too cold, it’ll be hard to blend and could lead to an uneven texture. Remember, patience is key!
How to Get the Perfect Crust
The crust of your no-bake Butterfinger lush deserves special attention. For the perfect crunch, crush your graham crackers finely. You can use a food processor or place them in a plastic bag and crush them with a rolling pin. For extra flavor, consider mixing in a bit of melted butter. The key is to press the mixture firmly into your dish to form a solid base that withstands the creamy layers above.
For more tips on dessert crusts, you might find this guide from the Food Network helpful!
With these tips, your no-bake Butterfinger lush will be a showstopper in no time. Enjoy!
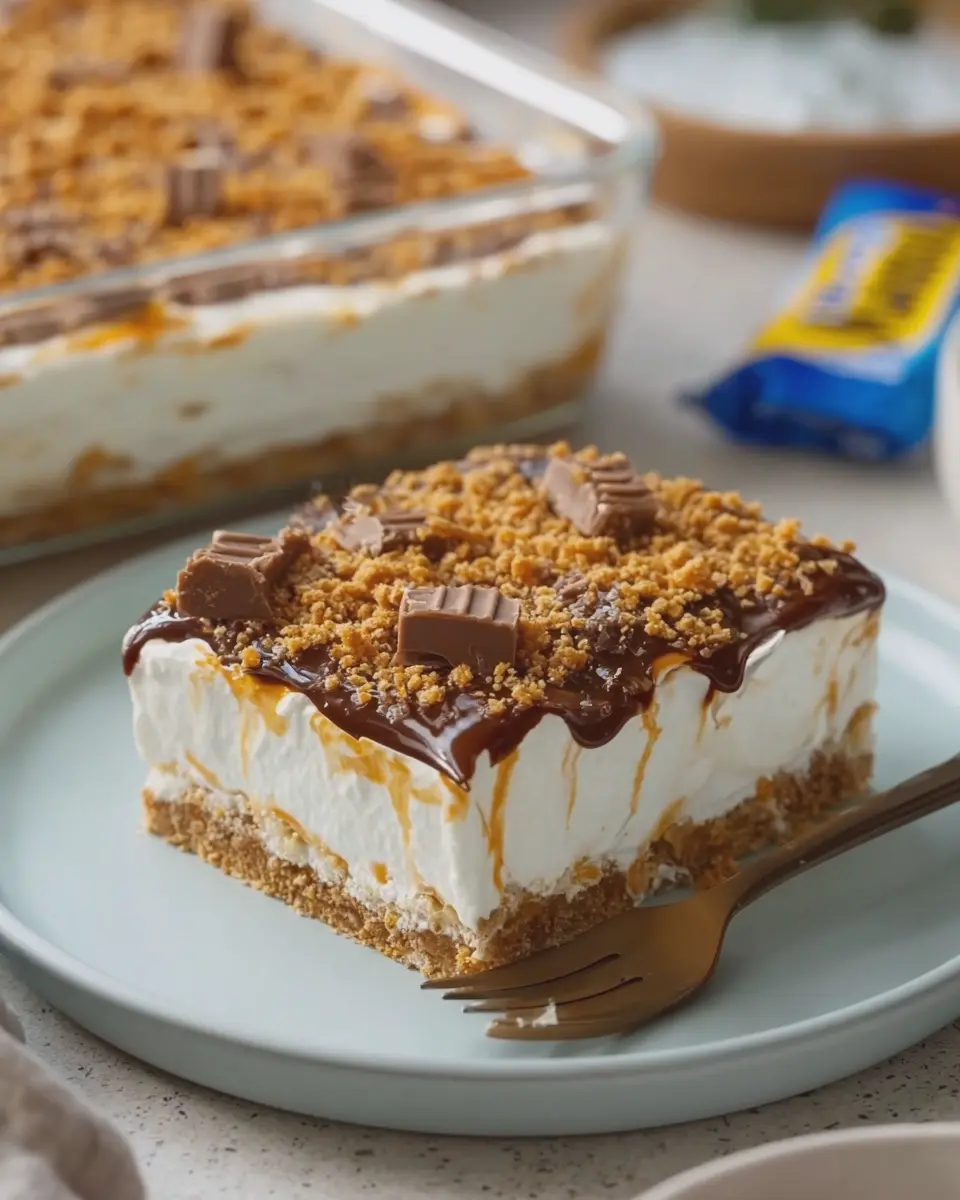
Serving suggestions for No-Bake Butterfinger Lush
Creative presentation ideas
When it comes to serving your no-bake Butterfinger lush, presentation can turn a delicious dessert into a stunning centerpiece. Consider these fun ideas to elevate your dish:
- Layered Parfaits: Serve individual portions in clear glasses or dessert cups. This allows the layers to shine, showcasing that beautiful mix of creamy goodness and crunchy Butterfinger bits.
- Garnish with Flair: Top each serving with a dollop of whipped cream and a sprinkle of crushed Butterfinger for that extra touch. You could also add a drizzle of chocolate sauce for a gourmet feel.
- Family Style: For gatherings, serve the lush in a large trifle bowl. Provide spoons and let guests dig in, adding an element of shared experience and fun.
Pairing suggestions with beverages
What better way to complement a rich no-bake Butterfinger lush than with a well-chosen drink? Consider these pairings:
- Iced Coffee: The robust flavors of a chilled coffee can balance the sweetness of the dessert beautifully. Try a vanilla or mocha flavor for a delightful fusion.
- Herbal Tea: A refreshing peppermint or chamomile tea can provide a soothing contrast, allowing the luscious flavors to stand out without overwhelming your palate.
- Sparkling Water: Add a splash of fruit juice to your sparkling water. This provides a light, refreshing beverage that won’t compete with the dessert, making it a perfect match.
For more creative drink ideas, sites like Serious Eats can be a great resource to explore. Enjoy your no-bake Butterfinger lush with these thoughtful serving suggestions!
Time breakdown for No-Bake Butterfinger Lush
Preparation time
Getting started on your no-bake Butterfinger lush is a breeze! You’ll need about 20 minutes to gather your ingredients and assemble this delightful treat. You can easily multitask during this time—perhaps you crank up your favorite playlist to make the process even more enjoyable.
Chilling time
Once you’ve created those delicious layers, it’s crucial to allow your dessert to chill for at least 4 hours in the fridge. This setting time helps the flavors meld beautifully and gives the lush its perfect texture. Plan ahead—this wait will only make your dessert experience even sweeter!
Total time
All in all, you’re looking at around 4 hours and 20 minutes from start to finish. But don’t worry, most of that time is hands-off—you’ll be free to sip your favorite drink while it works its magic in the fridge! For more ideas on easy desserts, check out this resource on no-bake options. With this clever time management, your no-bake Butterfinger lush will be ready for any gathering or just a cozy night in.
Nutritional facts for No-Bake Butterfinger Lush
Calories per serving
If you’re wondering about indulging in this rich no-bake Butterfinger lush, each serving clocks in at approximately 350 calories. Not too shabby for a delightful dessert that requires zero baking, right?
Key nutritional insights
When it comes to treating yourself, it’s good to know what’s in your food. Here are a few key nutritional insights:
- Sugars: With a sweet profile, you’ll find about 20 grams of sugar per serving, making it a decedent but thoughtful treat.
- Fats: This dessert features roughly 22 grams of fat. Most of this comes from cream cheese and whipped topping, contributing to that luscious mouthfeel.
- Protein: You get about 4 grams of protein per serving, thanks mainly to the cream cheese and peanut butter.
For a deeper dive into nutritional information related to desserts, check out resources from the USDA or MyFitnessPal. Balancing treat time with daily nutritional goals is something we all strive for, so keep these insights handy!
FAQs about No-Bake Butterfinger Lush
Can I make this dessert ahead of time?
Absolutely! One of the best features of this no-bake Butterfinger lush is how well it keeps. Preparing it a day in advance actually enhances the flavors, allowing them to meld beautifully. Just cover it tightly with plastic wrap or foil and pop it in the fridge. When you’re ready to serve, just sprinkle some extra chopped Butterfinger on top for a delightful crunch.
What if I can’t find fun-size Butterfinger bars?
No worries at all! If fun-size Butterfinger bars are hard to come by, you can easily substitute with regular-sized Butterfingers. Just chop them into bite-sized pieces to maintain that iconic flavor. Alternatively, consider using other similar candies like Reese’s or Twix for a unique twist. Be creative – it’s all about that luscious, creamy texture!
How long will the dessert last in the fridge?
A properly stored no-bake Butterfinger lush can last up to 3–4 days in the refrigerator. Just ensure it’s tightly covered to keep it fresh. While it may not last that long, as it’s likely to be devoured quickly, knowing it has a decent shelf life is reassuring. If you’re entertaining guests, you can enjoy peace of mind knowing there’s a sweet treat on standby.
With these FAQs, you’re well on your way to mastering your no-bake Butterfinger lush! For more dessert inspiration, check out resources like Serious Eats or Food Network for delicious ideas. Happy baking (or should I say, no-baking)!
Conclusion on No-Bake Butterfinger Lush
Why You’ll Love This Recipe
If you’re looking for a dessert that’s as easy as it is decadent, the no-bake Butterfinger lush is a must-try. This delightful treat combines creamy layers with crunchy Butterfinger pieces, offering the perfect balance of texture and flavor. Here’s why you’ll fall in love:
- Quick and Easy: No baking means less mess and more time to enjoy with friends.
- Rich Flavors: The combination of chocolate and peanut butter is a classic hit.
- Customizable: Feel free to swap in your favorite candy or add more layers!
Whether it’s for a last-minute gathering or a special occasion, this dessert is sure to impress. Looking for more fun twists on classic recipes? Check out Taste of Home for some inspiration! Enjoy your creation.
PrintNo-Bake Butterfinger Lush: The Indulgent Sweet Treat You’ll Love
No-Bake Butterfinger Lush is a scrumptious dessert that combines layers of creamy goodness with the rich, buttery flavor of Butterfingers. Perfect for any occasion!
- Prep Time: 20 minutes
- Total Time: 4 hours 20 minutes
- Yield: 8 servings 1x
- Category: Dessert
- Method: No-Bake
- Cuisine: American
- Diet: Vegetarian
Ingredients
- 1 package graham cracker crumbs
- 1/2 cup unsalted butter, melted
- 1 package cream cheese, softened
- 1 cup powdered sugar
- 1 cup heavy whipping cream
- 1 teaspoon vanilla extract
- 3 large Butterfinger bars, chopped
Instructions
- In a bowl, mix graham cracker crumbs and melted butter until combined. Press into the bottom of a dish to form a crust.
- In another bowl, beat cream cheese and powdered sugar until creamy. Fold in whipped cream and vanilla extract.
- Layer half of the cream cheese mixture over the crust, then sprinkle half of the chopped Butterfinger bars on top.
- Repeat the layers with the remaining cream cheese mixture and Butterfinger bars.
- Refrigerate for at least 4 hours before serving to allow the layers to set.
Notes
- For a chocolate twist, drizzle melted chocolate on top before serving.
- Store leftovers in the refrigerator for up to 3 days.
Nutrition
- Serving Size: 1 slice
- Calories: 350
- Sugar: 22g
- Sodium: 150mg
- Fat: 25g
- Saturated Fat: 15g
- Unsaturated Fat: 8g
- Trans Fat: 0g
- Carbohydrates: 30g
- Fiber: 1g
- Protein: 3g
- Cholesterol: 60mg
Keywords: No-Bake Butterfinger Lush, dessert, sweet treat