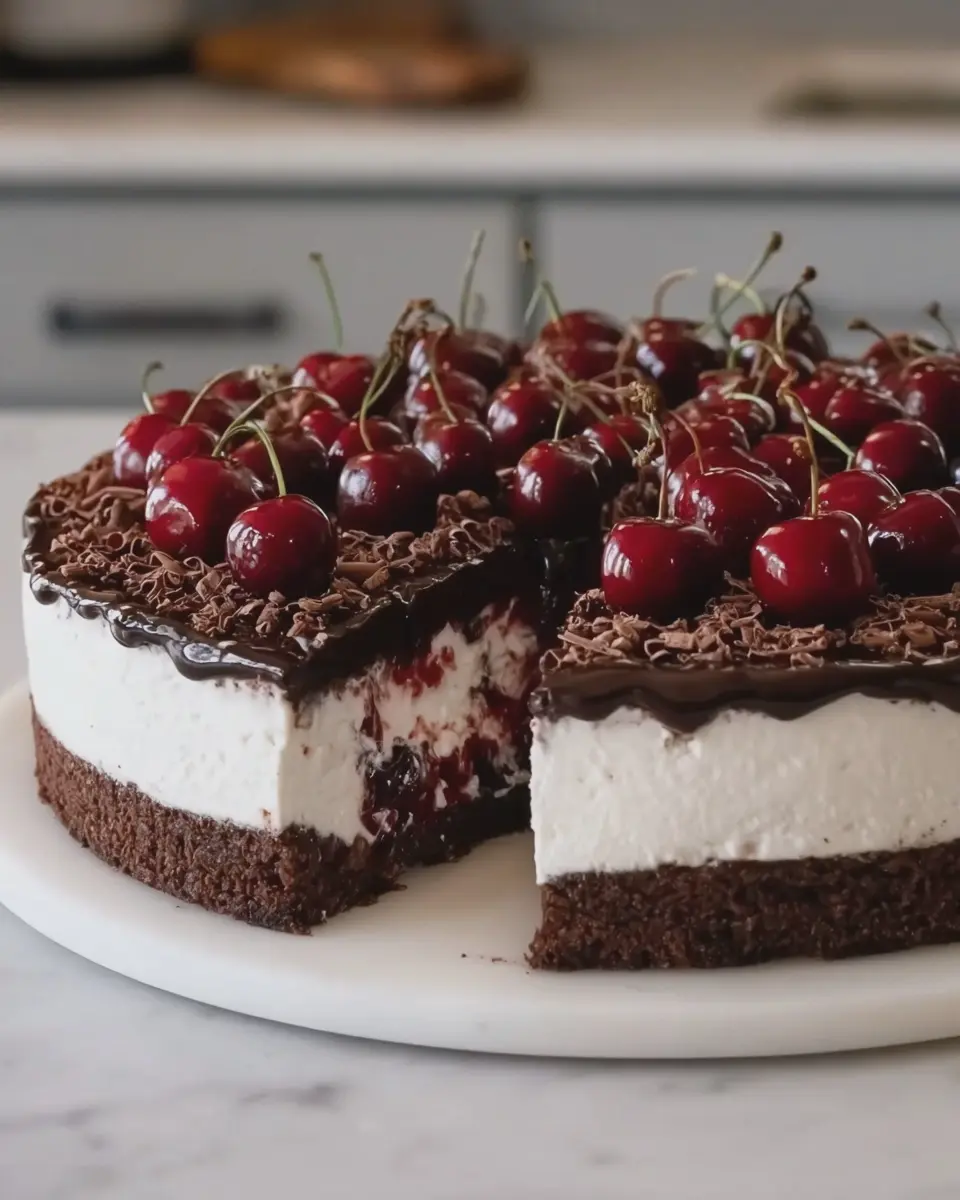
Introduction to No-Bake Black Forest Cheesecake
If you’re a busy young professional juggling work commitments, social activities, and a whirlwind of daily tasks, you know how challenging it can be to whip up dessert for yourself or for guests. Enter the no-bake black forest cheesecake — a delectable solution that combines the rich, velvety world of cheesecake with the timeless allure of black forest cake, all without the hassle of baking.
Why No-Bake Cheesecakes Are a Game Changer for Busy Young Professionals
Let’s face it: after a long day at the office, the last thing you want to do is preheat the oven and spend hours in the kitchen. No-bake recipes are your best friend in these moments. Not only do they cut down on prep time and cleanup, but they also provide the flexibility to plan ahead. With a no-bake cheesecake, you can prepare it the night before and let it chill while you focus on unwinding after a hectic day.
Consider this: according to the American Journal of Lifestyle Medicine, a well-prepared dessert can enhance social interactions and uplift moods. And with a no-bake black forest cheesecake, you can impress your friends and family while still having time for yourself. This cheesecake is perfectly creamy, rich, and topped with luscious cherry filling—resulting in a dessert that ticks all the boxes. Plus, you’ll find yourself experimenting with flavors and textures without the fear of an oven mishap!
Here are a few reasons why this no-bake wonder is perfect for your busy lifestyle:
- Quick and Easy: Most recipes require minimal ingredients and can be put together in under 30 minutes.
- Make-Ahead Convenience: Prepare the cheesecake in advance, letting the flavors meld beautifully as it chills in the fridge.
- Simple Cleanup: With no baking involved, cleanup is a breeze—no pans to wash, just your mixing bowl and spoons.
Whether you’re hosting a dinner party or simply indulging in a sweet treat after a long week, this no-bake black forest cheesecake is sure to be a hit. So why not give it a try? Your taste buds (and your schedule) will thank you!
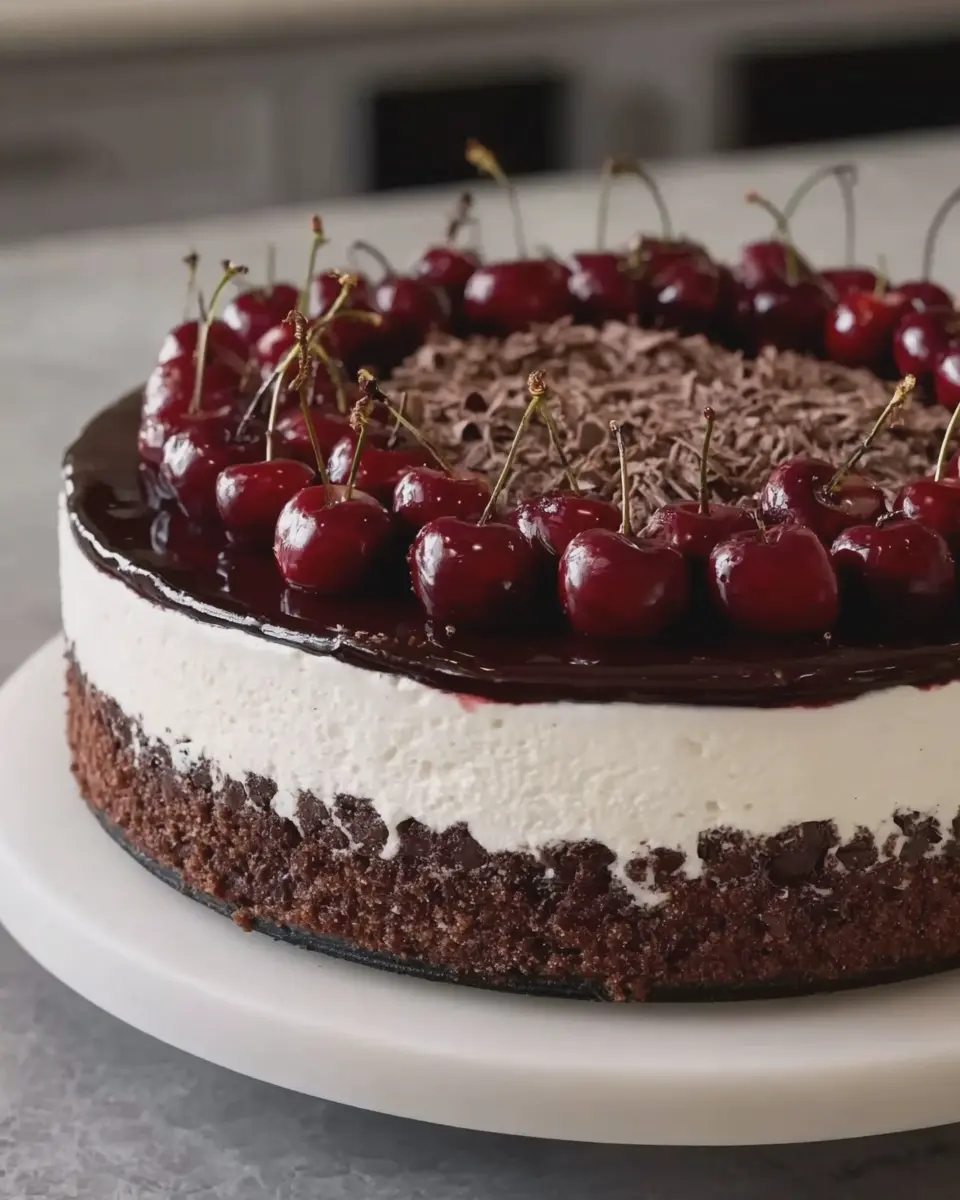
Ingredients for No-Bake Black Forest Cheesecake
Essential ingredients for a delicious cheesecake
Creating a mouthwatering no-bake black forest cheesecake starts with just the right ingredients. Here’s what you’ll need:
- Cream Cheese: The star of the show! Use full-fat for a richer taste.
- Heavy Whipping Cream: This adds a luscious, creamy texture to balance the cheesecake.
- Granulated Sugar: Sweeten things up; add to taste!
- Sour Cream: A touch of tanginess complements the sweetness perfectly.
- Chocolate Cookies: Crushed, these serve as the delightful crust of your cheesecake.
- Cherries: Fresh or jarred, these are essential for that classic Black Forest flavor.
- Cocoa Powder: Sprinkle this in for an additional chocolatey touch.
You can find detailed tips on cheese types and their properties at Serious Eats.
Optional toppings to elevate your dessert
Want to take your no-bake black forest cheesecake to the next level? Consider garnishing with:
- Whipped Cream: A cloud of this on top adds sophistication and creaminess.
- Chocolate Shavings: For that extra touch of elegance, sprinkle these on top!
- More Fresh Cherries: Not only do they look beautiful, but they also add a burst of flavor.
- Mint Leaves: A pop of green brings visual appeal and freshness.
Each of these toppings enhances both the look and taste of your cheesecake, making it a showstopper for any occasion!
Step-by-Step Preparation of No-Bake Black Forest Cheesecake
Creating a no-bake black forest cheesecake is nothing short of magical. This delectable dessert combines rich chocolate, fluffy cheesecake, and sweet cherries, making it perfect for any occasion. There’s a bit of a process involved, but I promise you it’s worth it! Let’s dive into the straightforward steps to get that cheesecake on the table.
Prepare the crust
The crust is the foundation of your no-bake black forest cheesecake, so we want to make it just right! Here’s what you’ll need:
- 200g of chocolate digestive biscuits (or graham crackers)
- 100g of unsalted butter, melted
-
Crush the biscuits: Start by placing the biscuits in a large zip-lock bag and crush them into fine crumbs. You can also use a food processor for a quicker method.
-
Combine with butter: In a mixing bowl, combine the biscuit crumbs with the melted butter. Mix until everything is evenly coated; it should resemble wet sand.
-
Form the crust: Press the mixture into a 9-inch round springform pan, ensuring it’s tightly packed and even. Aim for about half an inch thickness. This crust is the perfect balance—crunchy but not too overpowering.
Make the cheesecake filling
Now, let’s whip up that luscious cheesecake filling. This is where the magic happens:
- 600g of cream cheese, softened
- 150g of powdered sugar
- 200ml of heavy cream
- 1 tsp of vanilla extract
- 200g of cherry pie filling (you can make your own or use store-bought)
-
Beat the cream cheese: In a mixing bowl, beat the softened cream cheese and powdered sugar together until smooth. Make sure there are no lumps—nobody wants a lumpy cheesecake!
-
Add the heavy cream: Gradually add the heavy cream and vanilla extract, continuing to beat until the mixture holds stiff peaks. This is key to achieving that light and fluffy texture.
-
Fold in the cherry filling: Finally, gently fold in the cherry pie filling. This will give your cheesecake layers of flavor with every bite.
Assemble the cheesecake
Here’s the fun part—putting it all together!
-
Layer the mixture: Spoon the cheesecake filling over the prepared crust in the springform pan. Use a spatula to smooth the top.
-
Create layers: If you’re feeling adventurous, consider drizzling some extra cherry filling over the top before you smooth it out, creating a ripple effect.
-
Chill briefly: Before you pop it in the fridge, give it a light tap on the counter to remove any air bubbles—this helps it set nicely.
Chill until set
Patience is key here!
-
Refrigerate: Cover the cheesecake and place it in the refrigerator for at least 4 to 6 hours, or better yet, overnight. The longer it sets, the creamier and firmer it will get. I often prepare mine the night before, allowing the flavors to develop beautifully.
-
Check for firmness: When it’s set, the filling should be firm but still slightly jiggles when you move it—this is the sign of a fab no-bake cheesecake!
Garnish and serve
Now for the pièce de résistance!
-
Add toppings: Once your cheesecake is set, it’s time to get creative. Top it with additional cherry pie filling and whipped cream if you’re feeling fancy. You can also sprinkle some chocolate shavings on top for an extra touch.
-
Serve and enjoy: Carefully run a knife around the edges of the springform pan before releasing the sides. Slice, serve, and watch everyone’s eyes light up. This no-bake black forest cheesecake is destined to impress!
With these easy steps, you’ll not only have a stunning dessert but also a burst of delicious flavors that are sure to delight your guests— or even just yourself! If you want to explore more no-bake desserts, check out BBC Good Food, they have an incredible collection.
Bon appétit!
Variations on No-Bake Black Forest Cheesecake
When it comes to no-bake black forest cheesecake, there are so many exciting ways to switch things up. Here are two delicious variations that will take your dessert game to the next level!
Adding a Layer of Chocolate Ganache
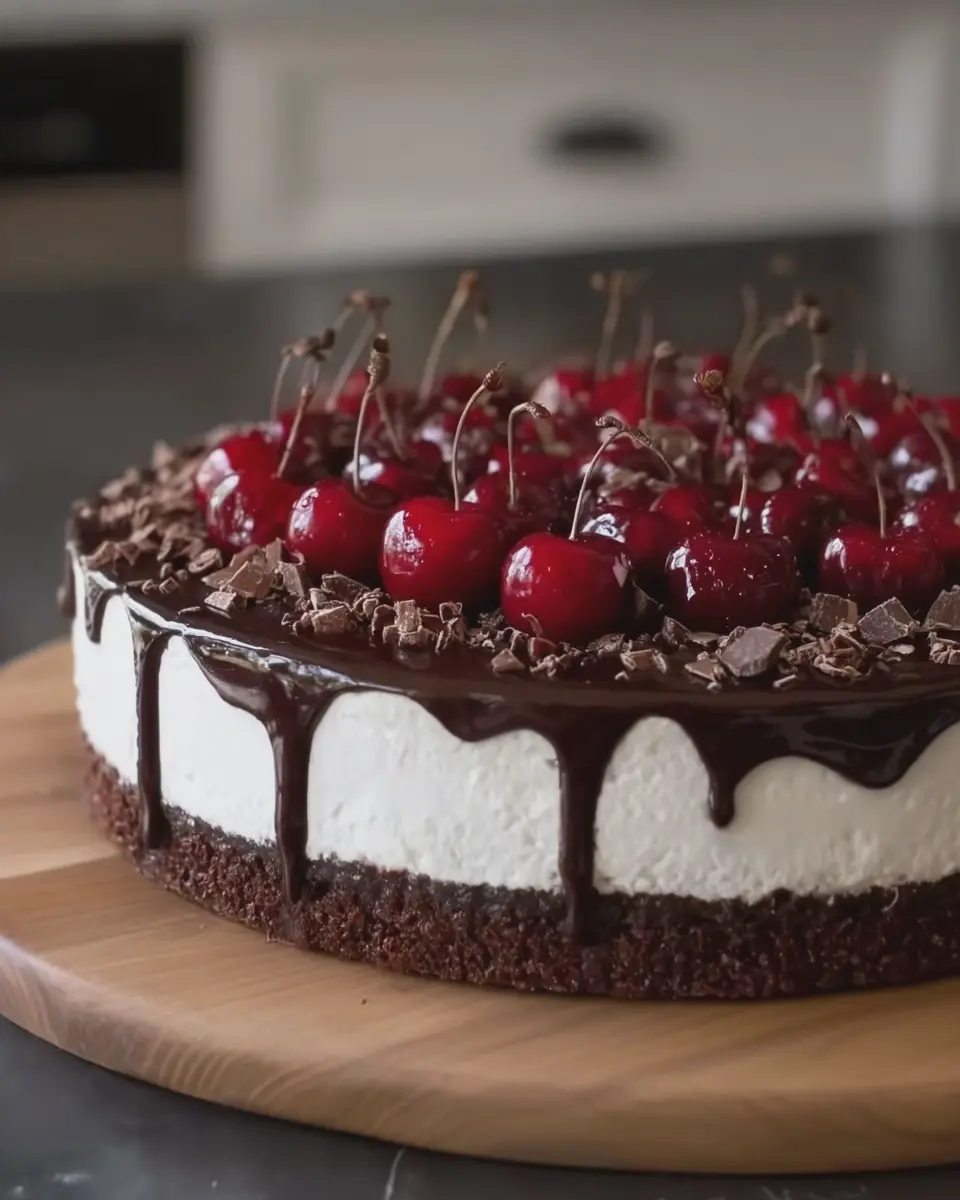
For an extra layer of indulgence, consider topping your no-bake black forest cheesecake with a luscious chocolate ganache. To whip this up, simply melt equal parts heavy cream and high-quality dark chocolate together until smooth. Pour this rich and velvety mixture over your chilled cheesecake before it sets in the fridge.
- Ensure the cheesecake is cooled completely before adding the ganache, so it doesn’t melt.
- For added texture, sprinkle some chocolate shavings or cocoa powder on top of the ganache.
This layer not only provides a delightful contrast in flavor but visually elevates your cheesecake, making it the star of any gathering.
Experimenting with Different Fruit Toppings
While traditional black cherries are a classic choice, don’t be afraid to experiment! You could try:
- Sliced Strawberries: Their vibrant color and sweet-tart flavor pair perfectly with the rich cheese.
- Blueberries: These tiny bursts of flavor add a fresh note and a healthful twist to your dessert.
- Peaches or Raspberries: If you’re looking for something unique, these fruits provide just the right amount of tanginess.
Mix and match these fruits or create seasonal versions of your no-bake black forest cheesecake. The versatility here is endless, and it’s a fun way to keep your dessert fresh and exciting!
Want to learn more about cheesecake variations? Check out this comprehensive guide on cheesecakes. By incorporating these ideas, your no-bake black forest cheesecake will never get boring!
Cooking Tips and Notes for No-Bake Black Forest Cheesecake
Common pitfalls to avoid when making cheesecake
Creating a delightful no-bake black forest cheesecake can seem daunting, but a few common mistakes can trip you up. Here’s what to look out for:
- Forgotten Ingredients: Double-check your list! Skipping even one key component, like the cream cheese or whipped topping, can throw your entire recipe off.
- Overmixing: When blending your filling, aim for a gentle hand. Overmixing can incorporate too much air, leading to cracks or a dense texture once set.
- Insufficient Chilling: Don’t rush the chilling process! Let your cheesecake sit in the fridge for at least four hours for the best results.
Best practices for achieving a smooth filling
A deliciously smooth filling is the hallmark of any great cheesecake. Here are some tips to help you nail it:
- Room Temperature Ingredients: Bring your cream cheese and other ingredients to room temperature first. This small step makes them blend effortlessly.
- Quality Cream Cheese: Invest in a high-quality cream cheese for a rich and creamy flavor. Brands like Philadelphia are often recommended by chefs.
- Avoid Lumps: Use a hand mixer or food processor to ensure there are no lumps in your filling. A smooth base provides a perfect canvas for your black forest toppings.
For more detailed techniques, check out resources from The Kitchn and Serious Eats. Happy baking!
Serving Suggestions for No-Bake Black Forest Cheesecake
Pairing Ideas for Your Cheesecake
Pairing your no-bake black forest cheesecake can elevate the experience! Consider serving it with:
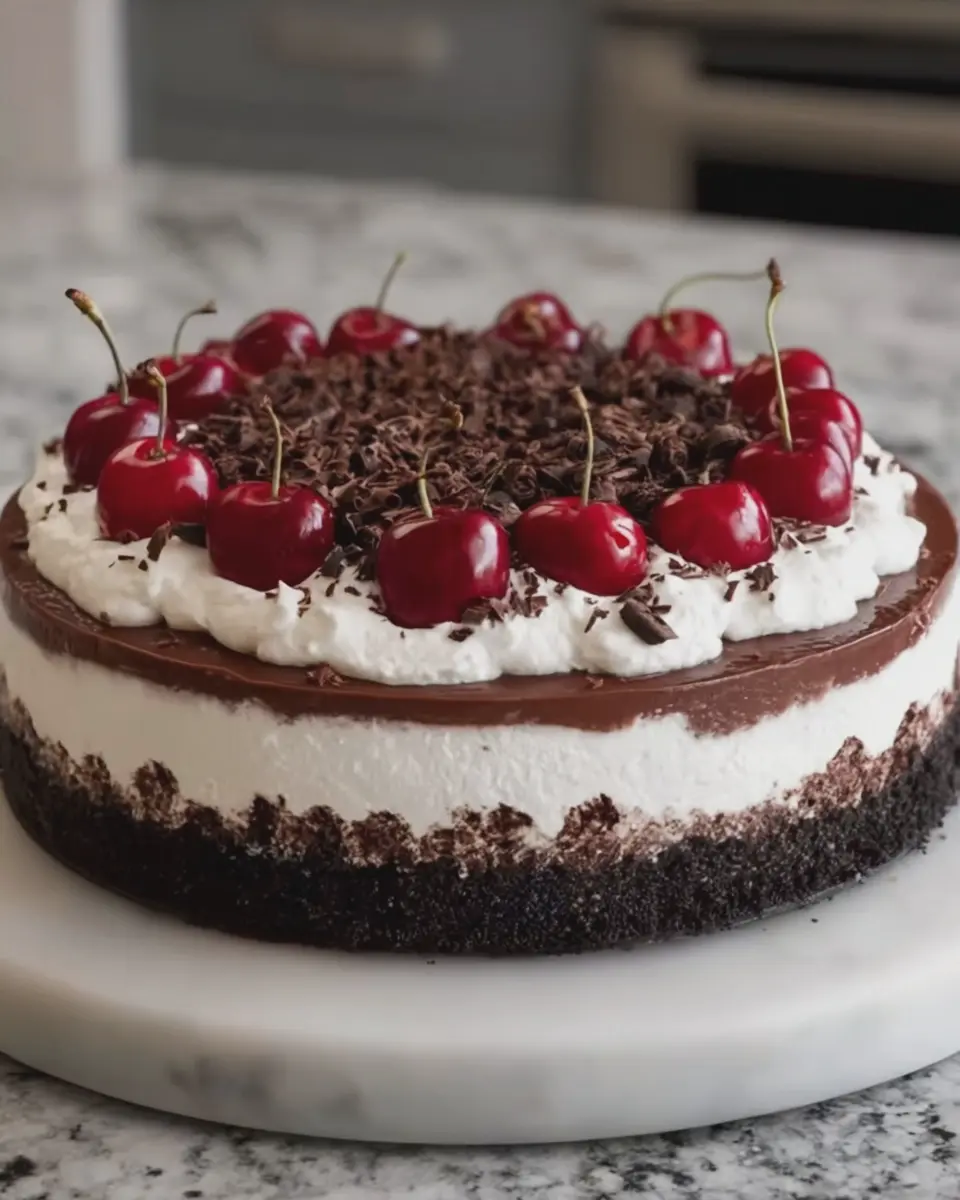
- Fresh Berries: Raspberries, strawberries, or cherries add a burst of fresh flavor that complements the rich cheesecake beautifully.
- Whipped Cream: A dollop of homemade whipped cream can enhance the creamy texture while balancing the sweetness.
- Chocolate Shavings: Sprinkle dark chocolate shavings on top for an elegant touch that signals indulgence.
- Coffee or Herbal Tea: A warm beverage like a robust coffee or a soothing herbal tea can provide a delightful contrast to the richness of the cheesecake.
How to Create an Irresistible Dessert Platter
Transform your no-bake black forest cheesecake into the centerpiece of an alluring dessert platter:
- Add Variety: Include an assortment of mini pastries, fruit tarts, and cookies to complement the cheesecake’s flavors.
- Elegant Presentation: Use a large wooden board or a slate platter to display your cheesecake alongside colorful fruits and confections.
- Garnish Thoughtfully: Decorate with mint leaves or edible flowers for a pop of color, making the presentation not just tasty but visually stunning.
Your guests will be impressed by both the flavors and the aesthetic—perfect for any gathering! For more tips on dessert presentations, check out sites like Food52 for inspiration.
Time Breakdown for No-Bake Black Forest Cheesecake
Preparation Time
Creating your no-bake black forest cheesecake is as easy as pie—no baking required! You’ll spend about 20 to 30 minutes gathering ingredients and putting everything together. Make sure to have all your tools ready, like a springform pan and a mixer, to streamline the process.
Chilling Time
The key to achieving that delightful, creamy texture is patience. Allow your cheesecake to chill in the refrigerator for at least 4 hours. This lets the flavors meld beautifully—a crucial step you won’t want to skip!
Total Time
In total, you’re looking at around 4.5 to 5 hours from start to finish. Perfect for a delightful summer dessert that impresses without the heat of the oven! So, gather your ingredients, take your time, and enjoy the delicious journey of making this delectable treat.
For more insider tips on cheesecakes, check out this expert guide on no-bake desserts to make the most of your culinary adventures!
Nutritional Facts for No-Bake Black Forest Cheesecake
Calories per serving
When indulging in this no-bake black forest cheesecake, you’re looking at approximately 250 calories per serving. This makes it a delightful dessert that satisfies your sweet tooth without going overboard.
Key nutrients in this delicious dessert
This no-bake black forest cheesecake isn’t just a pretty face; it’s packed with some essential nutrients:
- Calcium: Thanks to the cream cheese, you’ll get a boost of calcium, beneficial for strong bones.
- Protein: Each slice contains a good amount of protein from the cream cheese and whipped cream, which can help keep you feeling full.
- Antioxidants: The cherries bring much-needed antioxidants that are great for overall health.
To make it even healthier, consider substituting some of the sugar with natural sweeteners. You can find more tips on healthy dessert alternatives here. Enjoy this guilt-free treat, and remember: every delicious bite can also nourish your body!
FAQs about No-Bake Black Forest Cheesecake
Can I make this cheesecake ahead of time?
Absolutely! The no-bake black forest cheesecake is perfect for preparing ahead of time. In fact, making it a day before serving allows those lovely flavors to meld beautifully. Just follow the recipe, and once it’s set in the fridge, you can leave it there until you’re ready to serve. It’s an excellent option for parties or casual get-togethers!
How should I store leftover cheesecake?
If you find yourself with any leftover cheesecake (which might be a challenge because it’s so delicious!), store it in an airtight container in the refrigerator. It should stay fresh for about 3 to 5 days. Just note that the texture might be slightly different as the days go by, but it will still taste fantastic. For more tips on storing desserts, check out The Kitchn.
What can I substitute for cream cheese?
If you’re looking to switch things up with the no-bake black forest cheesecake or avoid cream cheese, there are several alternatives! Options include:
- Greek Yogurt: Offers a similar tanginess and can reduce calories.
- Mascarpone Cheese: Rich and creamy; gives a luxurious texture.
- Silken Tofu: Blend until smooth for a dairy-free option that still tastes great.
Experimenting with these substitutes can lead to exciting flavor profiles and cater to dietary preferences. If you try one, let us know how it turned out!
Conclusion on No-Bake Black Forest Cheesecake
Final thoughts on indulging guilt-free with homemade desserts
As we wrap up this delightful journey into the world of no-bake black forest cheesecake, it’s clear that indulging in traditional flavors doesn’t have to mean sacrificing your health. With a few simple ingredients, you can create a rich and satisfying dessert that brings joy without excessive guilt. Homemade desserts like this cheesecake allow you to control what goes into each bite, making it a perfect option for those who aim for balance in their diets.
Think about it: nothing beats the satisfaction of creating something delicious from scratch. You’re not just feeding your sweet tooth; you’re nourishing your creativity. So the next time you’re craving something sweet, remember that this no-bake black forest cheesecake is just as easy as it is indulgent.
For more insights on healthy desserts, check out Healthline’s tips on mindful eating. Happy baking!
PrintNo-Bake Black Forest Cheesecake: A Sinfully Easy Delight
Indulge in the rich and creamy No-Bake Black Forest Cheesecake, a delightful dessert that combines chocolate, cherries, and a hint of cream.
- Prep Time: 30 minutes
- Total Time: 4 hours 30 minutes
- Yield: 8 servings 1x
- Category: Dessert
- Method: No-Bake
- Cuisine: American
Ingredients
- 1 1/2 cups chocolate cookie crumbs
- 1/2 cup unsalted butter, melted
- 2 cups cream cheese, softened
- 1 cup powdered sugar
- 1 teaspoon vanilla extract
- 2 cups heavy whipping cream
- 1 cup cherry pie filling
- 1/4 cup grated dark chocolate
Instructions
- In a bowl, mix chocolate cookie crumbs and melted butter until combined. Press the mixture into the bottom of a springform pan to create the crust.
- In a separate bowl, beat cream cheese, powdered sugar, and vanilla extract until smooth.
- In another bowl, whip heavy cream until stiff peaks form, then fold into the cream cheese mixture.
- Spread half of the cream cheese mixture over the crust, followed by a layer of cherry pie filling.
- Pour the remaining cream cheese mixture on top and smooth it out.
- Refrigerate for at least 4 hours or until set.
- Before serving, garnish with grated dark chocolate and more cherry pie filling if desired.
Notes
- For best results, use full-fat cream cheese and heavy whipping cream.
- This cheesecake can be made a day in advance.
Nutrition
- Serving Size: 1 slice
- Calories: 350
- Sugar: 25g
- Sodium: 150mg
- Fat: 24g
- Saturated Fat: 15g
- Unsaturated Fat: 7g
- Trans Fat: 0g
- Carbohydrates: 30g
- Fiber: 1g
- Protein: 4g
- Cholesterol: 70mg
Keywords: No-Bake Black Forest Cheesecake, cheesecake, dessert, easy dessert