Introduction to Stained Glass Cookies
If you’re on the hunt for a delightful treat that combines both art and flavor, look no further than stained glass cookies. These colorful, eye-catching cookies not only taste delicious but also serve as a fantastic project for home bakers of all skill levels. Whether for a festive holiday gathering, a casual get-together, or simply an afternoon snack, stained glass cookies are sure to impress.
Why Stained Glass Cookies Are the Perfect Homemade Treat
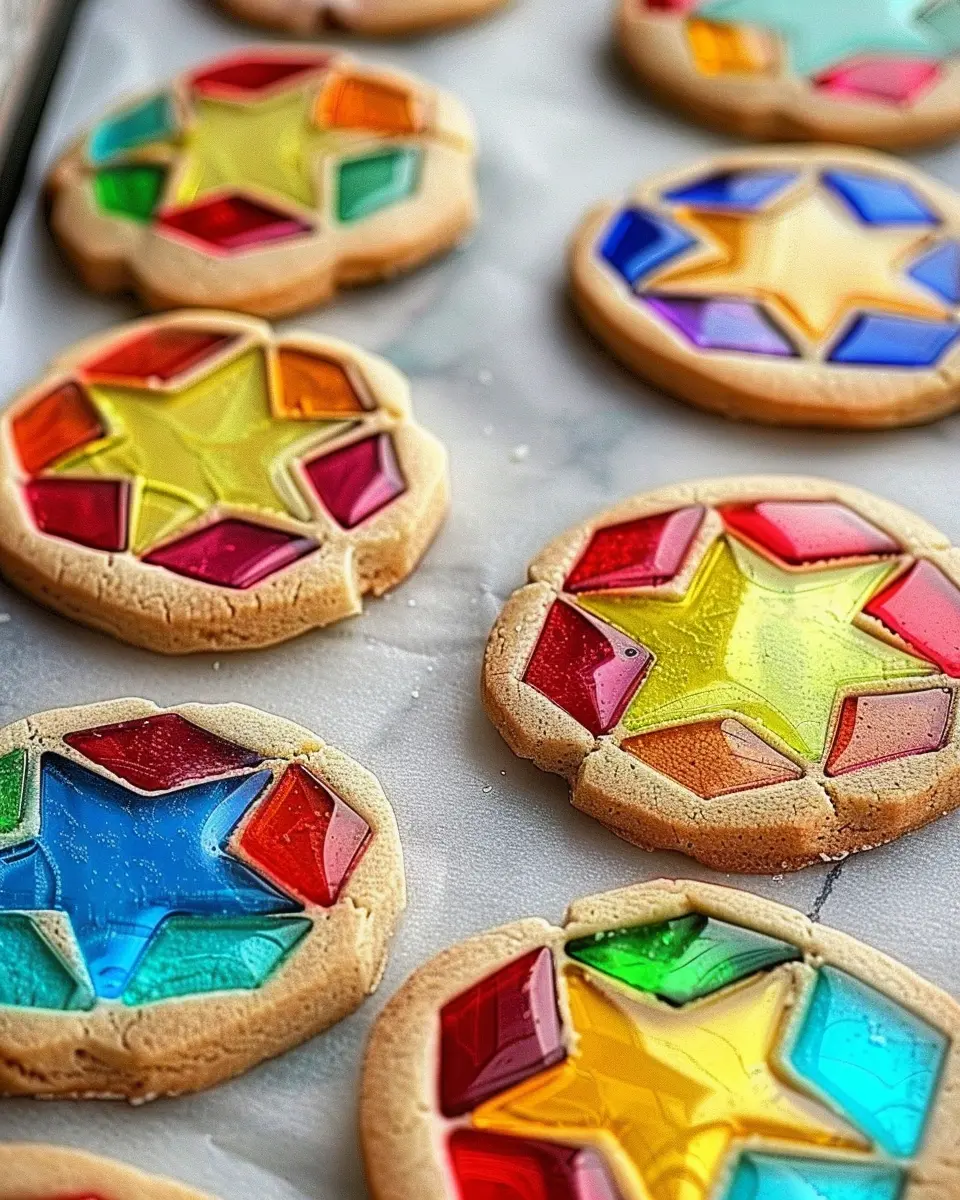
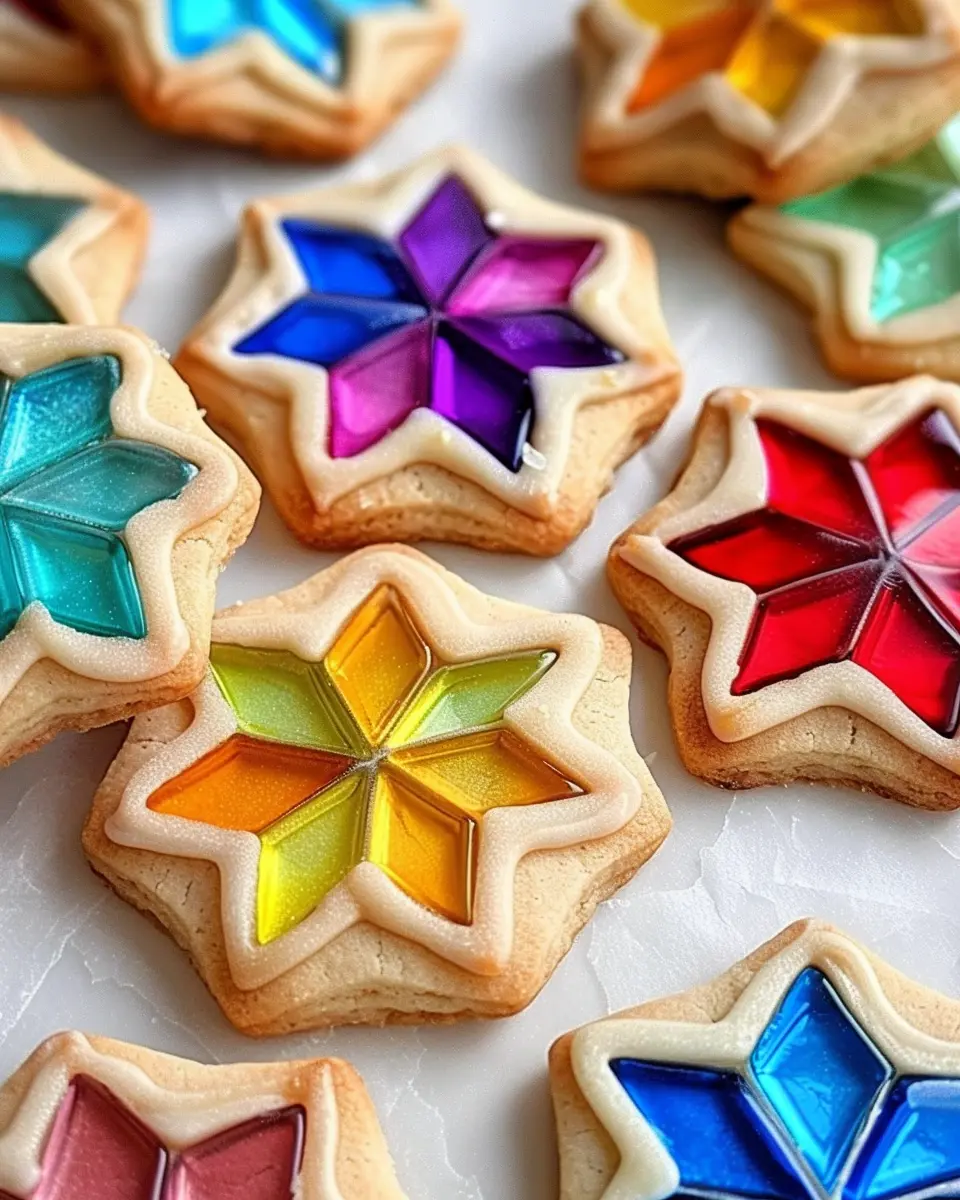
One of the standout features of stained glass cookies is their vibrant appearance, reminiscent of intricate stained glass windows. The use of hard candy in the center melts while baking, creating a glossy, jewel-like finish that is simply irresistible. It’s like bringing a piece of art to your dessert table!
-
Creative expression: The best part? You can let your creativity soar when it comes to design. Experiment with various shapes and colors of candy to make each batch uniquely yours. Have fun with seasonal themes, like snowflakes for winter or hearts for Valentine’s Day.
-
Easy to make: Don’t be intimidated by their stunning looks! The process is straightforward. By combining a simple sugar cookie dough with your choice of colorful candies, you can produce these captivating treats in no time.
-
Great for sharing: Stained glass cookies also make excellent gifts. Present them in a beautiful tin or box, and you’ll have a sweet offering that friends and family will adore. As noted by experts, homemade gifts carry a personal touch that store-bought options simply can’t match.
When you consider the joy of culinary creation, a splash of color, and the potential for brilliant presentations, it’s easy to see why stained glass cookies have become a favorite among bakers. Ready to try your hand at this impressive cookie? You’ll find that not only can you enjoy the process, but you’ll also end up with a treat that’s sure to become a staple in your baking repertoire.
For more fun and creative ideas, feel free to check out this resource on baking adventures!
Ingredients for Stained Glass Cookies
Creating beautiful stained glass cookies is not just about the artistry; it also starts with the right ingredients. Let’s break down what you need to whip up these delightful treats.
Essential cookie ingredients
For the cookie base, you’re going to need:
- Butter: Unsalted and softened for that perfect texture.
- Granulated Sugar: This sweetener is essential for that lovely crunch.
- Eggs: Just one will do to bind everything together.
- Vanilla Extract: A splash for a warm, inviting flavor.
- Flour: All-purpose flour works best to give your cookies structure.
- Baking Powder and Salt: These ensure your cookies rise beautifully.
Getting familiar with these ingredients can help you feel more confident in the kitchen. For a deep dive into the properties of sugar in baking, check out the American Association of Cereal Chemists.
Colorful options for the stained glass effect
Now, let’s talk about the fun part—the stained glass effect! You’ll want to stock up on:
- Hard Candies: Think Jolly Ranchers or Life Savers in assorted colors for that rainbow effect.
- Gel Food Coloring: If you want to add a pop of color to your dough itself.
- Royal Icing: Optional but can enhance the appearance when used as a decorative touch.
Imagining the vibrant colors shining through definitely adds excitement! So, what colors are you thinking of using?
By choosing your colors wisely, you can craft cookies that are not only delicious but also visually stunning, making them perfect for gatherings or as gifts. Enjoy experimenting!
Preparing Stained Glass Cookies
Stained glass cookies are not just a treat; they are true works of art that you can decorate, personalize, and indulge in. These cookies are perfect for holidays, parties, or just a fun baking day at home. Let’s dive into the process of creating your very own stained glass cookies that will surely impress your friends and family.
Gather Your Ingredients
Before we roll up our sleeves and get to work, let’s ensure we have everything we need. Here’s a simple list:
-
For the Sugar Cookie Dough:
-
1 cup unsalted butter, softened
-
1 cup granulated sugar
-
1 egg
-
1 teaspoon vanilla extract
-
2 ½ cups all-purpose flour
-
1 teaspoon baking powder
-
A pinch of salt
-
For the Stained Glass Effect:
-
Hard candies (like Jolly Ranchers or Life Savers) in assorted colors, crushed into small bits
Having a sturdy work surface and your cookie cutters handy will also make this process smoother.
Create the Sugar Cookie Dough
Now that you have everything at your fingertips, it’s time to get baking! In a large mixing bowl, cream together the softened butter and granulated sugar until it’s light and fluffy. This typically takes about three to five minutes of mixing.
Next, add the egg and vanilla extract, blending well until fully combined. In a separate bowl, whisk together the flour, baking powder, and salt. Gradually incorporate the dry ingredients into the wet mixture, stirring until it forms a dough. If the dough feels a bit sticky, don’t worry; it can chill in the fridge for about an hour, which makes it easier to handle.
Prepare the Candy for the Stained Glass Effect
While your dough is chilling, it’s time to prepare the candy! You want small, uniform pieces for the best results. Place your hard candies in a ziplock bag and crush them using a rolling pin or a sturdy object. Aim for a good mix of different colors to create that beautiful stained glass effect.
It’s worth noting that some hard candies melt better than others. For a fantastic guide on candy types and cooking tips, you can refer to Serious Eats.
Shape and Cut the Cookies
Once you’ve chilled your dough, dust your work surface with flour and roll it out to a thickness of about ¼ inch. Now the fun part begins—using your favorite cookie cutters, cut out shapes. Create a cut-out in the middle of each cookie if you want that stained glass look to shine through.
Fill the Cookies with Crushed Candy
Here’s where the magic happens! Carefully fill each cut-out shape with the crushed candy. You want just enough to cover the hole but not so much that it spills over the edges while baking.
This part can be a bit messy, but who doesn’t love a little chaos in the kitchen? Plus, the anticipation of watching the candy melt is half the fun!
Baking the Cookies to Perfection
Preheat your oven to 350°F (175°C). Place your prepared cookies on a baking sheet lined with parchment paper, ensuring there’s enough space between each cookie so they don’t touch.
Bake the cookies for about 8-10 minutes or until the edges start to turn golden. The candy should melt and fill the cut-out spaces, creating a beautiful stained glass effect.
Once they’re done, allow the cookies to cool on the pan for a few minutes before transferring them to a wire rack. This will help them firm up and maintain their shape.
And there you have it—the creation of stained glass cookies that are as delightful to look at as they are to eat! This fun and engaging process is sure to bring out your inner artist and leave you with treats that will brighten anyone’s day. Happy baking!
Variations on Stained Glass Cookies
Holiday-themed Stained Glass Cookies
When it comes to stained glass cookies, the options for holiday themes are almost limitless! Imagine making these colorful treats to match specific celebrations like:
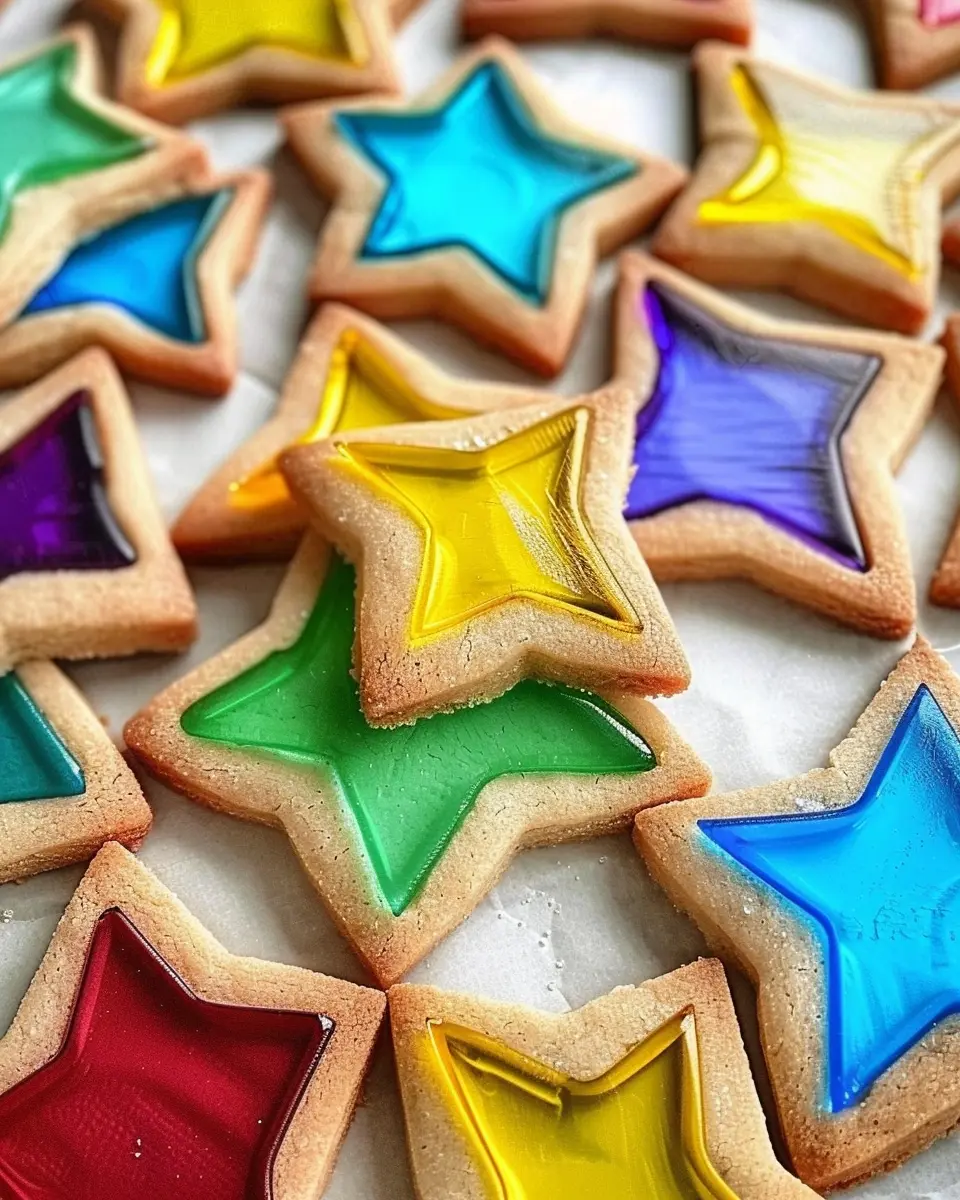
- Christmas: Use red and green candies for a festive look, incorporating shapes like stars, trees, or ornaments.
- Easter: Opt for pastel colors with bunny and egg shapes for a springtime treat.
- Halloween: Go spooky with orange and black candy, shaping your cookies into pumpkins or ghosts.
These themed stained glass cookies not only taste delicious but also double as enchanting decorations for your dessert table. Plus, don’t forget to package them creatively to share with friends or co-workers—perfect for spreading some joy!
Flavor Variations for the Sugar Cookie Base
The base of your stained glass cookies can also see some exciting twists. Traditional sugar cookies are fantastic, but why not experiment? Here are a few flavor ideas to spice things up:
- Vanilla Bean: A classic, classic favorite. Pure vanilla extract will elevate your cookies.
- Almond: Just a teaspoon of almond extract can add a delightful nutty flavor.
- Citrus Zest: Using lemon or orange zest can brighten your cookies and make them refreshingly zesty.
These variations allow for creative expression in the kitchen while delighting your taste buds. Plus, seasonal flavors can really wow your guests!
If you want to discover even more flavor ideas, check out Food52 for inspiration. With these variations, you’re all set to make stained glass cookies that are not only visually stunning but also a joy to eat!
Baking Tips for Stained Glass Cookies
Creating stained glass cookies can be a delightful experience, but it comes with its own set of challenges. Here’s how to elevate your cookie-baking game!
Common Pitfalls to Avoid
While making these beautiful cookies, it’s easy to encounter some common hiccups. Here are a few things to keep in mind:
- Overbaking: Keep a watchful eye! Overbaked cookies can turn too hard. Aim for a light golden color around the edges.
- Melted Candy: If your hard candies bubble over, they may create a messy result. To avoid this, chop them finely and only fill the centers with a moderate amount.
- Sticking to Pans: Don’t skip the parchment paper! It not only prevents sticking but makes cleanup a breeze.
Recommendations for Upward Crispiness
For that perfect crunch in your stained glass cookies, follow these tips:
- Chill the Dough: After mixing, refrigerate your dough for at least 30 minutes. This helps the cookies hold their shape and crisp up nicely.
- Use a Thin Rolling Pin: Roll your dough to about 1/4 inch thick for optimal texture—thin cookies equal crunchiness!
- Experiment with Sugar Types: A mix of white and brown sugar can enhance structure while providing a subtle flavor twist.
For more in-depth baking techniques, resources like King Arthur Baking or The Kitchn can be invaluable in your cookie endeavors.
Happy baking!
Serving suggestions for Stained Glass Cookies
Creative ways to package and present them
When it comes to stained glass cookies, presentation is key. These vibrant, whimsical treats can be beautifully packaged to make them even more inviting. Consider using:
- Cellophane bags with ribbon: Fill clear bags with an assortment of cookies and tie them with colorful ribbons for a festive touch.
- Mason jars: Layer the cookies in a jar for an eye-catching display. You could even tuck in a small note with serving suggestions or your favorite cookie recipe.
- Decorated boxes: Personalize cookie boxes with stickers or drawings, making each gift unique and more personal.
Pairing with drinks or other treats
To elevate your cookie experience, think about what to serve alongside your stained glass cookies. Here are some delightful pairing suggestions:
- Tea: A light herbal or fruity tea complements the sweetness without overpowering it.
- Milk: You can never go wrong with the classic peanut butter and jelly pairing—glass of milk and some classic cookies.
- Fruit skewers: Fresh fruit adds a refreshing crunch that balances the sweetness of the cookies.
For a fun afternoon gathering, consider a cookie decoration party alongside some homemade lemonade. The more colorful, the better!
Looking for more ideas? Check out this guide from The Spruce Eats on hosting casual gatherings with sweet treats. Enjoy your baking!
Time details for Stained Glass Cookies
Preparation time
Making stained glass cookies is not only fun but also relatively quick. You’ll need about 20 minutes to prepare your dough and cut out the shapes. This time allows for a little creativity in choosing your cookie designs—think stars, hearts, or holiday-themed shapes!
Baking time
For the baking part, set your timer for 8 to 10 minutes. Keep a close watch on your cookies as they bake, ensuring they turn crisp but not too dark. The magic happens when they melt the colorful candies inside!
Total time
In total, you’re looking at roughly 30 to 40 minutes from start to finish, making it a perfect weekend baking project. The best part? You’ll have stunning cookies to share with friends or decorate your holiday table! For more cookie baking tips, consider checking resources like The Spruce Eats for additional inspiration. Happy baking!
Nutritional information for Stained Glass Cookies
When you’re baking up a batch of stained glass cookies, it’s good to know what you’re indulging in. Let’s break down some of the key nutritional components.
Calories
One standard stained glass cookie typically contains about 100-120 calories. This can vary based on the size and the specific ingredients you use. If you’re watching your calorie intake, consider enjoying a small cookie to satisfy that sweet tooth.
Sugar content
These cookies are undeniably sweet, with a sugar content of around 8-10 grams per cookie. The vibrant candies melted into the dough contribute significantly to that sweetness, making them a delightful treat for special occasions.
Dietary considerations
While stained glass cookies are primarily made with classic ingredients like flour, butter, and sugar, they can be tailored to accommodate various dietary needs. For instance:
- Gluten-free: Substitute all-purpose flour with a gluten-free blend.
- Vegan: Replace butter with coconut oil or a plant-based butter alternative.
For more information on dietary modifications, check out resources from the Academy of Nutrition and Dietetics.
As you whip up these colorful confections, keep these nutritional insights in mind. They’re a small but sweet indulgence that can be enjoyed mindfully!
FAQs about Stained Glass Cookies
Can I use different types of candy?
Absolutely! While traditional stained glass cookies often feature hard candies like Jolly Ranchers, feel free to experiment with other options. Clear or semi-transparent candies work best to achieve that stunning stained-glass effect. However, don’t shy away from using gummy candies or even crushed lollipops for a pop of color and flavor. Just remember that different candies may alter melting times, so keep a close eye when they’re in the oven.
How do I store these cookies?
To keep your stained glass cookies deliciously fresh, store them in an airtight container at room temperature. They can stay fresh for about a week. If you’re interested in extending their shelf life, you can refrigerate them for up to two weeks. Just ensure they are cool before sealing them up to avoid condensation and sogginess. For longer storage, consider freezing them—though they may not retain their crispness as well.
What’s the best way to keep the cookies from breaking?
Oh, the heartache of a beautiful stained glass cookie breaking! To minimize this, here are a few tips:
- Chill the dough: Letting the dough chill before rolling it out helps prevent it from spreading too much and becoming fragile.
- Be gentle: When transferring cookie cutouts to the baking sheet, use a thin spatula to support them fully.
- Bake evenly: Make sure your oven is preheated and the cookies are spaced evenly on the baking tray to allow for consistent heat distribution.
For more baking tips, check out this resource from King Arthur Baking that delves into cookie techniques and secrets!
By following these guidelines, you’ll keep your stained glass cookies looking fabulous and intact for everyone to enjoy!
Conclusion on Stained Glass Cookies
Recap of the Joy of Making Stained Glass Cookies
Making stained glass cookies is more than just a fun baking project; it’s a delightful creative adventure where your kitchen transforms into a colorful art studio. Remember how satisfying it is to watch the melted candies create dazzling patterns through the cookie? Each batch tells a story, bringing a sense of accomplishment as you share these vibrant treats with friends or family.
With a little patience and creativity, you can elevate your baking game. So next time you’re looking to impress at a gathering or simply want a joyful activity, consider whipped-up stained glass cookies for a treat that’s as memorable as it is delicious. Happy baking!
PrintStained Glass Cookies: Easy and Fun Holiday Treats to Make

These stained glass cookies are a delightful treat that combines a classic cookie base with colorful candy centers, perfect for any holiday celebration.
- Prep Time: 20 minutes
- Cook Time: 12 minutes
- Total Time: 32 minutes
- Yield: 24 cookies 1x
- Category: Dessert
- Method: Baking
- Cuisine: American
Ingredients
- 2 cups all-purpose flour
- 1 cup unsalted butter, softened
- 1 cup granulated sugar
- 1 large egg
- 1 teaspoon vanilla extract
- 1 teaspoon almond extract
- ½ teaspoon salt
- 1 cup assorted hard candies
Instructions
- Preheat the oven to 350°F (175°C).
- In a large bowl, cream together the butter and sugar until smooth.
- Beat in the egg, vanilla extract, and almond extract.
- Gradually mix in the flour and salt.
- Roll the dough into balls and place on a baking sheet.
- Using a cookie cutter, cut a shape out of the center of each cookie.
- Fill the center with crushed hard candies.
- Bake for 10-12 minutes or until the edges are lightly golden.
- Let the cookies cool on a wire rack before serving.
Notes
- These cookies can be stored in an airtight container for up to one week.
- Experiment with different candy colors for a festive look.
Nutrition
- Serving Size: 1 cookie
- Calories: 100
- Sugar: 8g
- Sodium: 15mg
- Fat: 6g
- Saturated Fat: 4g
- Unsaturated Fat: 2g
- Trans Fat: 0g
- Carbohydrates: 12g
- Fiber: 0g
- Protein: 1g
- Cholesterol: 30mg
Keywords: Stained Glass Cookies, Holiday Treats, Easy Cookies